FENDER, HOOD, TAILGATE AND TRUNK LID
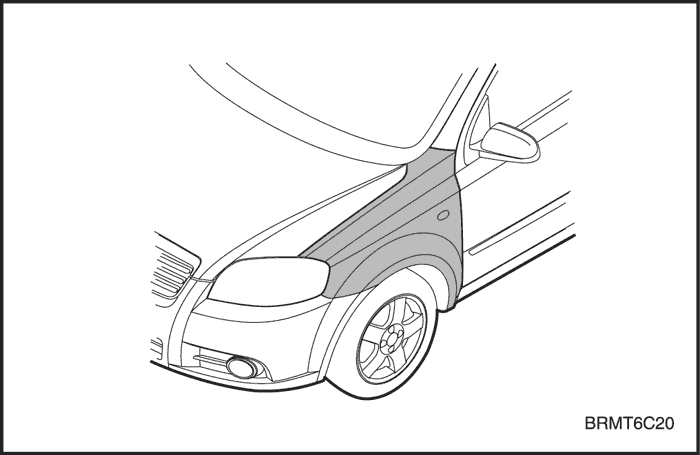
FENDER
REPAIR PROCEDURE
- Remove the related parts.
- Front bumper and mud guard.
- Remove the fender
- Preparation of the new fender.
- Preparation of the new fender and check damaged areas.
- Apply the paint.
- CAUTION
- Ventilate when spraying paint. Most paint contains substances that are harmful if inhaled or swallowed, Read the paint label before opening paint container.
- Avoid contact with skin, Wear an approved respirator, gloves, eye protection and appropriate clothing when painting.
- Paint is flammable. Store in a safe place, and keep it away from sparks, flames or cigarettes.
- Apply the mastic sealer.
- Apply the mastic sealer to the mounting bolts.


- Preinstall the fender.
- Fasten to the wheelhouse at two places with bolts. Close the hood and check the front and rear clearances and level differences of the hood and door.


- Tighten fully.
- After checking and adjusting the mounting position, tighten all bolts fully.
- Install the related parts.
- Install in the reverse order in which they were removed.
- Check clearance
- Check clearance of front bumper.
HOOD
REPAIR PROCEDURE
- Remove the related parts.
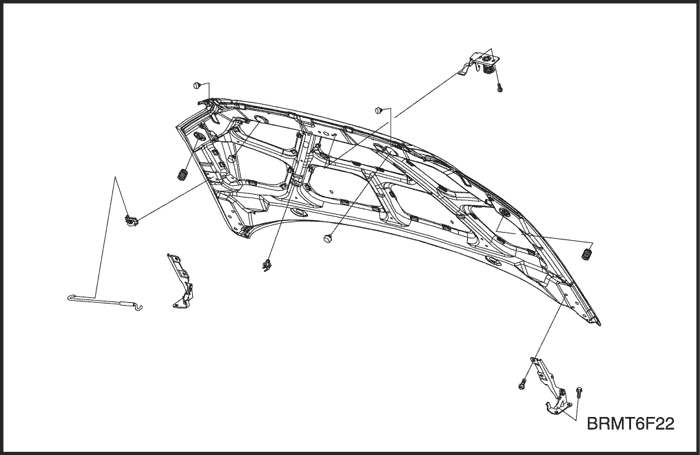
- Remove the hood.
- Remove the hood mounting bolts from two hinge bows.


- Preparation of the new hood.
- Preparation of the new hood and check damagedareas.
- Apply the paint.
- CAUTION
- Ventilate when spraying paint. Most paint contains substances that are harmful if inhaled or swallowed.
- Read the paint label before opening paint container.
- Avoid contact with skin. Wear an approved respirator, gloves, eye protection and appropriate clothing when painting.
- Paint is flammable. Store in a safe place, and keep it away from sparks, flames or cigarettes.
- Preinstall the hood.
- Fasten to the hood hinges bows at two places with four bolts, carefully.


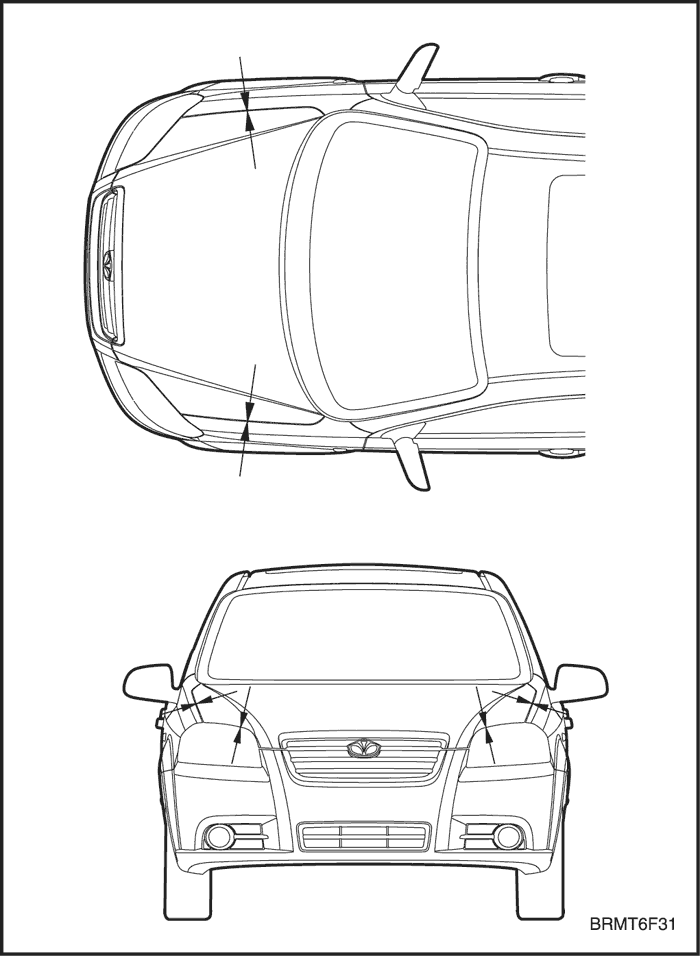
- Close the hood and check the front and rear clearances and level difference of hood. fender and head lamps.


- Tighten fully.
- After checking and adjusting the mounting position, tighten all bolts fully.
- Install the related parts.
- Install in the reverse order in which they were removed.
- Check and adjust.
- Check clearances and level differences.
- Check the hood locking and unlocking condition.
TRUNK LID
REPAIR PROCEDURE
- Remove the related parts.
- Wiring harness and solenoid valve.
- Lock set, latch set and others.
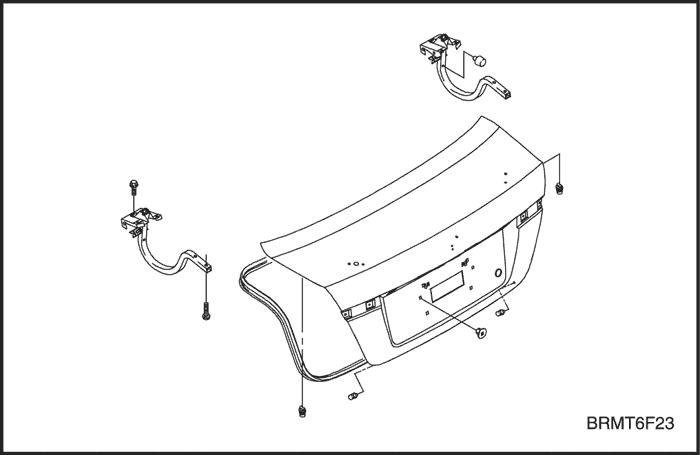
- Remove the trunk lid.
- Remove the trunk lid mounting bolts from twohinge bows.


- Preparation of the new trunk lid.
- Preparation of the new trunk lid and check damaged areas.
- Apply the paint.
- CAUTION
- Ventilate when spraying paint. Most paint containssubstances that are harmful if inhaled or swallowed.Read the paint label before opening paint container.
- Avoid contact with skin. Wear an approved respirator, gloves, eye protection and appropriateclothing when painting.
- Paint is flammable. Store in a safe place, andkeep it away from sparks, flames or cigarettes.
- Preinstall the trunk lid.
- Fasten to the trunk lid hinges bows at two placeswith four bolts, carefully.
- Install bumper.


- Close the trunk lid and check the clearances andlevel difference of trunk lid, side panel outers andrear combination lamps.


- Tighten fully.
- After checking and adjusting the mounting position, tighten all bolts fully.
- Install the related parts.
- Washer hose and nozzles.
- Install in the reverse order in which they were removed.
- Check and adjust.
- Check clearances and level differences.
- Check the hood locking and unlocking condition.
- Check spary conditions of washer liquid and adjust washer spray nozzels on the hood panel.
- Close the trunk lid and check the clearances and level difference of trunk lid, side panel outers and rear combination lamps.


- Tighten fully.
- After checking and adjusting the mounting position tighten all bolts fully.
- Install the related parts.
- Wiring harness and solenoid valve.
- Lock set, latches and linkages.
- Install in the reverse order in which they were removed.
- Check and adjust.
- Clean the trunk compartment.
- Check clearances and level differences.
- Check the trunk lid locking and unlocking condition.
- Check the trunk lid locking and unlocking condition.
- Check for water leaks in the trunk compartment.


