SECTION 9M
EXTERIOR TRIM
SPECIFICATIONS
Fastener Tightening Specifications
Application
|
N•m
|
Lb-Ft
|
Lb-In
|
|
Rear Spoiler Nut
|
3.0
|
-
|
27
|
|
Mud Guard Screw
|
1.5
|
-
|
13
|
MAINTENANCE AND REPAIR
On-Vehicle Service
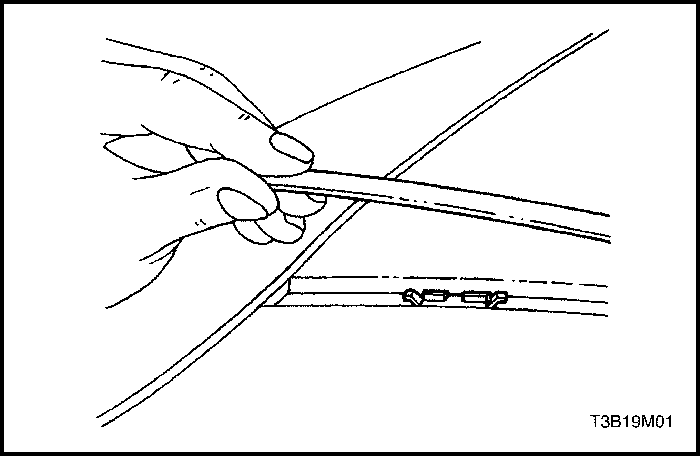


Roof Molding
Removal Procedure
- Remove the roof molding from the plastic clips.
Installation Procedure
- Press the roof molding onto the plastic clips.
Rear Spoiler
Removal Procedure
- Disconnect the negative battery cable.
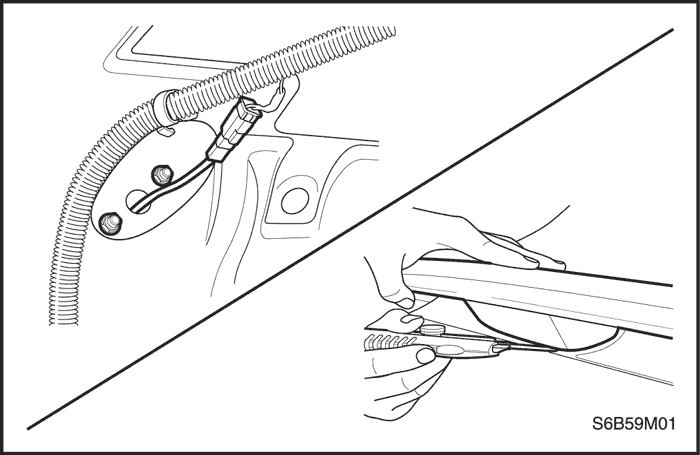
- Remove the clips and the trunk lid trim.
- Disconnect the rear spoiler stop lamp electrical connector.
- Remove the nuts.
- Using a knife, carefully prise the rear poiler from the trunk lid, separating the double-sided tape.
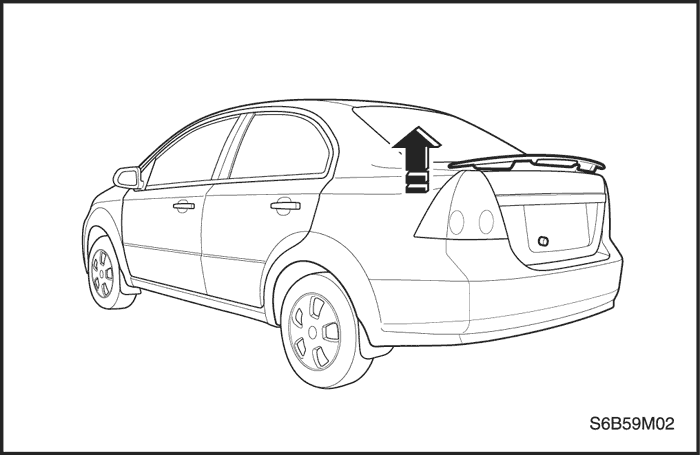
- Remove the rear spoiler.
Installation Procedure
- If reusing the rear spoiler, remove any remaining double-sided tape from the rear spoiler and trunk lid. Apply new double-sided tape.
- Peel off the adhesive backing paper and affix the rear spoiler on to the trunk lid, ensuring it is correctly positioned.
- Insert the nuts attaching the rear spoile.
Tighten
Tighten the rear spoiler nuts to 3.0 N•m (27 lb-in).
- Connect the rear spoiler stop lamp electrical connector.
- Install the trunk lid trim with the clips.
- Connect the negative battery cable.
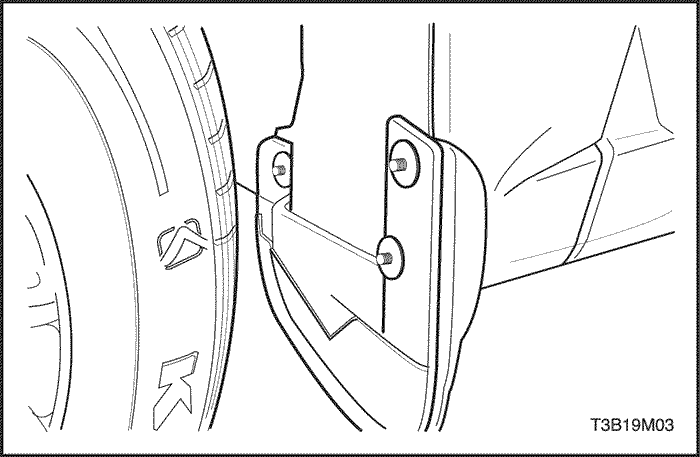
Mud Guards
Removal Procedure
- Remove the screws and the mud guard.
Installation Procedure
Notice : Dissimilar metals in direct contact with each other may corrode rapidly. Make sure to use the correct fasteners to prevent premature corrosion.
- Install the screws and the mud guard.
Tighten
Tighten the mud guard screws to 1.5 N•m (13 lb-in).
GENERAL DESCRIPTION
AND SYSTEM OPERATION
Emblems and Lettering
The emblems and lettering on the vehicle are attached by adhesive. The company emblem appears on the hood. The lettering, which appears in several places on the body of the vehicle, features the model, the grade, and the company name.
Mud Guards
Front and rear mud guards are optional equipment on all models. Mud guards will help prevent an excessive buildup of mud on the body.


