Lower Control Arm Replacement
Special Tools
EN-45059 Angle Meter
For equivalent regional tools, refer to Special Tools .
Removal Procedure
- Raise and support the vehicle. Refer to Lifting and Jacking the Vehicle .
- Remove the tyre and wheel. Refer to Tyre and Wheel Removal and Installation .
- Remove wheel speed sensor wiring harness from control arm and steering knuckle.
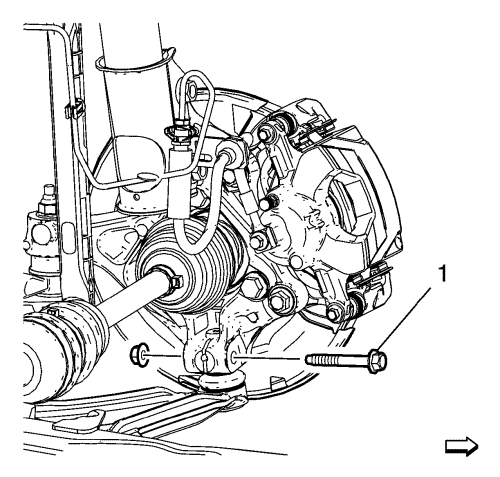
- Remove and DISCARD the lower ball joint to knuckle nut and bolt (1).
- Separate the lower control arm from the knuckle.
Caution: Do not pry in such a way that the ball joint seal is contacted. Damage to the seal may result.
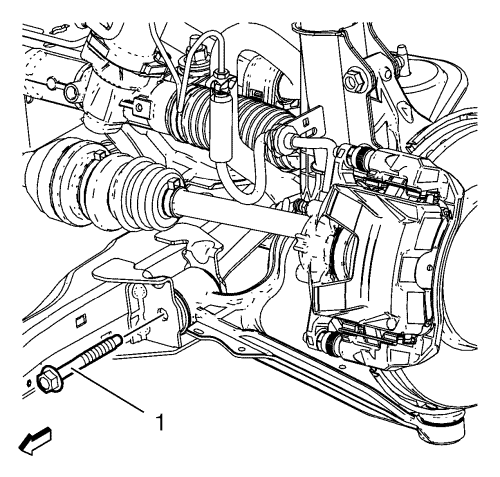
- Remove and DISCARD the front lower control arm nut and bolt (1).
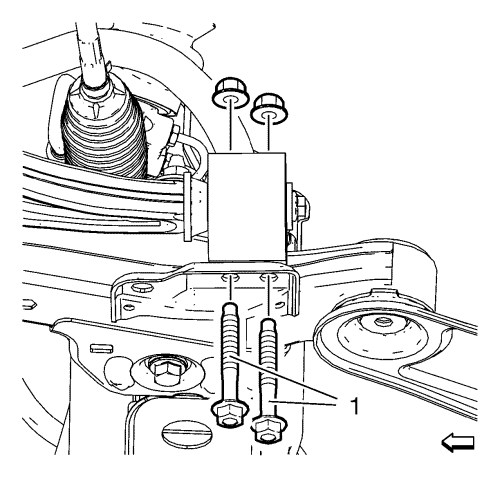
- Remove and DISCARD the rear lower control arm bush nuts and bolts (1).
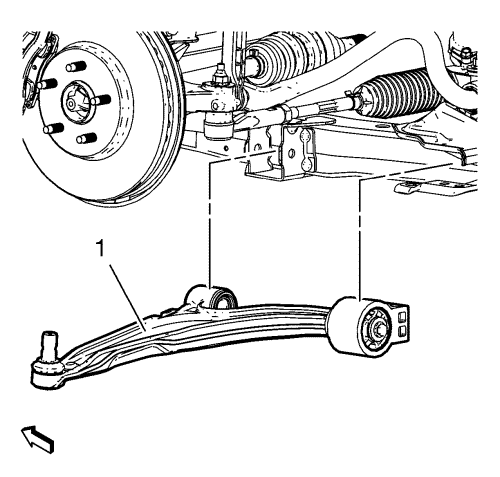
- Remove the lower control (1) arm from the front frame.
Installation Procedure
- Position the lower control arm (1) in the cradle.
- Install and hand tighten the NEW rear lower control arm bush nuts and bolts (1).
- Install and hand tighten the NEW front lower control arm nut and bolt (1).
- Support the lower control arm with a hydraulic jack and lift the control arm into the neutral position.
Caution: Refer to Fastener Caution in the Preface section.
- Install the NEW ball joint to knuckle bolt (1) with a NEW nut and tighten to 30 N·m (22 lb ft).
Warning: Refer to Torque-to-Yield Fastener Warning in the Preface section.
- Tighten the ball joint to knuckle bolt (1) and nut a final pass to an additional 60 - 75 degrees, using the EN-45059 meter.
- Tighten the front and rear lower control arm bolts and nuts a first pass to 70 N·m (52 lb ft).
Warning: Refer to Torque-to-Yield Fastener Warning in the Preface section.
- Tighten the front and rear lower control arm bolts and nuts a final pass to an additional 75 - 90 degrees, using the EN-45059 meter.
- Remove the jack stand.
- Install the tyre and wheel. Refer to Tyre and Wheel Removal and Installation .
- Lower the vehicle.
| © Copyright Chevrolet. All rights reserved |
| © Copyright Chevrolet. All rights reserved |


