Strut, Strut Component, or Spring Replacement
Special Tools
| • | CH-6068 Spring Tensioner Device |
For equivalent regional tools, refer to Special Tools .
Disassembly Procedure
- Remove the strut assembly. Refer to Strut Assembly Removal and Installation .
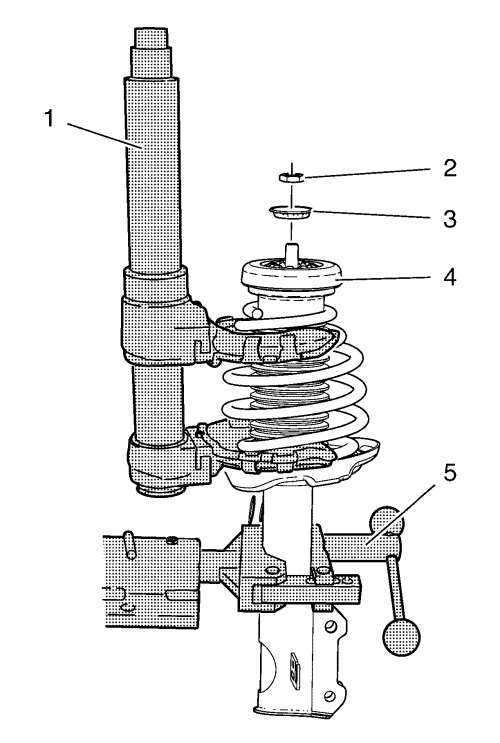
- Install the strut to the CH-6066 holder (5).
- Tension spring (4), using CH-6068 tensioner to remove the spring tension from the upper strut mount.
- Remove the strut nut (2).
- Remove the strut mount insulator washer (3).
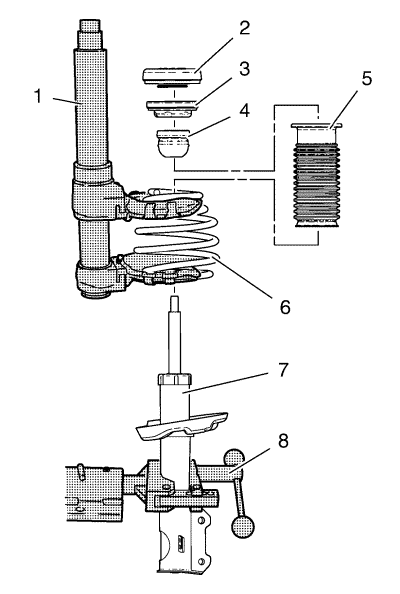
- Remove the front spring strut components:
| 6.1. | Remove the strut mount insulator assembly (2). Inspect for damage and replace as necessary. |
| 6.2. | Remove the strut mount bearing assembly (3). Inspect for damage and replace as necessary. |
| 6.3. | Remove the bumper (4). Inspect for damage and replace as necessary. |
| 6.4. | Remove the insulator (5). Inspect for damage and replace as necessary. |
| 6.5. | Remove the spring (6) with CH-6068 tensioner (1). |
| 6.6. | Remove the spring tension using the CH-6068 tensioner. Inspect for damage and replace as necessary. |
| 6.7. | Remove the strut (7) from CH-6066 holder (8). |
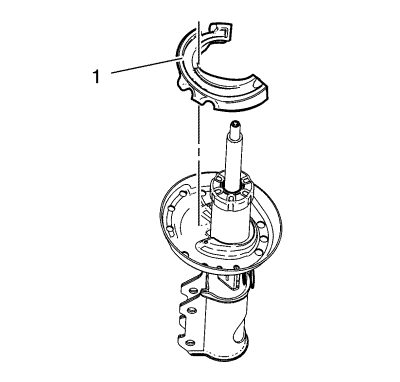
- Remove the lower insulator (1). Inspect for damage and replace as necessary.
Assembly Procedure
- Install the lower insulator (1).
- Install the spring strut components:
| 2.1. | Install the strut (7) to the CH-6066 holder (8). |
| 2.2. | Install the spring (6) to the CH-6068 tensioner (1), compress spring to remove the spring tension. |
| 2.3. | Install the spring (6) to the strut (7). |
| 2.4. | Install the insulator (5) to the strut (7). |
| 2.5. | Install the bumper (4) to the strut (7). |
| 2.6. | Install the strut mount bearing (3) to the strut (7). |
| 2.7. | Install the mount insulator assembly (2) to the strut (7). |
- Install the strut mount insulator washer (3).
Caution: Refer to Fastener Caution in the Preface section.
- Install the strut nut (2) to the strut shaft and tighten to 70 N·m (52 lb ft).
- Remove the CH-6068 tensioner (1) from the spring (4).
- Remove the front strut from CH-6066 holder (5).
- Install the strut assembly. Refer to Strut Assembly Removal and Installation .
| © Copyright Chevrolet. All rights reserved |
| © Copyright Chevrolet. All rights reserved |


