Control Valve Body Cover Replacement - except 2.0L Diesel LNP
Removal Procedure
- Remove the battery tray. Refer to Battery Tray Replacement .
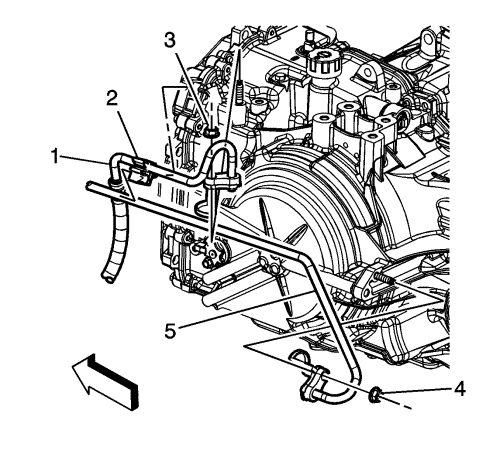
- Remove the oil cooler inlet (1) and outlet (5) hoses from the retainer (2) on the control valve body cover.
- Raise and support the vehicle. Refer to Lifting and Jacking the Vehicle .
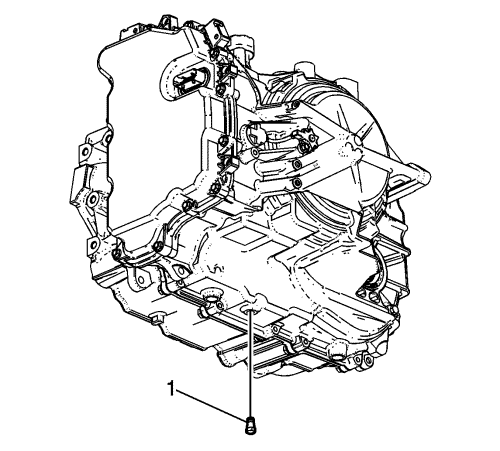
- Remove the fluid level drain plug (1).
- Drain the transmission fluid into a suitable container.
Caution: Refer to Component Fastener Tightening Caution in the Preface section.
- Install the fluid level drain plug (1) and tighten to 12 N·m (106 lb in)
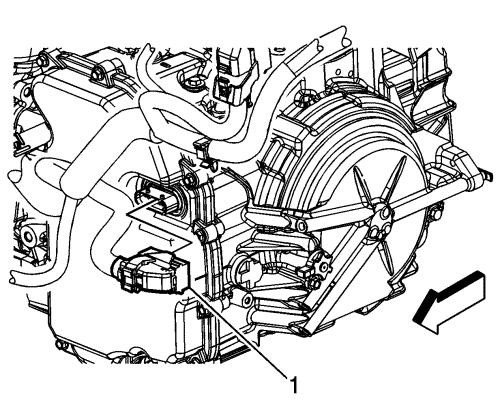
- Disconnect the control valve body transmission control module (TCM) electrical connector (1), then the wiring harness from the cover.
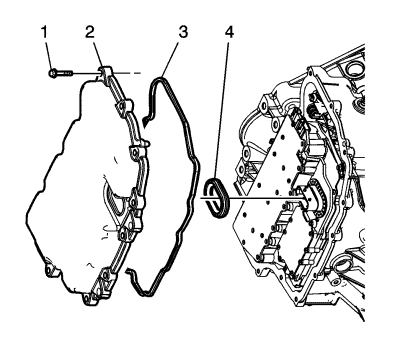
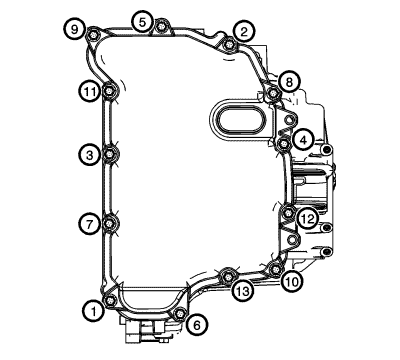
- Remove the control valve body cover bolts (1).
- Remove the control valve body cover.
- Remove the control valve body cover gasket.
Caution: Support the control solenoid valve assembly around the connector when removing the seal. Excessive pulling force can damage the internal electrical connections.
- Remove the control valve body cover wiring connector hole seal.
- Remove all traces of the old gasket material. Clean the transmission case and control valve body cover gasket surfaces.
Installation Procedure
- Install the control valve body cover wiring connector hole seal (4).
- Install the control valve body cover gasket (3) to the control valve body cover.
- Install the control valve body cover (2).
- Hand start the control valve body cover bolts (1).
Caution: Refer to Fastener Caution in the Preface section.
Note: Install all control valve body cover bolts and studs by hand then torque all bolts and studs in sequence.
- Install the control valve body cover bolts. Tighten the bolts in sequence to 12 N·m (106 lb in).
- Connect the control valve body transmission control module (TCM) electrical connector (1), then clip the wiring harness to the cover.
- Lower the vehicle.
- Install the oil cooler inlet (1) and outlet (5) hoses to the retainer (2) on the control valve body cover.
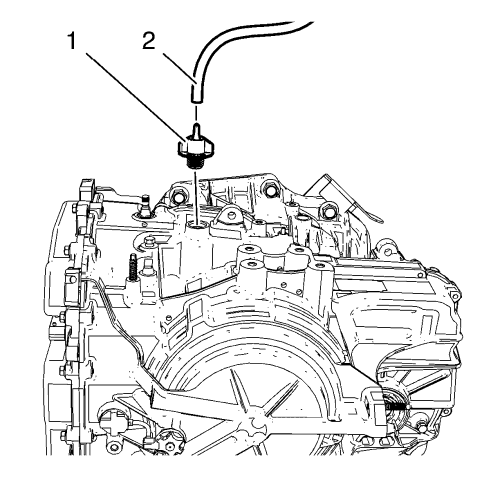
- Remove the transmission vent hose (2).
- Remove the fluid level filler cap (1).
- Fill the transmission to a proper level with the correct fluid. Refer to Transmission Fluid Level and Condition Check and Fluid Capacity Specifications : 6T40/45/50
- Install the fluid level filler cap (1).
- Install the transmission vent hose (2).
- Check for leaks.
- Install the battery tray. Refer to Battery Tray Replacement .
| © Copyright Chevrolet. All rights reserved |
| © Copyright Chevrolet. All rights reserved |


