Orlando |
||||||||
|
|
|
|||||||
Warning: With a pressurised cooling system, the coolant temperature in the radiator can be considerably higher than the boiling point of the solution at atmospheric pressure. Removal of the surge tank cap, while the cooling system is hot and under high pressure, causes the solution to boil instantaneously with explosive force. This will cause the solution to spew out over the engine, the wings, and the person removing the cap. Serious bodily injury may result.
Note: Use only a GM released anti-freeze mixture and ensure a concentration of 50 percent water to 50 percent antifreeze. Antifreeze does not just prevent the cooling system from freezing up, it also protects all the components that are in contact with coolant from rust/limescale deposits. As a result, antifreeze should always be added, even in tropical countries.
In addition to the anti-freeze mixture, water quality also plays an important role. Potable tap water should normally suffice to fulfil this requirement. The quality of regenerated sea water is not suitable. Damage may also be caused to the engine if unauthorized anti-freeze agent is used. If radiator, cylinder head or cylinder head seal have been replaced the old coolant must not be re-used.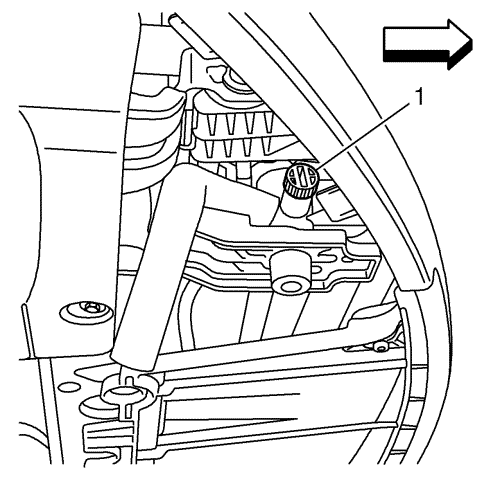
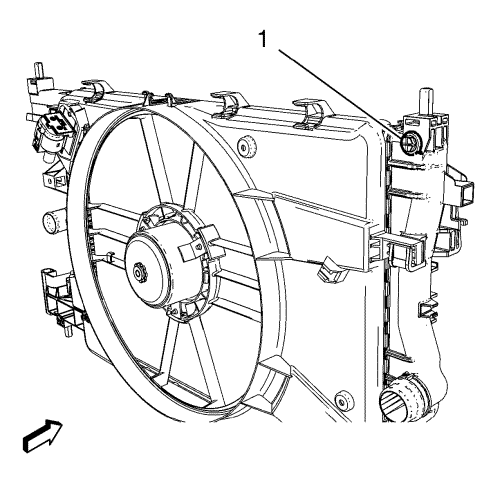
Note: Close vent screw when coolant flows out on the loosen vent screw.
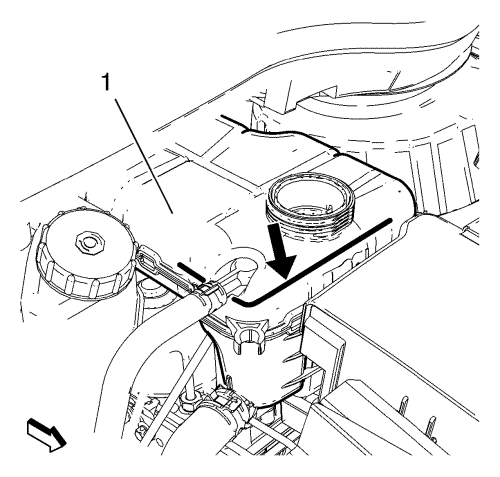
When the coolant has stopped dropping top up the coolant until the bottom line of the down pipe hole (black arrow).
Note: After Engine Start top up coolant immediately until the bottom line of the down pipe hole (black arrow) and close cap.
Note: After removing the heater core (located in passenger room) the following additional work has to be done:
Kick the accelerator pedal 3 times immediately - thereby the engine speed should not exceed 2500 RPM.Warm up engine at idle speed up to 2.500 RPM until radiator fan setting switches on.
Note: After removing the heater core (located in passenger room) let the engine run for further 2 minutes at 2.000-2.500 RPM. This ensures complete venting of the cooling system.
Kick the accelerator pedal 3 times - thereby the engine speed should not exceed 2.500 RPM.
| © Copyright Chevrolet. All rights reserved |
| © Copyright Chevrolet. All rights reserved |


