Front Bumper Impact Bar Replacement
Removal Procedure
Warning : Refer to Approved Equipment for Collision Repair Warning in the Preface section.
Warning : Refer to Glass and Sheet Metal Handling Warning in the Preface section.
- Disable the SIR System. Refer to SIR Disabling and Enabling .
- Disconnect the negative battery cable. Refer to
Battery Negative Cable Disconnection and Connection : without Start/Stop System .
- Remove all related panels and components.
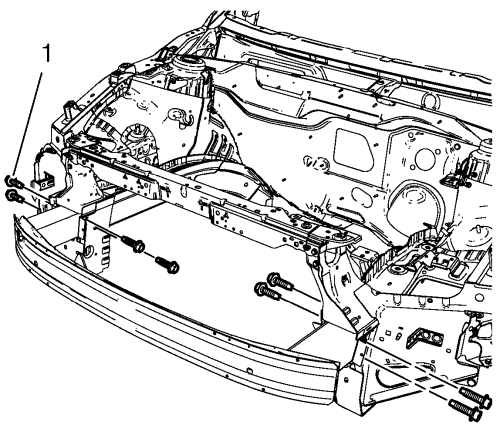
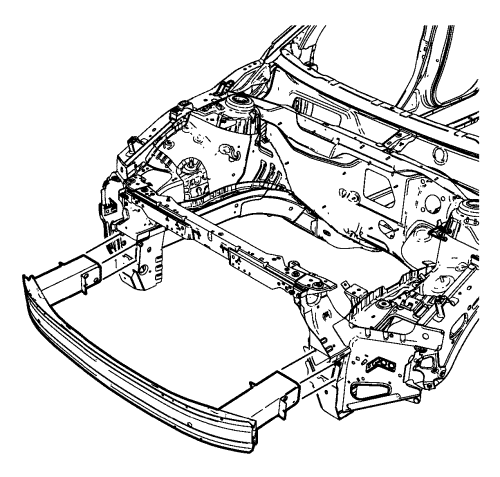
- Remove the 8 front bumper impact bar bolts (1).
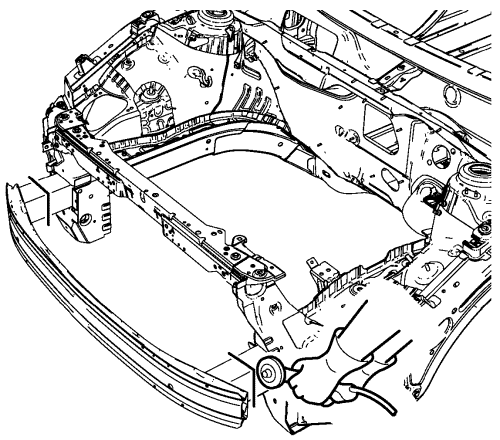
- Cut the front bumper impact bar left and right.
- Locate and mark all factory welds.
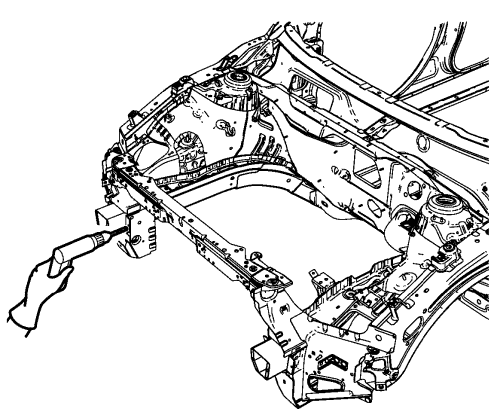
- Drill all factory welds.
- Remove the remaining parts of the front bumper impact bar.
Installation Procedure
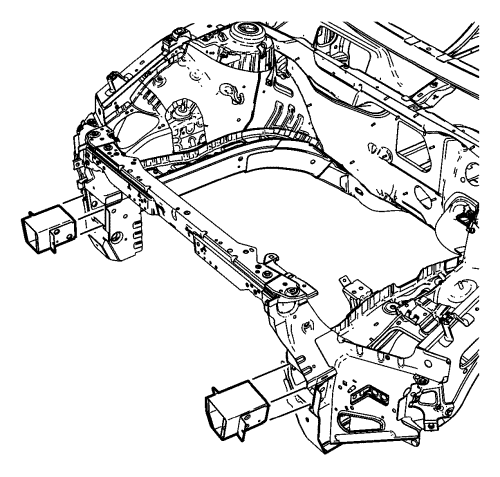
- Position the front bumper impact bar on the vehicle.
Caution : Refer to Fastener Caution in the Preface section.
- Install the 8 front bumper impact bar bolts (1) and tighten to 110 N·m (81 lb ft).
Note : Use only the original front bumper impact bar bolts. Replace bolts if damaged.
- Paint the repaired area. Refer to Basecoat/Clearcoat Paint Systems .
- Install all related panels and components.
- Connect the negative battery cable. Refer to
Battery Negative Cable Disconnection and Connection : without Start/Stop System .
- Enable the SIR system. Refer to SIR Disabling and Enabling .
| © Copyright Chevrolet. All rights reserved |
| © Copyright Chevrolet. All rights reserved |


