- Position the vehicle on level ground and move the front wheels to the straight-ahead position.
- Disconnect battery. Refer to
Battery Negative Cable Disconnection and Connection : without Start/Stop System .
- Remove tailgate upper trim finish panel. Refer to Tailgate Upper Trim Finish Panel Replacement .
- Remove tailgate trim finish panel. Refer to Liftgate Trim Finish Panel Replacement .
- Remove tailgate lower trim finish panel. Refer to Tailgate Lower Trim Finish Panel Replacement .
- Remove high mount brake light. Refer to High Mount Brake lamp Replacement .
- Remove rear window wiper motor. Refer to Rear Window Wiper Motor Replacement .
- Disconnect the electrical connectors from the tailgate window demister bus bars.
- Cover the following parts to protect from the broken glass:
- Use BO-46974 system to remove the tailgate window.
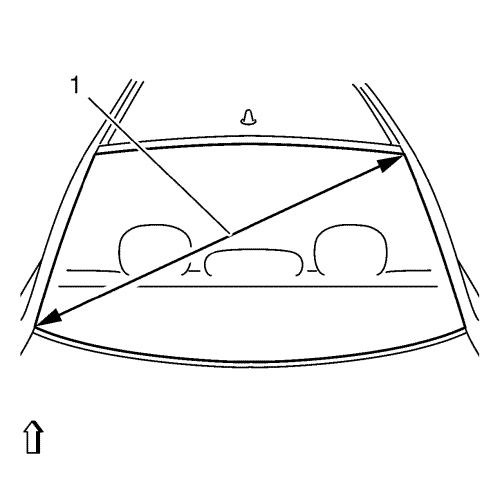
- Take the diagonal measurement (1) of the tailgate window.
- Cut cutting wire to needed lengths.
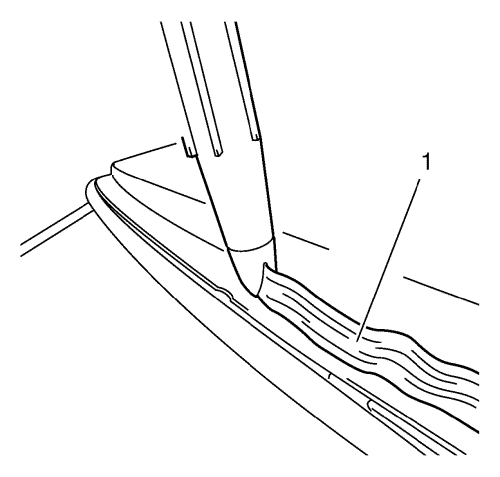
- Heat the awl with a suitable tool.
Note: Ensure that the tailgate window is not damaged in the process. Otherwise, stress cracks could form in the tailgate window. Mask off the area with fabric tape (1).
- Stick the awl through the adhesive bead in the area of the lower C-pillar.
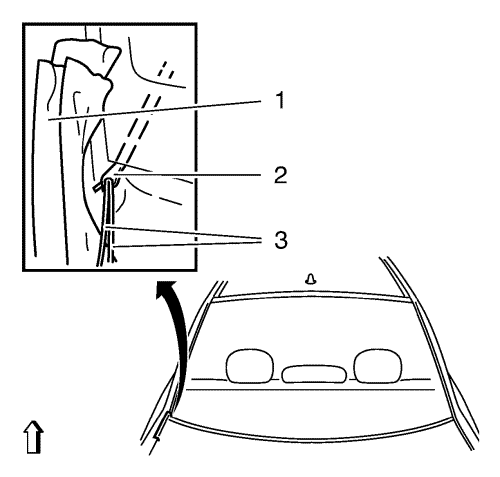
- Pull the wire through.
| • | Thread both ends of the cutting wire (3) in the bores of the piercing awl (2) and bend them. |
| • | Use the piercing awl (2) to pull the cutting wire to the centre of the tailgate window. |
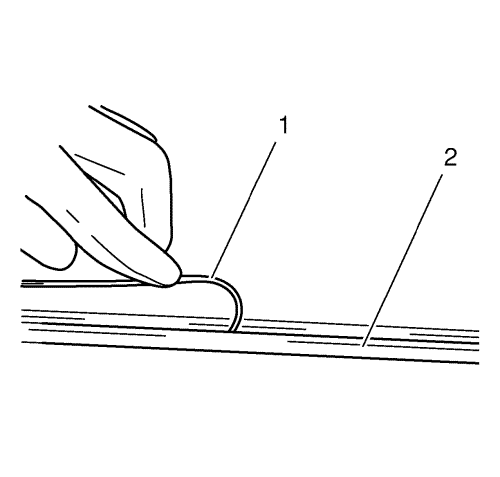
- Lay the wire under the tailgate window all the way round.
Note: The cutting wire (1) should be rolled in beneath the rubber window seal (2) at the tailgate window.
- Pull the remaining wire into the interior.
Note: Ensure that the cutting wire is fitted correctly to the winch deflection roller.
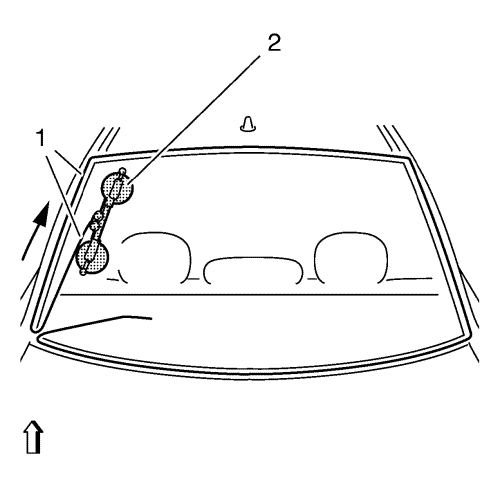
- Place the winch (2) with two winding heads on tailgate window inside.
| • | Position the winch vertically at the same height as the C-pillar. |
| • | Attach the cutting wire (1) to the winch (2). |
| • | Insert transfer ratchet and pre-tension cutting wire. |
Note: Arrow shows the path taken by the cutting wire.
- Cut out the tailgate window until the cutting wire is level with the winch.
Note: Ensure that the cutting wire is fitted correctly to the winch deflection roller.
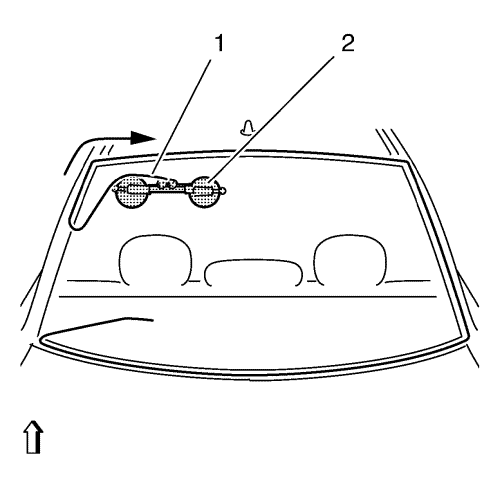
- Place the winch (2) with two winding heads in the vehicle.
| • | Position the winch (2) in the area of the roof frame. |
| • | Insert transfer ratchet and pre-tension cutting wire (1). |
Note: Arrow shows the path taken by the cutting wire.
Note: Increased cutting effort is required in the area of the tailgate window radius.
- Cut out the tailgate window until the cutting wire levels with the winch.
Note: Ensure Check that the cutting wire is laid correctly to the winch deflection roller.
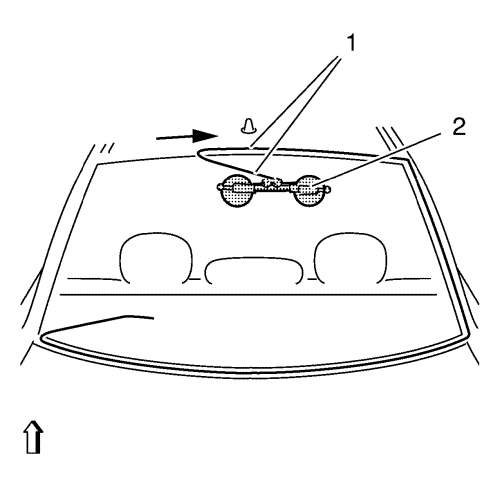
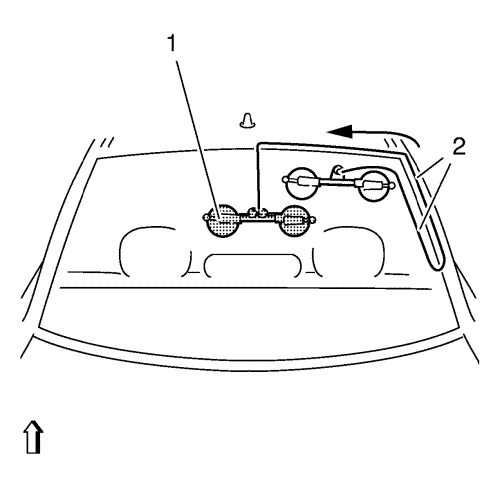
- Place the winch (2) with two winding heads in the vehicle.
| • | Position winch (2) in the middle area of tailgate window. |
| • | Insert transfer ratchet and pre-tension cutting wire (1). |
Note: Arrow shows the path taken by the cutting wire.
- Cut out the tailgate window until the cutting wire levels with the winch.
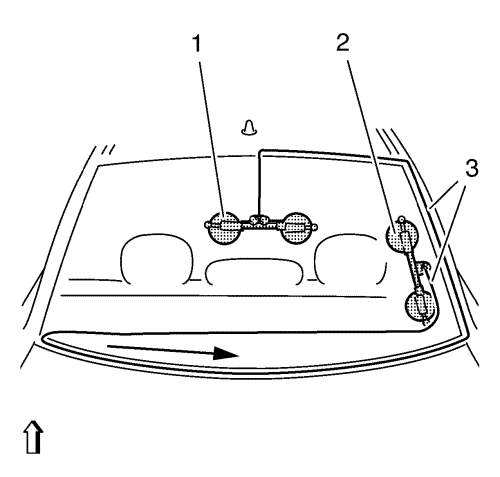
Note: Ensure that the cutting wire (3) is fitted correctly to the winch deflection roller.
- Position the winch with one winding head on tailgate window inside.
| • | The winch (1) with 2 winding heads stays in the position. |
| • | Position winch (2) with one winding head in the area of the lower C-pillar. |
| • | Thread the second end of the wire (3). |
| • | Insert transfer ratchet and apply tension to the cutting wire. |
Note: Arrow shows the path taken by the cutting wire.
Note: Increased cutting effort is required in the area of the tailgate window radius.
- Cut out the tailgate window until the cutting wire levels with the winch.
Note: Check that the cutting wire is laid correctly at the winch deflection roller.
- Position the winch (1) with one winding head in the vehicle.
| • | Position the winch (1) with one winding head in the upper area of the tailgate window. |
| • | Insert transfer ratchet and pre-tension cutting wire (2). |
Note: Arrow shows the path taken by the cutting wire.
Note: Increased cutting effort is required in the area of the tailgate window radius.
- Cut out the tailgate window until the cutting wire levels with the winch.
Note: Check that the cutting wire (2) is laid correctly to the winch deflection roller.
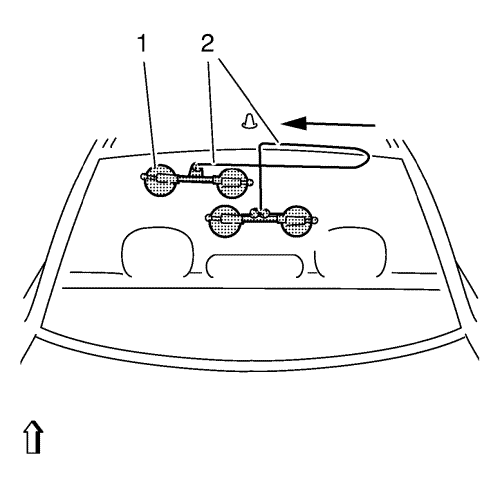
- Position the winch (1) with one winding head on tailgate window inside.
| • | Position winch (1) with one winding head next to winch with two winding heads so that the cutting wire (2) crosses. |
| • | Insert transfer ratchet and pre-tension cutting wire. |
Note: Arrow shows the path taken by the cutting wire.
- Cut out the tailgate window until the cutting wire (2) has cut through the adhesive bead completely.
- Remove glass removal system.
- Fit and lock BO-641 holder onto tailgate window.
Note: Second mechanic required.
- Remove the rear window.
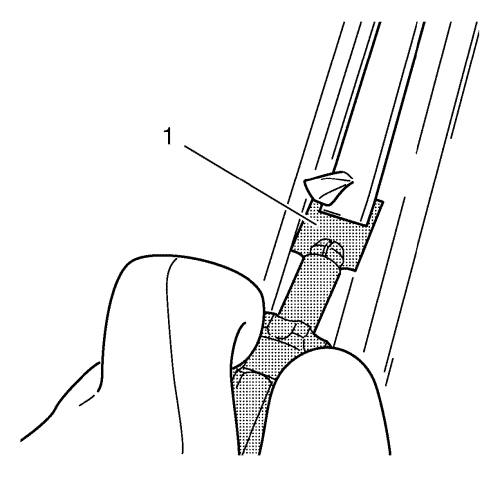
- Cut out the adhesive tape with the knife provided (1) to within 1 mm (0.039 in).
- Repair any paint damage.
Using a touch-up pen to match the colour of the vehicle, repair any paint damage.
- If the tailgate window rubber is damaged, replace with a new one.
- Cut off the adhesive bead on the glass pane.
Cut out the adhesive tape with the knife provided to within 1 mm (0.039 in).