Orlando
Engine Cooling Fan Wiring Harness Replacement - 2.0L Diesel LNP
Removal Procedure
Open the bonnet.
Remove the battery cover. Refer to
Battery Cover Replacement
.
Disconnect the battery negative cable. Refer to
Battery Negative Cable Disconnection and Connection
:
without Start/Stop System
.
Disconnect the 2 engine control module wiring harness plugs (1) from the engine control module (2).
Remove the engine control module bracket (2) along with the engine control module (1) from the battery tray (3).
Remove the battery tray. Refer to
Battery Tray Replacement
.
Remove the front bumper fascia. Refer to
Front Bumper Fascia Removal and Installation
.
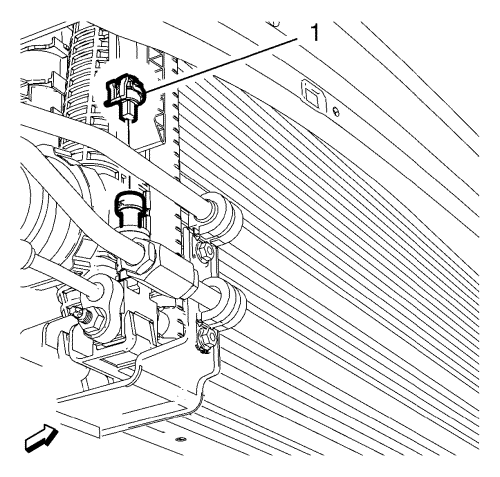
Disconnect the air conditioning refrigerant pressure sensor wiring harness plug (1).
Raise and support the vehicle. Refer to
Lifting and Jacking the Vehicle
.
Remove the engine compartment insulator. Refer to
Front Compartment Insulator Replacement
.
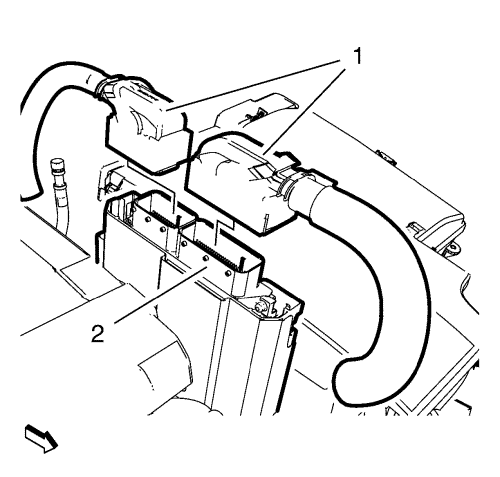
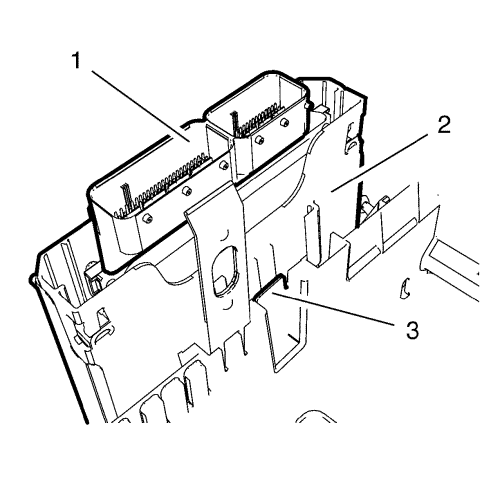
Slide the CRFM module box (2) to the right and remove the CRFM module box from the bracket.
Disconnect the 4 wiring harness connectors (1, 3).
Unclip the wiring harness clip (8) from the engine cooling fan cowl.
Unclip the wiring harness from the engine cooling fan cowl holders (9). Hang the wiring harness aside.
Lower the vehicle.
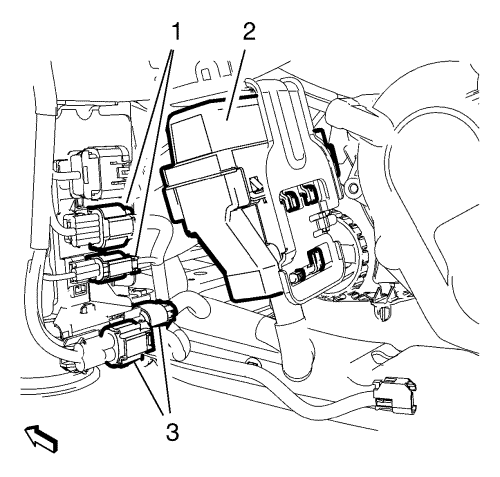
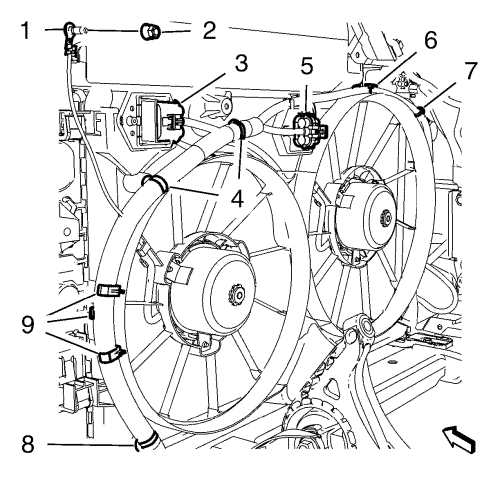
Remove the wiring harness ground cable nut (2) and the wiring harness ground cable (1).
Disconnect the 2 engine cooling fan motor wiring harness plugs (3, 5).
Unclip the wiring harness clip (4, 7) from the engine cooling fan cowl.
Unclip the wiring harness from the engine cooling fan cowl holders (6).
Remove the engine cooling fan cowl wiring harness from the vehicle.
Installation Procedure
Install and position the engine cooling fan cowl wiring harness plug.
Clip the wiring harness to the engine cooling fan cowl holders (6).
Clip the wiring harness clip (4, 7) to the engine cooling fan cowl.
Connect the 2 engine cooling fan motor wiring harness plugs (3, 5).
Caution:
Refer to
Fastener Caution
in the Preface section.
Install the wiring harness ground cable (1) and the wiring harness ground cable nut (2) and tighten to
9 N·m (80 lb in)
.
Raise the vehicle.
Clip the wiring harness to the engine cooling fan cowl holders (9).
Clip the wiring harness clip (8) to the engine cooling fan cowl.
Connect the 4 wiring harness connectors (1, 3).
Install the CRFM module box (2) to the bracket and slide the CRFM module box to the left until it stops.
Install the engine compartment insulator. Refer to
Front Compartment Insulator Replacement
.
Lower the vehicle.
Connect the air conditioning refrigerant pressure sensor wiring harness plug (1).
Install the front bumper fascia. Refer to
Front Bumper Fascia Removal and Installation
.
Install the battery tray. Refer to
Battery Tray Replacement
.
Install the engine control module bracket (2) along with the engine control module (1) to the battery tray (3).
Connect the 2 engine control module wiring harness plugs (1) to the engine control module (2).
Connect the battery negative cable. Refer to
Battery Negative Cable Disconnection and Connection
:
without Start/Stop System
.
Install the battery cover. Refer to
Battery Cover Replacement
.
Close the bonnet.
© Copyright Chevrolet. All rights reserved
© Copyright Chevrolet. All rights reserved