To the top of the document
Orlando
   
GMDE Start Page Load static TOC Load dynamic TOC Help?

Lower Sump Replacement

Removal Procedure

  1. Raise and support the vehicle. Refer to Lifting and Jacking the Vehicle .
  2. Remove the front compartment insulator. Refer to Front Compartment Insulator Replacement .
  3. Drain the engine oil. Refer to Engine Oil and Oil Filter Replacement .

  4. 2373144
  5. Remove the 14 lower sump retaining bolts (2).
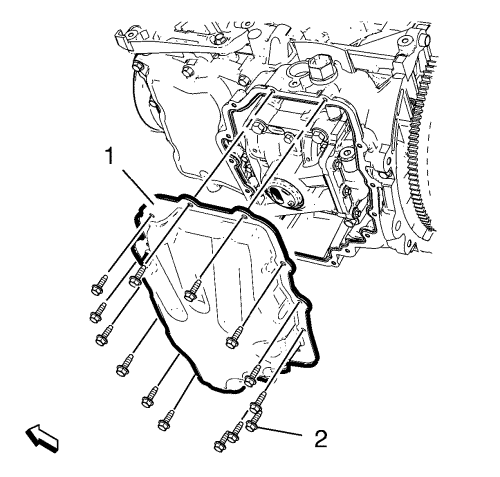
  6. Note: Carefully detach from engine block, using a suitable tool. Do not damage sealing surfaces.

  7. Remove the sump (1).

Installation Procedure

  1. Remove any old thread sealant and gasket material with a suitable tool.
  2. Clean the lower oil pan and lower oil pan components with solvent.
  3. Note: Ensure that the sealing surface is clear of oil, grease and old sealant material.

  4. Clean out debris from the bolt holes.
  5. Warning: Refer to Safety Glasses and Compressed Air Warning in the Preface section.

  6. Dry the lower oil pan and lower oil pan components with compressed air.

  7. 2373286

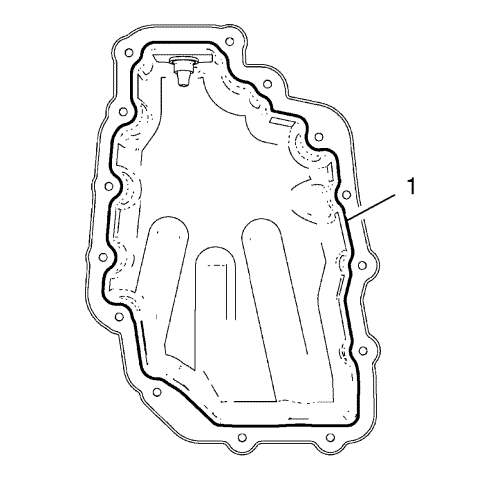
    Note: The complete installation procedure of the lower sump should be done in 10 minutes.

    Note: Do not coat sealing compound on the sump bolt holes and threads.

  8. Apply sealing compound on the sealant line (1).

  9. 2373144
  10. Install the lower oil sump (1).
  11. Caution: Refer to Fastener Caution in the Preface section.

  12. Install the 14 lower sump retaining bolts (2) and tighten evenly to 10 N·m (89 lb in).
  13. Install the front compartment insulator. Refer to Front Compartment Insulator Replacement .
  14. Lower the vehicle.
  15. Fill the engine with engine oil. Refer to Engine Mechanical Specifications .


© Copyright Chevrolet. All rights reserved


© Copyright Chevrolet. All rights reserved