To the top of the document
Orlando
   
GMDE Start Page Load static TOC Load dynamic TOC Help?

Battery Positive and Negative Cable Replacement - 2.0L Diesel LNP

Removal Procedure

  1. Disconnect the battery negative cable. Refer to Battery Negative Cable Disconnection and Connection : without Start/Stop System .

  2. 2577153
  3. Unlock the retaining tab (1) on the battery fuse box cover.
  4. Use a suitable screw driver (2) to unlock the clip (4) through the window (3).

  5. 2027594

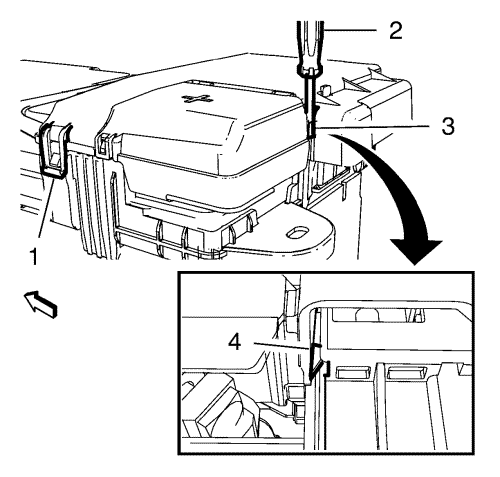
    Note: Pull the battery fuse box housing. DO NOT pull the flap.

  6. Open the battery fuse box cover (1).
  7. Remove the battery positive to starter cable nut (2).
  8. Remove the battery positive to starter cable (3) from the battery.

  9. 2027762
  10. Remove the negative cable nut (1).
  11. Remove the negative cable (2).

  12. 2506324
  13. Disconnect the 2 engine control module wiring harness plugs (1) from the engine control module (2).
  14. Remove the engine control module (2) in top direction.
  15. Remove the battery tray. Refer to Battery Tray Replacement .

  16. 2506336
  17. Remove the 2 positive and negative cable bracket nuts (1, 2).
  18. Raise and support the vehicle. Refer to Lifting and Jacking the Vehicle .
  19. Remove the engine compartment insulator. Refer to Front Compartment Insulator Replacement .

  20. 2506217
  21. Remove the positive and negative cable nut (2).
  22. Remove the positive and negative cable (5) from the starter.
  23. Remove the ground cable bolt (4).
  24. Remove the ground cable (3) from the engine block.
  25. Unclip the positive and negative cable clip from bracket.

  26. 2506273
  27. Fold the alternator cap (2) aside.
  28. Remove the alternator positive cable retaining nut (3).
  29. Remove the alternator positive cable (4) from the alternator.
  30. Hang the positive and negative cable aside.
  31. Lower the vehicle.
  32. Remove the positive and negative cable from the vehicle.

Installation Procedure

  1. Position the positive and negative cable on the vehicle.
  2. Raise the vehicle.
  3. Position the positive and negative cable.

  4. 2506273
  5. Install the positive and negative cable (4) to the alternator.
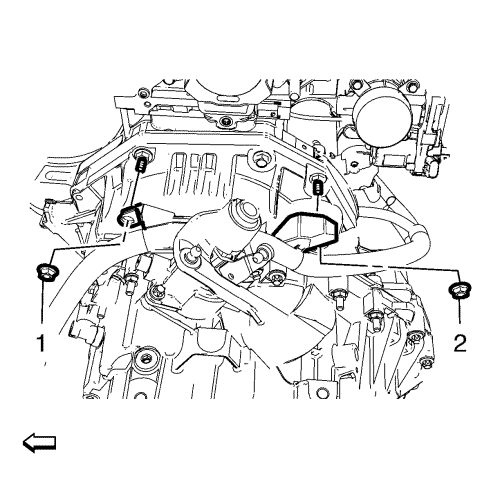
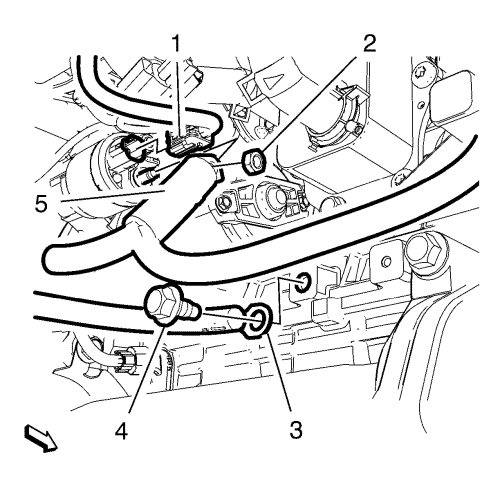
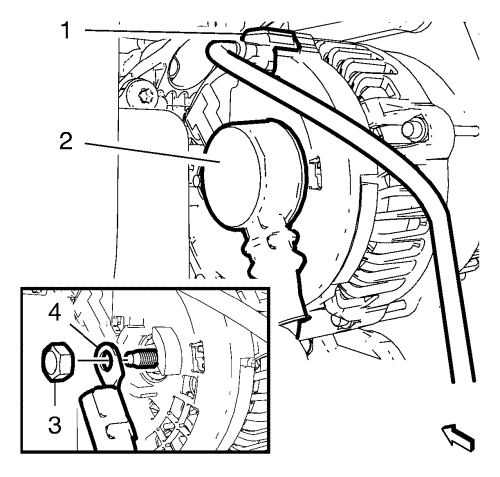
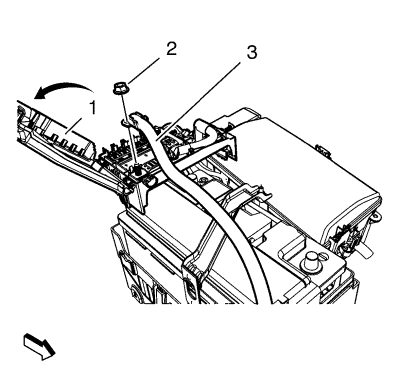
  6. Caution: Refer to Fastener Caution in the Preface section.

  7. Install the positive and negative cable retaining nut (3) and tighten to 17 N·m (13 lb ft).
  8. Fold the alternator cap (2) to the positive and negative cable terminal.

  9. 2506217
  10. Clip the positive and negative cable clip into the bracket.
  11. Install the ground cable (3) to the engine block.
  12. Install the ground cable bolt (4) and tighten to 22 N·m (16 lb ft).
  13. Install the positive and negative cable (5) to the starter.
  14. Install the positive and negative cable nut (2) and tighten to 9,5 N·m (84 lb in).
  15. Install the engine compartment insulator. Refer to Front Compartment Insulator Replacement .
  16. Lower the vehicle.

  17. 2506336
  18. Install the 2 positive and negative cable bracket nuts (1, 2) and tighten to 17 N·m (13 lb ft).

  19. 2506324
  20. Connect the 2 engine control module wiring harness plugs (1) to the engine control module (2).
  21. Install the battery tray. Refer to Battery Tray Replacement .
  22. Install the engine control module (2).
  23. Connect the 2 engine control module wiring harness plugs (1) to the engine control module (2).

  24. 2027762
  25. Install the negative cable (2).
  26. Install the negative cable nut (1) and tighten to 9 N·m (80 lb in).

  27. 2027594
  28. Install the battery positive to starter cable (3) to the battery.
  29. Install and tighten the battery positive to starter cable nut (2).

  30. 2577153
  31. Close the battery fuse box cover and lock the retaining tabs (1) and (4).
  32. Connect the battery negative cable. Refer to Battery Negative Cable Disconnection and Connection : without Start/Stop System .


© Copyright Chevrolet. All rights reserved


© Copyright Chevrolet. All rights reserved