Exhaust Temperature Sensor Replacement - Position 1
Special Tools
EN-50429 Adaptor Exhaust Temperature Sensor Remover/Installer
For equivalent regional tools, refer to Special Tools .
Removal Procedure
- Remove the engine sight shield. Refer to Engine Sight Shield Replacement .
- Remove the turbocharger heat shield. Refer to Turbocharger Heat Shield Replacement .
- Remove the positive crankcase ventilation hose. Refer to Positive Crankcase Ventilation Hose/Pipe/Tube Replacement .
- Remove the air cleaner outlet duct. Refer to Air Cleaner Outlet Duct Replacement .
- Disconnect the exhaust temperature sensor wiring harness plug position 1 from the engine wiring harness.
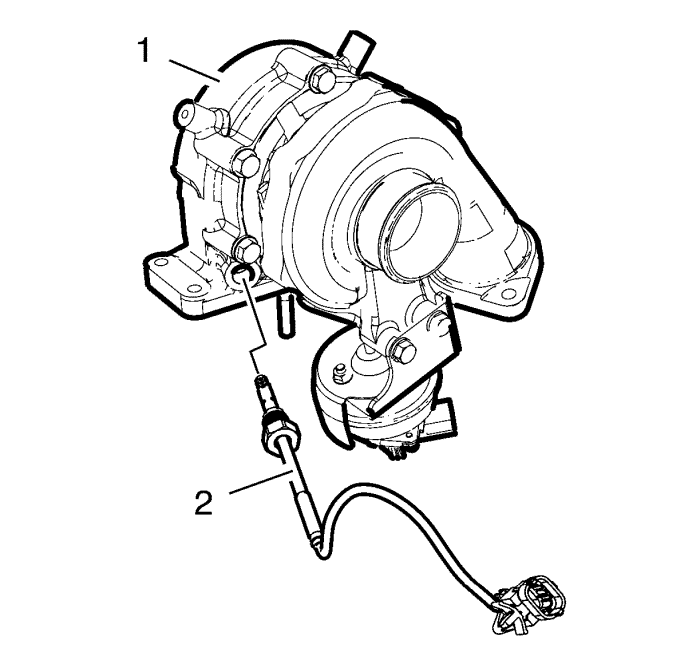
- Remove the exhaust temperature sensor position 1 (2) from the turbocharger (1), using the EN-50429 adaptor .
Installation Procedure
Caution: Refer to Fastener Caution in the Preface section.
- Install the exhaust temperature sensor position 1 (2) to the turbocharger (1), using the EN-50429 adaptor . Tighten the exhaust temperature sensor position 1 (2) to 45 N·m (33 lb ft).
- Connect the exhaust temperature sensor wiring harness plug position 1 to the engine wiring harness.
- Install the air cleaner outlet duct. Refer to Air Cleaner Outlet Duct Replacement .
- Install the positive crankcase ventilation hose. Refer to Positive Crankcase Ventilation Hose/Pipe/Tube Replacement .
- Install the turbocharger heat shield. Refer to Turbocharger Heat Shield Replacement .
- Install the engine sight shield. Refer to Engine Sight Shield Replacement .
| © Copyright Chevrolet. All rights reserved |
| © Copyright Chevrolet. All rights reserved |


