Clutch Actuator Cylinder Front Pipe Replacement - F40 and Left Hand Drive
Removal Procedure
- Remove battery tray. Refer to Battery Tray Replacement .
- Remove radiator expansion tankRadiator Surge Tank Replacement and lay aside.
- Place basin underneath.
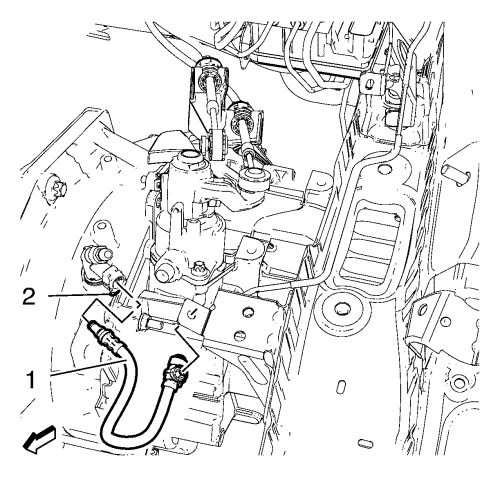
- Clip clutch actuator cylinder front pipe (2) out of 2 retainers.
- Open retaining clip (1).
- Disconnect clutch actuator cylinder front pipe from clutch actuator cylinder pipe elbow.
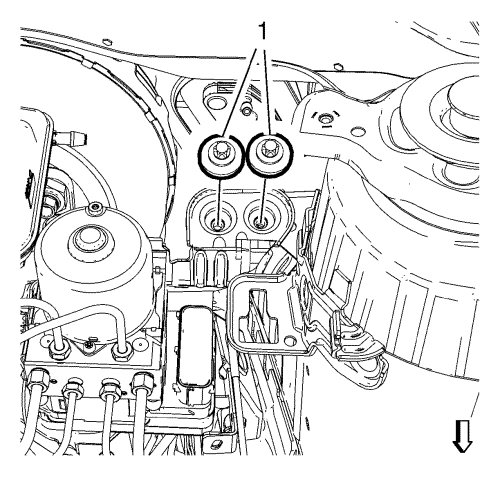
- Remove 2 brake pressure modulator valve bracket bolts (1).
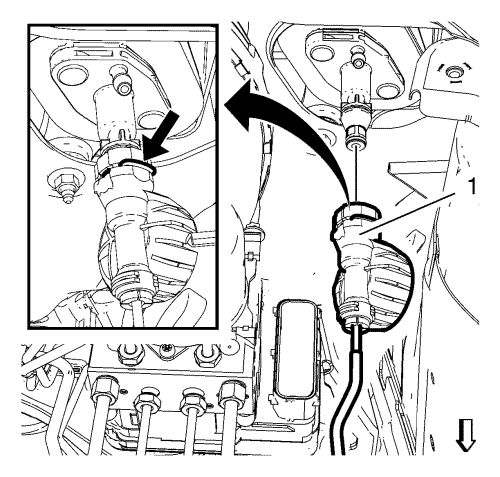
- Open retaining clip (arrow).
- Disconnect clutch actuator cylinder front pipe (1) from clutch master cylinder.
Note: For removal of clutch actuator cylinder front pipe lift brake pressure modulator valve bracket carefully.
- Remove clutch actuator cylinder front pipe.
Installation Procedure
Note: For installation of clutch actuator cylinder front pipe lift brake pressure modulator valve bracket carefully.
- Install clutch actuator cylinder front pipe.
- Connect clutch actuator cylinder front pipe (1) to clutch master cylinder.
- Close retaining clip (arrow).
- Connect clutch actuator cylinder front pipe (2) to clutch actuator cylinder pipe elbow.
- Close retaining clip (1).
- Clip clutch actuator cylinder front pipe (1) into 2 retainers.
Caution: Refer to Fastener Caution in the Preface section.
- Install 2 brake pressure modulator valve bracket bolts (1) and tighten to 20 N·m (15 lb ft).
- Install radiator surge tankRadiator Surge Tank Replacement .
- Bleed hydraulic clutch system. Refer to Hydraulic Clutch System Bleeding .
- Install battery tray. Refer to Battery Tray Replacement .
| © Copyright Chevrolet. All rights reserved |
| © Copyright Chevrolet. All rights reserved |


