To the top of the document
Orlando
   
GMDE Start Page Load static TOC Load dynamic TOC Help?

Engine Coolant Fan Shroud Replacement - 1.8L 2H0 - Manual Transmission

Removal Procedure

  1. Disconnect the battery negative cable. Refer to Battery Negative Cable Disconnection and Connection : without Start/Stop System .

  2. 2512592
  3. Remove the ground cable nut (3) and the ground cable (4).
  4. Disconnect the engine cooling fan resistor wiring harness plug (2).
  5. Unclip the engine cooling fan wiring harness (6) from the 7 wiring harness clips (1, 5, 7). Hang the engine cooling fan wiring harness aside.

  6. 2512584
  7. Unclip the engine cooling fan cowl (1) at the 4 mounting points (2).
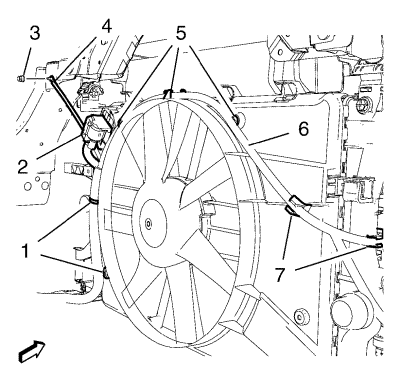
  8. Note: Push the engine cooling fan to the right side.

  9. Remove the engine cooling fan cowl in top direction from the radiator.

  10. 2512588
  11. Unclip the engine cooling fan resistor (3) from the engine cooling fan cowl (2).
  12. Unclip the cooling fan wiring harness from the engine cooling fan cowl clips (4).
  13. Remove the 3 engine cooling fan motor bolts (1).
  14. Remove the engine cooling fan (5) along with the engine cooling fan motor.

Installation Procedure


    2512588
  1. Install the engine cooling fan (5) along with the engine cooling fan motor.
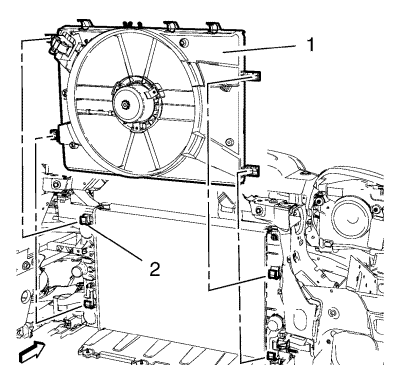
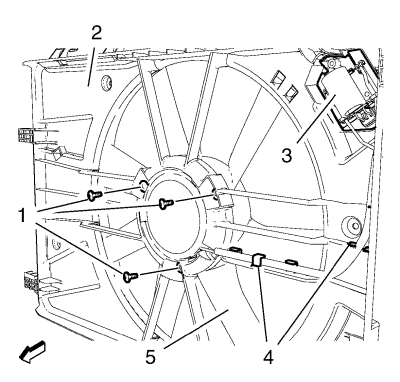
  2. Caution: Refer to Fastener Caution in the Preface section.

  3. Install the 3 engine cooling fan motor bolts (1) and tighten to 4 N·m (35 lb in).
  4. Clip the cooling fan wiring harness to the engine cooling fan cowl clips (4).
  5. Clip the engine cooling fan resistor (3) to the engine cooling fan cowl (2).

  6. 2512584
  7. Install the engine cooling fan cowl (1) to the radiator.
  8. Clip the engine cooling fan cowl to the 4 mounting points (2).

  9. 2512592
  10. Position the engine cooling fan wiring harness (6). Clip the engine cooling fan wiring harness to the 7 wiring harness clips (1, 5, 7).
  11. Connect the engine cooling fan resistor wiring harness plug (2).
  12. Install the ground cable (4) and the ground cable nut (3) and tighten the nut to 10 N·m (89 lb in).
  13. Connect the battery negative cable. Refer to Battery Negative Cable Disconnection and Connection : without Start/Stop System .


© Copyright Chevrolet. All rights reserved


© Copyright Chevrolet. All rights reserved