To the top of the document
Orlando
   
GMDE Start Page Load static TOC Load dynamic TOC Help?

Exhaust Rear Silencer Heat Shield Replacement - except 2.0L LBN

Removal Procedure

    Warning: In order to avoid being burned, do not service the exhaust system while it is still hot. Service the system when it is cool.

    Warning: Always wear protective goggles and gloves when removing exhaust parts as falling rust and sharp edges from worn exhaust components could result in serious personal injury.

    Caution: Do not bend the exhaust flex pipe more than 10 degrees in any direction. Bending of more than 10 degrees or twisting in a range of ±0.5 degrees will damage the exhaust flex decoupler.

  1. Remove the Spare Wheel and Carrier. Refer to Spare Wheel and Carrier Replacement .

  2. 2512624
  3. Remove the 2 exhaust rear silencer hanger insulators (3) from the exhaust rear silencer .
  4. Remove the exhaust rear silencer hanger insulator bracket bolt (1) from the exhaust rear silencer hanger insulator bracket (2).
  5. Place the exhaust system on to the rear axle.

  6. 2512625
  7. Remove the 4 exhaust rear silencer heat shield retainers (2).
  8. Remove the exhaust rear silencer heat shield (1)

Installation Procedure


    2512625
  1. Install the exhaust rear silencer heat shield (1)
  2. Install the 4 exhaust rear silencer heat shield retainers (2).
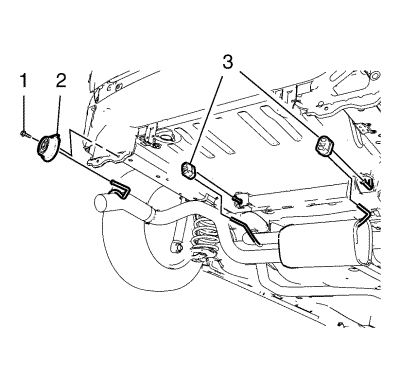
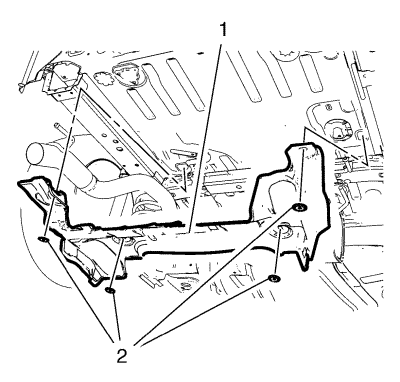
  3. Caution: Refer to Fastener Caution in the Preface section.


    2512624
  4. Install the exhaust rear silencer hanger insulator bracket bolt (1) to the exhaust rear silencer hanger insulator bracket (2) and tighten the bolt to 25 N·m (18 lb ft).
  5. Install the 2 exhaust rear silencer hanger insulators (3) to the exhaust rear silencer.
  6. Install the Spare Wheel and Carrier. Refer to Spare Wheel and Carrier Replacement .


© Copyright Chevrolet. All rights reserved


© Copyright Chevrolet. All rights reserved