Charge Air Cooler Inlet Hose Replacement - 2.0L Diesel LNP
Removal Procedure
- Remove the battery cover. Refer to Battery Cover Replacement .
- Disconnect the battery negative cable. Refer to
Battery Negative Cable Disconnection and Connection : without Start/Stop System .
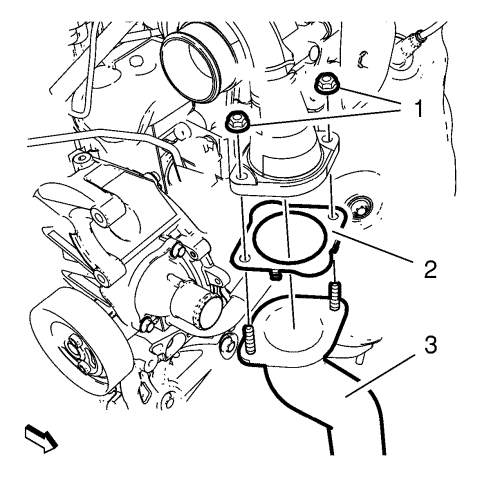
- Remove the 2 charge air cooler inlet hose nuts (1).
- Remove the charge air cooler inlet hose (3) from the turbocharger and remove the gasket (2).
- Remove the inlet air duct. Refer to Inlet Air Duct Replacement .
- Disconnect the air conditioning refrigerant pressure sensor wiring harness plug from the air conditioning condenser.
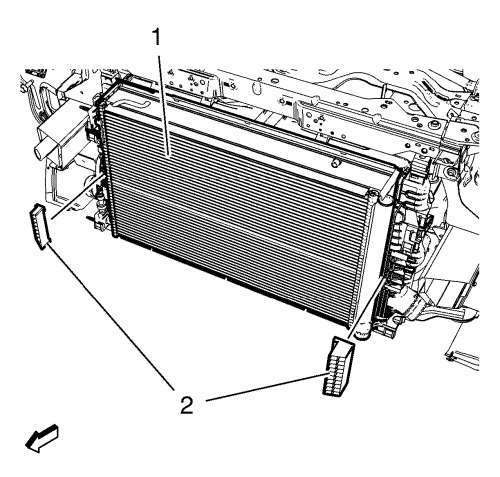
- Unclip the 2 radiator protector fenders (2) from the radiator (1).
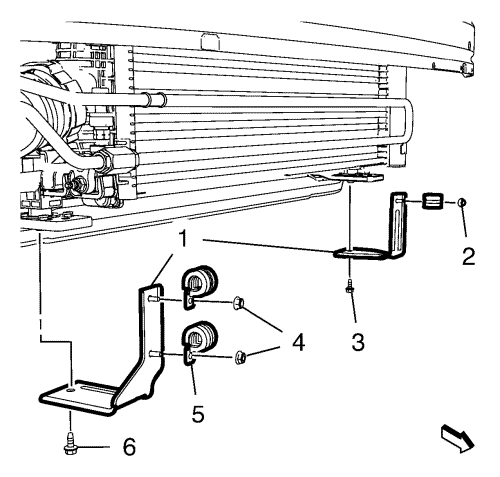
- Remove the 3 power steering fluid cooling pipe loop bracket hose clamp nuts (2, 4).
- Remove the 2 power steering fluid cooling pipe loop bracket bolts (3, 6).
- Remove the 2 power steering fluid cooling pipe loop brackets (1).
- Remove the radiator air seal .
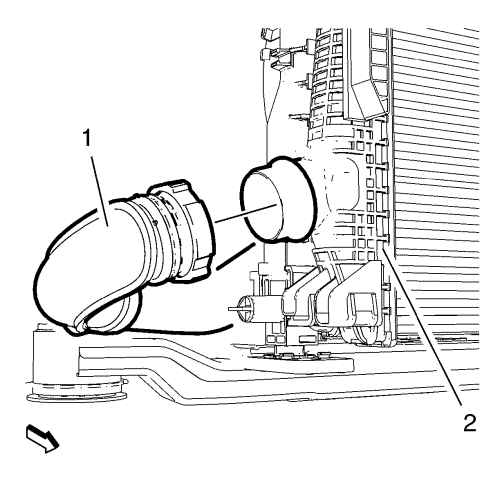
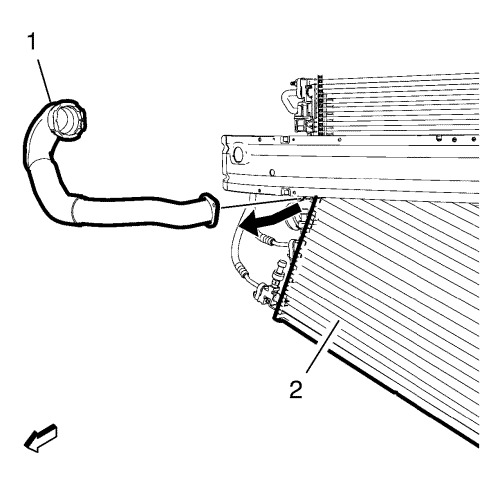
- Remove the charge air cooler inlet hose (1) from the charge air cooler (2).
- Remove the radiator upper brackets. Refer to Radiator Upper Bracket Replacement .
- Unclip the air conditioning condenser (2) from the charge air cooler .
- Hang the air conditioning condenser (2) aside and secure with safety belts.
Note: Move the radiator forward to remove the charge air cooler inlet hose.
- Remove the charge air cooler inlet hose (1) downwards from the vehicle.
Installation Procedure
Note: Move the radiator forward to install the charge air cooler inlet hose.
- Position the charge air cooler inlet hose (1) to the vehicle.
- Install the air conditioning condenser (2) to the charge air cooler.
- Install the charge air cooler inlet hose (1) to the charge air cooler (2).
- Install the radiator upper brackets. Refer to Radiator Upper Bracket Replacement .
Caution: Refer to Fastener Caution in the Preface section.
- Install the 2 power steering fluid cooling pipe loop brackets (1).
- Install the 2 power steering fluid cooling pipe loop bracket bolts (3, 6) and tighten to 9 N·m (80 lb in).
- Install the 3 power steering fluid cooling pipe loop bracket hose clamp nuts (2, 4) and tighten to 9 N·m (80 lb in).
- Install the radiator air seal .
- Clip in the 2 radiator protector fenders (2) to the radiator (1).
- Connect the air conditioning refrigerant pressure sensor wiring harness plug to the air conditioning condenser.
- Install the inlet air duct. Refer to Inlet Air Duct Replacement .
- Install a NEW gasket (2).
- Install the charge air cooler inlet hose (3) to the turbocharger.
- Install the 2 charge air cooler inlet hose nuts (1) and tighten to 22 N·m (16 lb ft).
- Connect the battery negative cable. Refer to
Battery Negative Cable Disconnection and Connection : without Start/Stop System .
- Install the battery cover. Refer to Battery Cover Replacement .
| © Copyright Chevrolet. All rights reserved |
| © Copyright Chevrolet. All rights reserved |


