To the top of the document
Spark
   
GMDE Start Page Load static TOC Load dynamic TOC Help?

Front Wheel Speed Sensor Replacement — Right Side

Removal Procedure

  1. Raise and support the vehicle. Refer to Lifting and Jacking the Vehicle
  2. Remove the tire and wheel assembly. Refer to Tire and Wheel Removal and Installation .

  3. 2308703
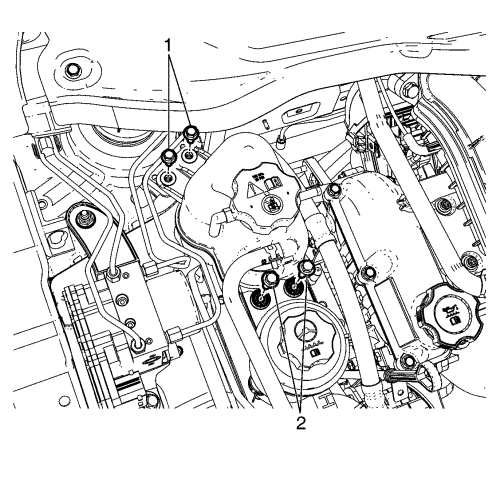
  4. Remove the radiator surge tank mounting bolts (1) and the power steering fluid reservoir mounting bolts (2), and detach the radiator surge tank and power steering fluid reservoir without disconnecting the coolant hose and the power steering hose, and position aside. Refer to Radiator Surge Tank Replacement and Power Steering Fluid Reservoir Replacement - Off Vehicle .

  5. 2308704
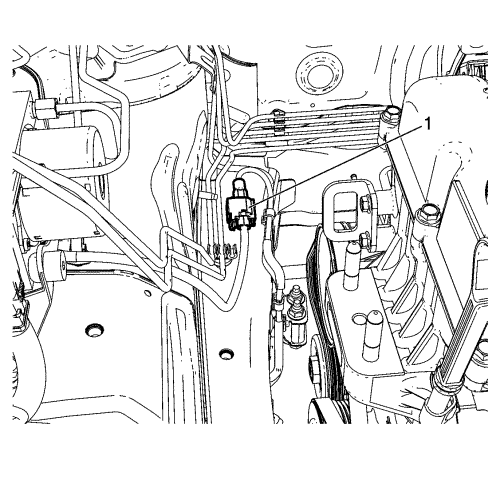
  6. Disconnect the wheel speed sensor electrical connector (1).

  7. 2308705
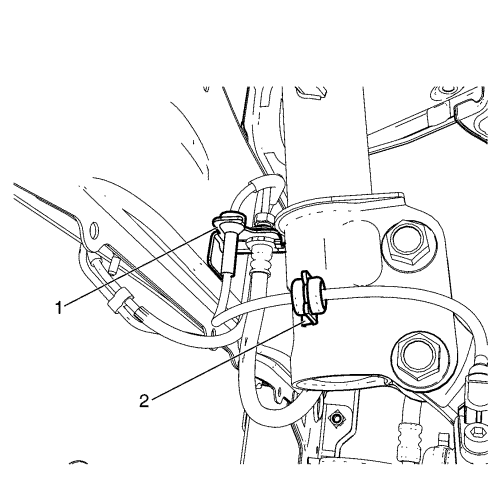
  8. Detach the wheel speed sensor harness from the body frame mounted bracket (1).
  9. Detach the wheel speed sensor harness from the front strut mounted bracket (2).

  10. 2308706
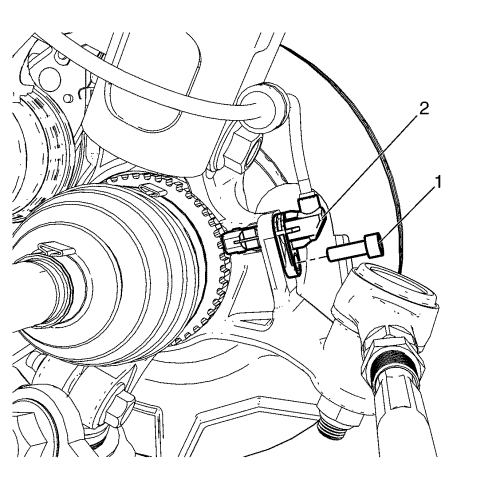
  11. Remove the wheel speed sensor to knuckle retaining bolt (1).
  12. Remove the wheel speed sensor (2) from the steering knuckle.

Installation Procedure


    2308706
  1. Install the wheel speed sensor (2) to the steering knuckle.
  2. Caution: Refer to Fastener Caution in the Preface section.

  3. Install the wheel speed sensor to knuckle retaining bolt (1) and tighten to 8.5 N·m (75 lb in) .

  4. 2308705
  5. Attach the wheel speed sensor harness to the front strut mounted bracket (2).
  6. Attach the wheel speed sensor harness to the body frame mounted bracket (1).

  7. 2308704
  8. Connect the wheel speed sensor electrical connector (1).

  9. 2308703
  10. Position the radiator surge tank and the power steering fluid reservoir to the original place, and install the radiator surge tank mounting bolts (1) and the power steering fluid reservoir mounting bolts (2). Refer to Radiator Surge Tank Replacement and Power Steering Fluid Reservoir Replacement - Off Vehicle .
  11. Install the tyre and wheel. Refer to Tire and Wheel Removal and Installation .
  12. Lower the vehicle.


© Copyright Chevrolet. All rights reserved