Warning: Refer to Brake Dust Warning in the Preface section.
Note: Use ONLY HAND TOOLS whenever tightening or loosening the adjusting nut.
- Apply and fully release the park brake several times. Verify that the park brake lever releases completely.
- Turn ON the ignition. Verify the red BRAKE warning lamp is not illuminated.
- If the red BRAKE warning lamp is illuminated, verify the following:
| • | The park brake lever is in the fully released position and against the stop. |
| • | There is no slack in the park brake cables. |
- If the red BRAKE warning lamp remained illuminated and there were no other visible causes, refer to Symptoms - Hydraulic Brakes .
- Turn OFF the ignition.
- Release the park brake lever boot from the floor console by applying light pressure inward on the sides of the boot retainer, and pull the boot back.
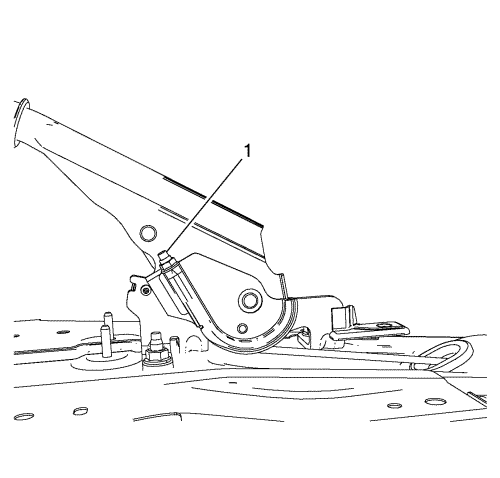
- With the park brake lever in the released position, loosen the adjusting nut (1) enough to completely relieve tension on the front cable.
Caution: Refer to Vehicle Lifting and Jacking Caution in the Preface section.
- Raise and support the vehicle. Raise the vehicle just enough to allow rear tyre and wheel assembly removal and rear drum adjustment.
- Remove the rear tyre and wheel assemblies. Refer to Tire and Wheel Removal and Installation .
- Adjust the rear drum brakes. Refer to Drum Brake Adjustment .
- Ensure there is no brake shoe drag after adjustment by rotating the brake drums. If drag exists, re-centre the brake shoes and perform the brake shoe adjustment again.
- Raise the park brake lever 6 detent positions.
Caution: Refer to Fastener Caution in the Preface section.
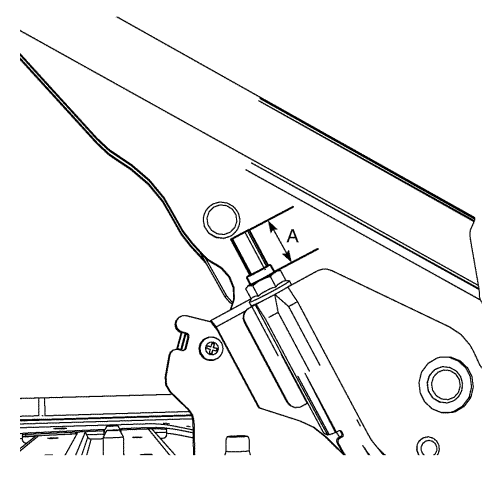
- Install the park brake cable adjusting nut until the projection amount (A) of the adjusting rod reaches 21 mm from the adjusting nut.
- Attempt to rotate the rear brake drums. There should be no rotation forward or rearward.
- Fully release the park brake lever.
- Verify the park brake is released by rotating the rear brake drums. The drums should rotate freely and exhibit no brake shoe drag.
- If the drums do not rotate freely, repeat the park brake cable adjustment procedure.
- Raise the park brake lever 3 detent positions and attempt to rotate the rear brake drums:
| • | One of the brake drums should not rotate forward or rearward. |
| • | The other brake drum should not rotate forward or rearward, or should require substantial effort to rotate. |
- Raise the park brake lever one additional detent position and attempt to rotate the rear brake drums.
- Verify that the left and right brake drums cannot be rotated.
- Install the rear tyre and wheel assemblies. Refer to Tire and Wheel Removal and Installation .
- Lower the vehicle.
- Position the park brake lever boot to the floor console and press the boot retainer into place to secure.
- Release the park brake lever.


