Rear Brake Cylinder Replacement
Removal Procedure
Warning: Refer to Brake Dust Warning in the Preface section.
Warning: Refer to Brake Fluid Irritant Warning in the Preface section.
- Raise and support the vehicle. Refer to Lifting and Jacking the Vehicle .
- Remove the tyre and wheel. Refer to Tire and Wheel Removal and Installation .
- Remove the brake drum. Refer to Brake Drum Replacement .
- Remove the drum brake adjusting hardware. Refer to Drum Brake Adjusting Hardware Replacement .
- Clean the area surrounding the wheel cylinder of dirt and debris.
- Remove the wheel cylinder bleeder valve to get tool access to the brake pipe fitting.

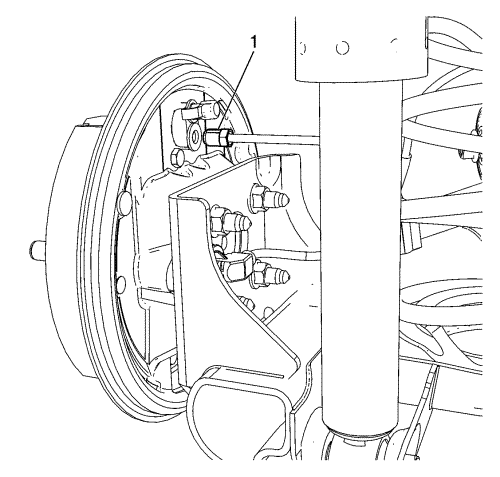
- Disconnect the wheel cylinder brake pipe fitting (1).
Cap the brake pipe fitting to prevent brake fluid loss and contamination.

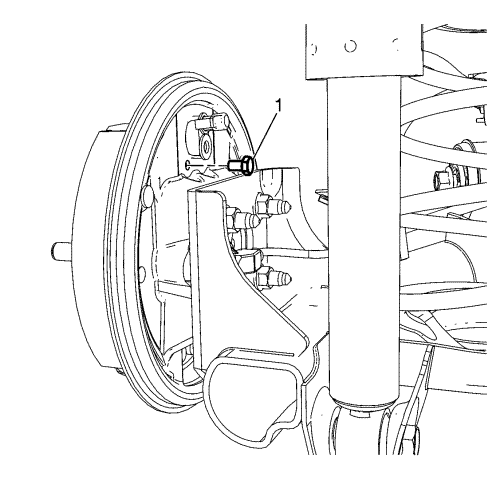
- Remove the wheel cylinder bolts (1).

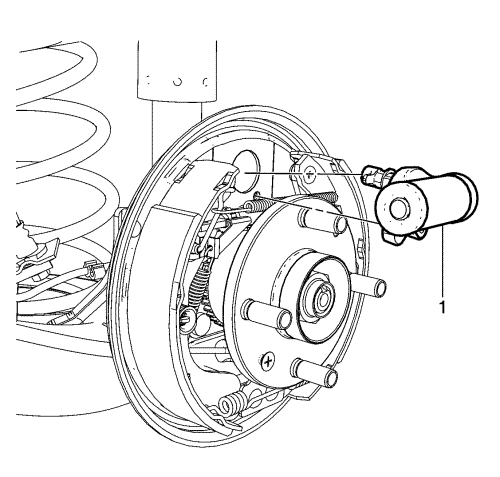
- Spread the top of the brake shoes slightly and remove the wheel cylinder (1) form the backing plate.
Installation Procedure

- Spread the top of the brake shoes slightly and install the wheel cylinder (1) to the backing plate.
Caution: Refer to Fastener Caution in the Preface section.

- Install the wheel cylinder bolt (1) and tighten to 10 N·m (89 lb in).
- Install the wheel cylinder bleeder valve and tighten to 8.5 N·m (75 lb in).

- Install the wheel cylinder brake pipe fitting (1) to the wheel cylinder and tighten to 18 N·m (13 lb ft).
- Install the drum brake adjusting hardware. Refer to Drum Brake Adjusting Hardware Replacement .
- Adjust the drum brakes. Refer to Drum Brake Adjustment .
- Install the brake drum. Refer to Brake Drum Replacement .
- Install the tyre and wheel assembly. Refer to Tire and Wheel Removal and Installation .
- Bleed the hydraulic brake system. Refer to
Hydraulic Brake System Bleeding : Pressure → Manual .
- Lower the vehicle.
| © Copyright Chevrolet. All rights reserved |


