Line Pressure Check
Time Lag Test
Note:
| • | In this test, be sure to wait for at least one minute after moving the select lever back to N range before starting the next measurement. |
| • | Be sure to take the measurement when the engine is fully warmed up. |
- After checking the automatic transmission (AT) level, block the front and rear wheels securely and depress the floor brake.
- Start the engine and move the select lever from N to D. Using a stop watch, measure the time it takes from this point until shift shock is felt.
- Similarly, measure the time lag from N to R range.
Time Lag
| Result
| Problem Cause
|
N - D Range = 1.0 Second
| Time lag in shifting from N to D exceeds the specified level.
|
| • | Damage of the Clutch Piston Oil Seal |
|
N - R Range = 1.0 Second
| Time lag in shifting from N to R exceeds the specified level.
|
| • | Low and Reverse Brake Slip |
| • | Damage of the Brake or Clutch Piston Oil Seal |
|
Oil Pressure Test
Special Tools
| • | DT-46450-01 Oil Pressure Gauge |
| • | DT-50046 Oil Pressure Gauge Adapter |
For equivalent regional tools, refer to Special Tools .
- Check the ATF level and condition. Refer to Transmission Fluid Level and Condition Check .
- Turn the engine OFF.
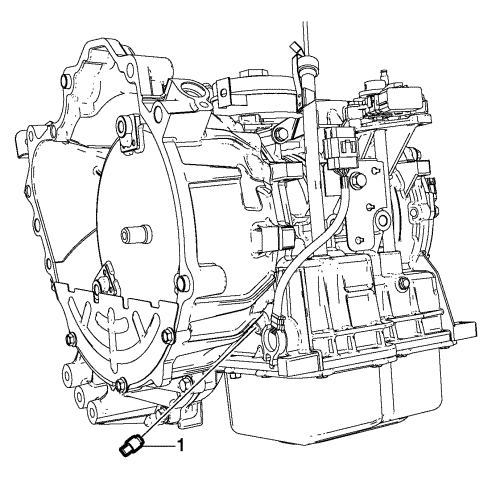
- Remove the line pressure test hole plug (1).
- Install the DT-46450-01 oil pressure gauge and DT-50046 oil pressure gauge adapter to the oil pressure inspection hole in the transmission case.
Warning: Keep the brakes applied at all times in order to prevent unexpected vehicle motion. Personal injury may result if the vehicle moves unexpectedly.
- Chock the front and rear wheels and apply the parking brake fully.
Note:
| • | Ensure that the ATF does not leak after installing the oil pressure gauge. |
| • | Do not hold the stall condition for longer than 5 seconds at a time. Be sure to cool the transmission, idling for at least 30 seconds before starting the next test. |
- Start the engine and depress the foot brake. Measure the oil pressure in D and R ranges when idling, and when the engine has stalled.
- Compare the line pressure test results with the line pressure results in the following table. If the line pressure is not a specified one, refer to the line pressure test diagnosis in this procedure for further evaluation.
- Turn the engine OFF.
- Remove the DT-46450-01 oil pressure gauge and DT-50046 oil pressure gauge adapter.
- Install the line pressure test hole plug (1).
Line Pressure Test Result
Engine Operation
| D Range
| R Range
|
Idling
| 461 kPa (67 psi)
| 587 kPa (85 psi)
|
Stall
| 1170 kPa (170 psi)
| 1491 kPa (216 psi)
|
Line Pressure Test Diagnosis
Result
| Probable Cause
|
D Range
| R Range
|
| • | Higher than the specified oil pressure when idling |
| • | Higher than the specified oil pressure when the engine has stalled |
| Faulty valve body
|
| • | Lower than the specified oil pressure when idling |
| • | Lower than the specified oil pressure when the engine has stalled |
|
| • | Damaged low clutch piston oil seal |
|
| • | Damaged reverse clutch piston oil seal |
| • | Damaged low and reverse brake piston oil seal |
|
| © Copyright Chevrolet. All rights reserved |


