Repairing Connector Terminals - Terminal Repair
Special Tools
| • | J-38125-580 Terminal Repair Kit |
For equivalent regional tools, refer to Special Tools .
Use the following repair procedures to repair each type of terminal:
Note: The first step for all terminal repairs is to find the connector end view in SI.
Cable Seal Terminals
- Cut off the terminal between the core and the insulation crimp to minimise any wire loss.
- Remove the old seal.
- Apply the correct cable seal, per the wire gauge size, from the kit. Slide the seal back along the wire to enable removal of the insulation.
- To minimise wire loss, remove only the insulation required.
- Using the connector end view, determine the correct crimp tool and crimp jaw.
- Align the seal with the end of the cable insulation.
- Position the stripped wire and seal in the terminal.
- Hand Crimp the core wings first.
- Hand Crimp the insulation wings around the seal and the cable.
- Solder all of the hand crimp terminals except the Micro-Pack 100 and 0.64 sizes.
Unsealed Terminals
- Cut off the terminal between the core and the insulation crimp to minimise any wire loss.
- To minimise wire loss, remove only the insulation required.
- Position the stripped wire in the terminal.
- Hand Crimp the core wings first.
- Hand Crimp the insulation wings around the cable.
- Solder all of the hand crimp terminals except the Micro-Pack 100 and 0.64 sizes.
Micro-Pack 100W Size Terminal
The Micro-Pack 100W connectors have small terminals that are difficult to handle and hold when crimping. In order to aid the technician when crimping these terminals, a new crimping tool was developed. The J 38125-101 (W jaw) crimping tool was developed to crimp Micro-Pack 100W terminals. The J 38125-101 (W jaw) crimping tool has a terminal holding block that will hold the terminal in place while the terminal is being crimped. After the terminal is removed from the connector perform the following procedure in order to repair Micro-Pack 100 terminals.
- Cut the wire as close to the terminal as possible.
Note: After cutting the damaged terminal from the wire, determine if the remaining wire is long enough to reach the connector without putting a strain on the wire. If the wire is not long enough, splice a small length of the same gauge wire to the existing wire, then crimp the new terminal on the added wire.
- Strip 5 mm (3/16 in) of insulation from the wire.

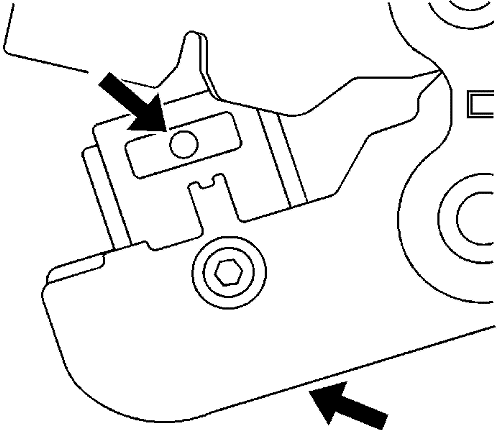
- Depress the spring loaded locator of the J 38125-101 (W jaw) crimping tool until the terminal holder is completely visible.

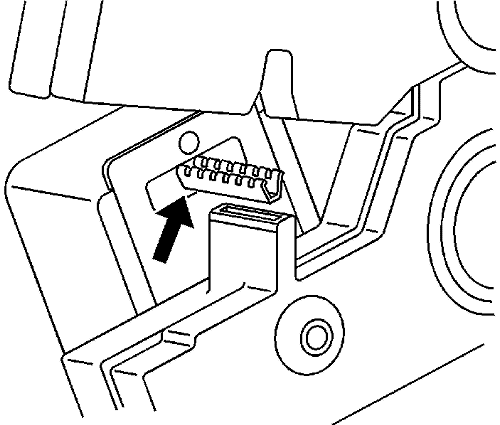
- Insert the terminal into the crimp tool until the core wings are flush with the anvil on the crimp tool. Be sure that the wings are pointed toward the crimp tool former and release the spring locator. The locator will hold the terminal in place. Inspect the alignment of the terminal wings with the crimp tool former. If the terminal wings are wider than the crimp tool former, remove the terminal and bend the terminal wings in slightly.
- Place stripped wire into terminal.
- Crimp the new terminal to the wire. If a jam occurs, press the emergency release to open applicator.
Micro 0.64 Size Terminal
The Micro 64 connectors have small terminals that are difficult to handle and hold when crimping. In order to aid the technician when crimping these terminals, a new crimping tool was developed. The J 38125-64 (M jaw) was developed to crimp Micro 64 terminals. The J-38125-64 crimping tool has a terminal holding block that will hold the terminal in place while the terminal is being crimped. The J-38125-64 crimping tool is also designed to crimp both the wire and the insulation at the same time.
After the terminal is removed from the connector perform the following procedure in order to repair Micro 64 terminals.
Note: After cutting the damaged terminal from the wire, determine if the remaining wire is long enough to reach the connector without putting a strain on the wire. If the wire is not long enough, splice a small length of the same gauge wire to the existing wire, then crimp the new terminal on the added wire.
- Cut the wire as close to the damaged terminal as possible.
- Strip 5 mm (3/16 in) of insulation from the wire.

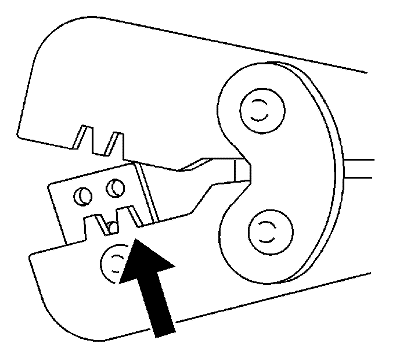
- Depress the spring loaded locater of the crimping tool until the terminal holder is completely visible.

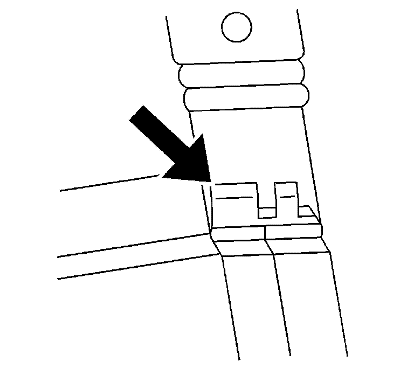
- Insert terminal into the appropriate terminal holder until it hits bottom and stops. The correct terminal holder is determined by the wire size. Also ensure that the terminal's wings are pointing towards the former on the tool and the release locater.
- Insert the stripped cable into the terminal. Insulation should be visible on both sides of the terminal insulation wings.
- Compress the handles until the ratchet automatically releases.
- Place the terminal into the appropriate cavity and assemble the connector.
| © Copyright Chevrolet. All rights reserved |


