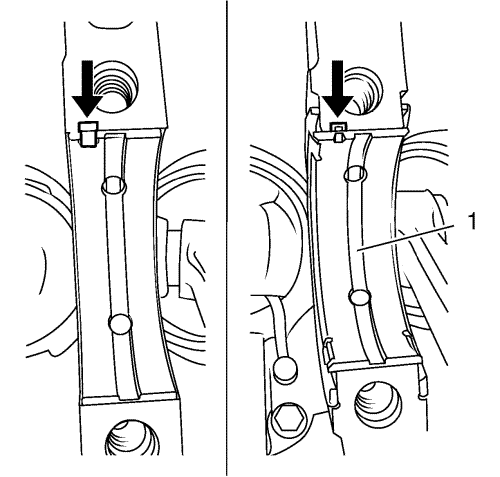
- Coat the crankshaft bearing shells with engine oil.
Note: Ensure that guide lugs (arrows) are properly seated. Note position of thrust bearing (1) at the second crankshaft bearing.
If the old crankshaft bearing shells was reused, set it in as removed.
- Install the 4 upper crankshaft bearing shells into engine block.
- Insert the crankshaft into engine block.
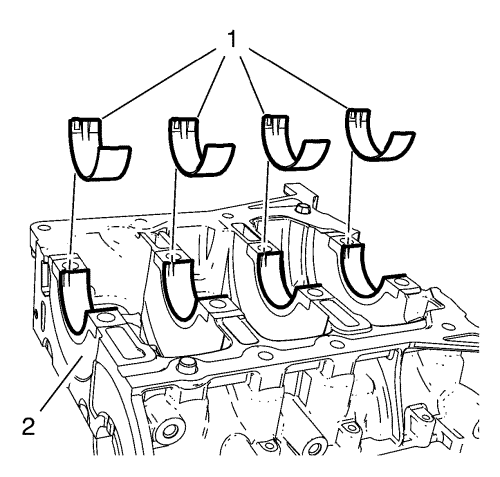
- Coat the crankshaft bearing shells with engine oil.
Note: Ensure that guide lugs are properly seated. If the old crankshaft bearing shells was reused, set it in as removed.
- Install the 4 lower crankshaft bearing shells (1) into crankcase (2).
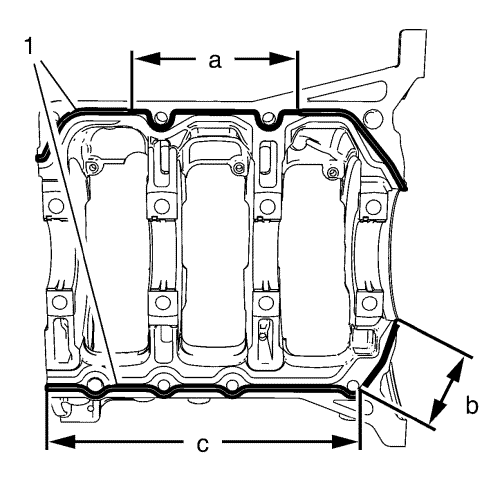
Note: Assemble the lower crankcase no later than 3 minutes from the application of the sealer.
- Apply silicone sealing compound (1) to the lower crankcase. Note the difference sealer dimensions in the areas as shown in the graphic:
| • | (a) Sealant bead width 1.5 mm (0.0591 in), bead height 1.5 mm (0.0591 in). |
| • | (b) Sealant bead width 2.0 mm (0.0787 in), bead height 2.0 mm (0.0787 in). |
| • | (c) Sealant bead width 3.0 mm (0.1181 in), bead height 2.0 mm (0.0787 in). |
| • | Sealant bead width unless otherwise specified 2.5 mm (0.0984 in). |
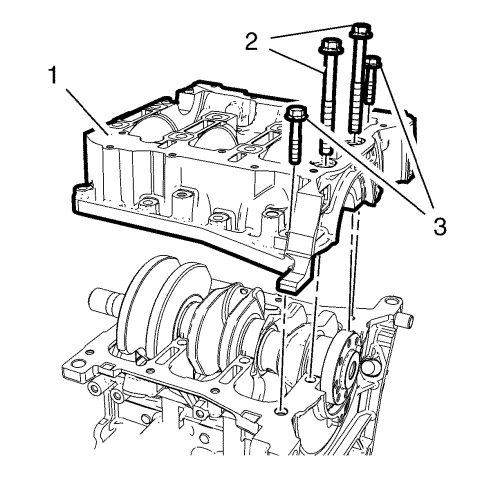
- Install the lower crankcase (1).
- Loosely install the NEW 8 lower crankcase bolts M10 (2).
- Loosely install the NEW 8 lower crankcase bolts M8 (3).
Caution: Refer to Fastener Caution in the Preface section.
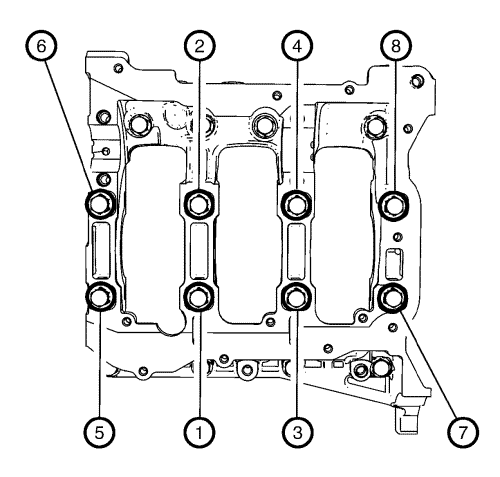
- Tighten the 8 lower crankcase inner bolts in sequence as shown and in the following order:
| • | Tighten the bolts in sequence as shown to 20 N·m (15 lb ft) |
| • | Tighten in sequence as shown to additional 80 ° |
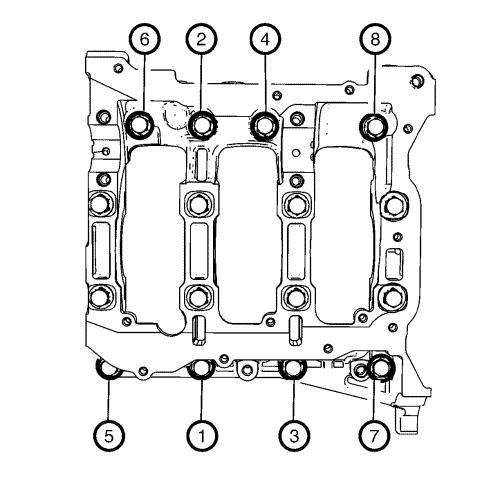
- Tighten the 8 lower crankcase outer bolts in sequence as shown to 30 N·m (22 lb ft).


