SEALING, CAULKING AND DEADNER
SEALING & CAULKING
Note : Seal the following areas to prevent air leaks water leaks, and rust.
- Spot Weld Sealer
- Body Sealer
- Dash Upper Cross Member
- Spot Tape Seal
- Dash Upper Bulkhead
- Dash Upper Panel
- Dash Panel
- Dash Center Cross Member
- Wheelhouse Extension
- Wheelhouse Rear Panel
- Front Outer Longitudinal
- Front Inner Longitudinal
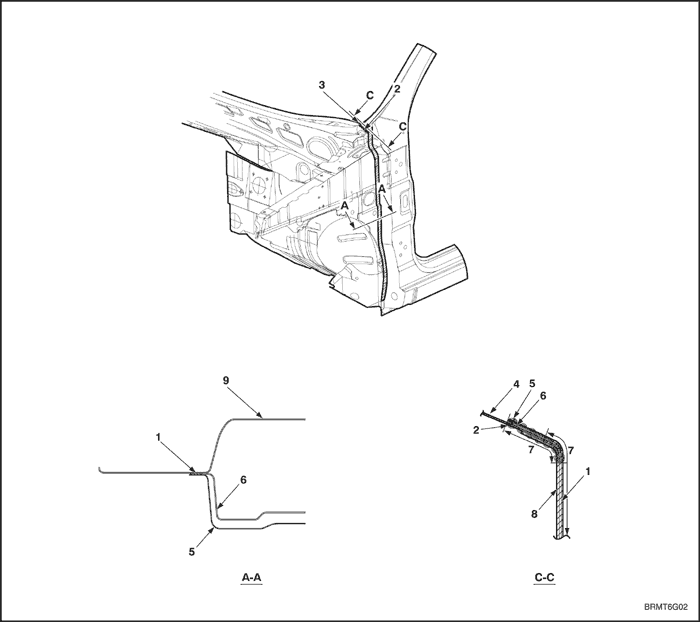
ENGINE ROOM
- Spot Weld Sealer
- Body Sealer
- Sealant to be wiped
- Dash Top Panel
- Side Outer Panel
- Front Pillar Lower Reinforcement
- Sealing area
- Hood Hinge Lower Bracket
- Dash Side Panel
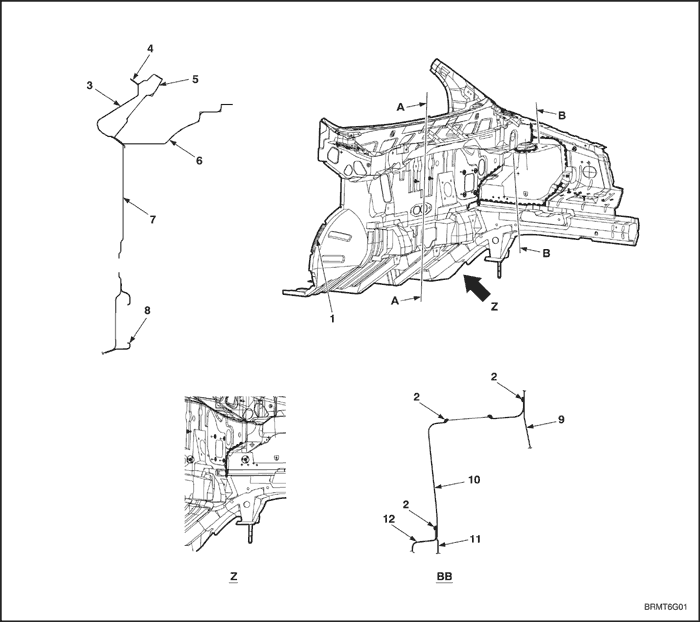
DASH
- Body Sealer
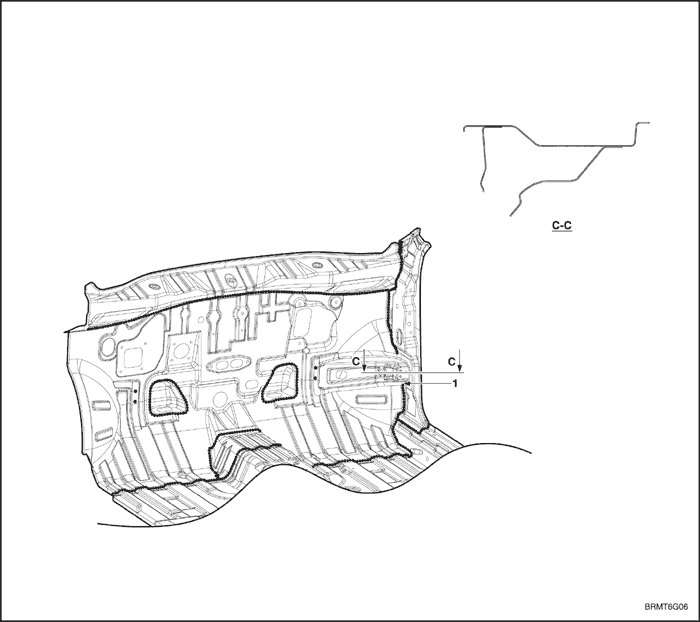
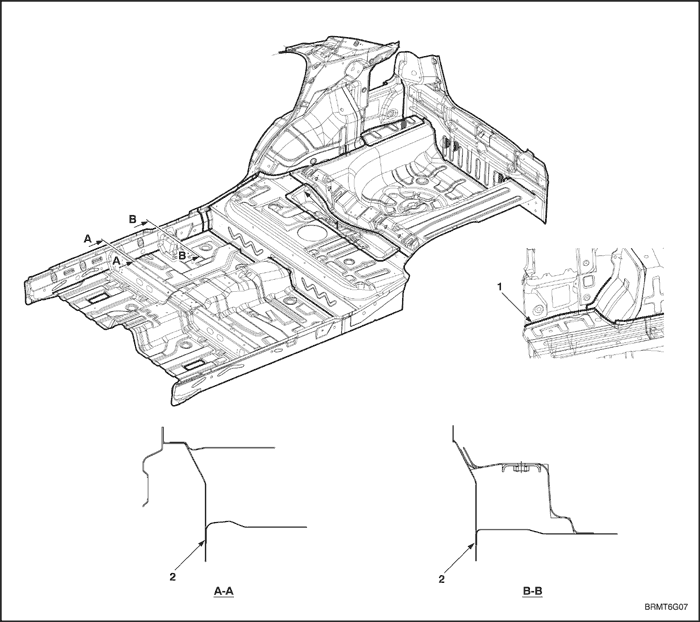
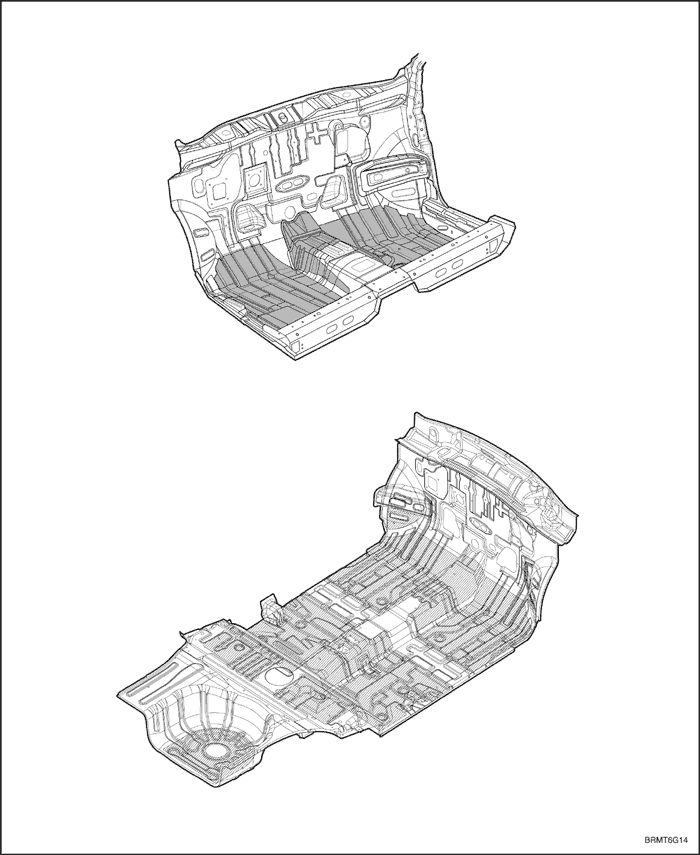
FLOOR & TRUNK ROOM
- Body Sealer
- Caulking Sealer
REAR LAMP & TRUNK ROOM
- Body Sealer
- Side Outer Panel
- Fuel Filler Cap
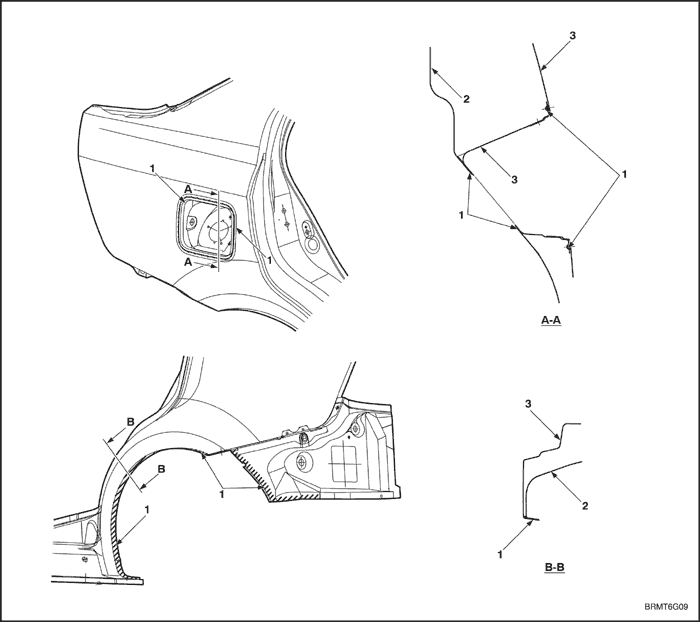
REAR FENDER
- Sopt Weld Sealer
- Side Inner Panel
- Side outer Panel
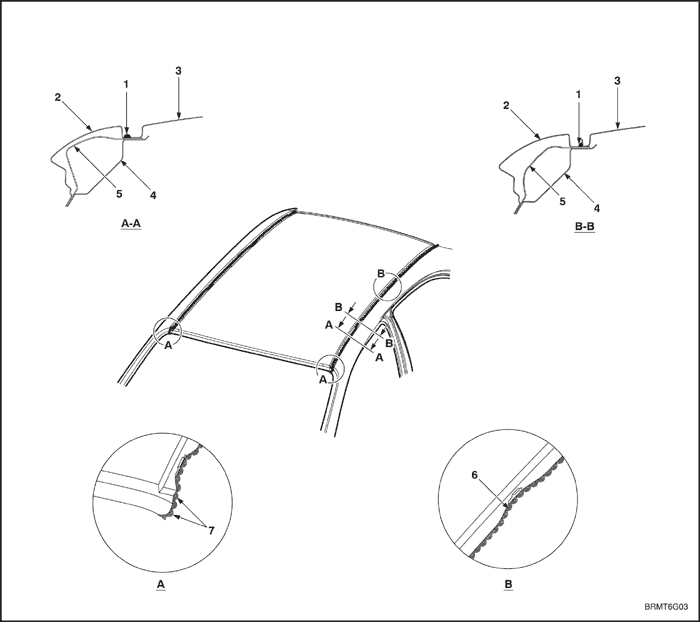
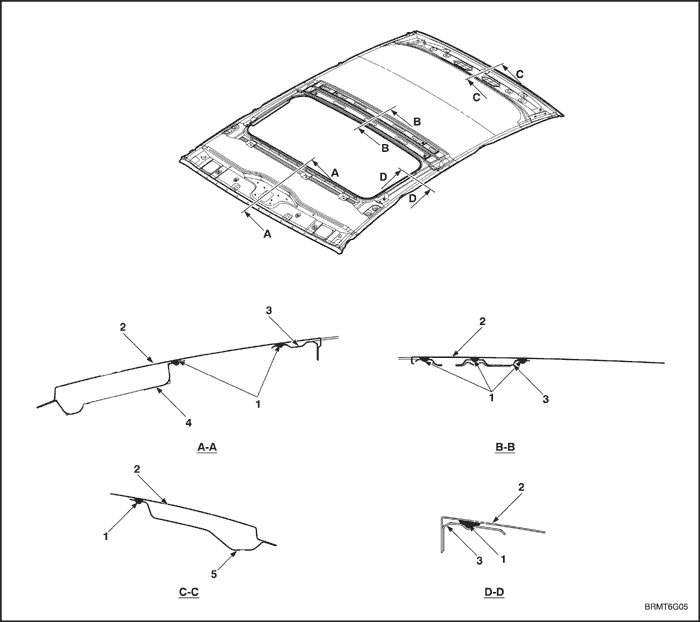
ROOF
- Body Sealer
- Side Outer Panel
- Roof Panel
- Roof Side Inner Panle
- Front Pillar Upper Reinforcement
- Sealer to be wiped for roof molding mounting
- Sealer to be wiped for glass matching
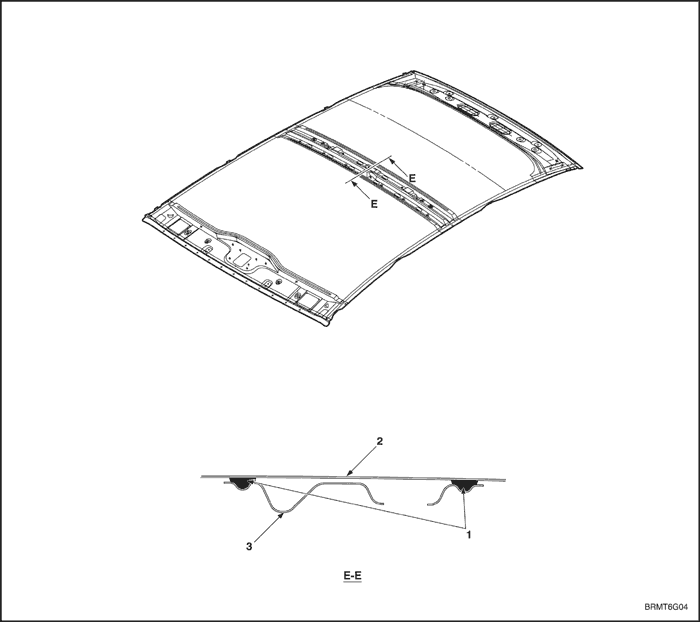
ROOF
- Adhesive
- Roof Panel
- Roof Center Support
SUN ROOF
- Adhesive
- Roof Panel
- Sunroof Frame
- Windshield Header Rail
- Roof Inner Rear Frame
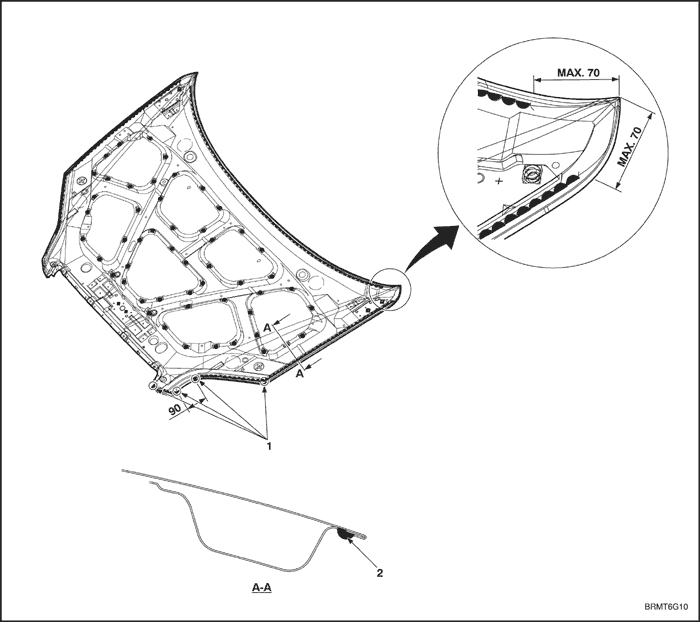
HOOD
- Sealer to be wiped in this area
- Body Sealer
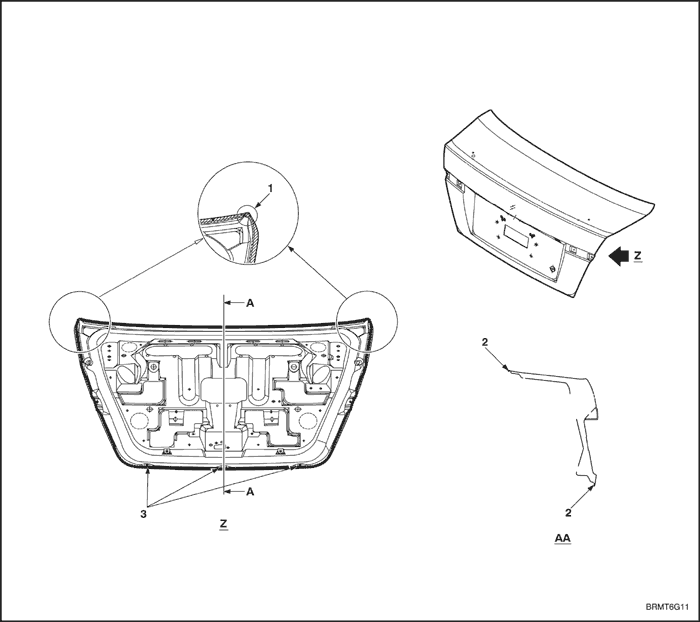
TRUNK
- This area to be closed by sealer
- Body Sealer
- Water drain hole to be free of sealer
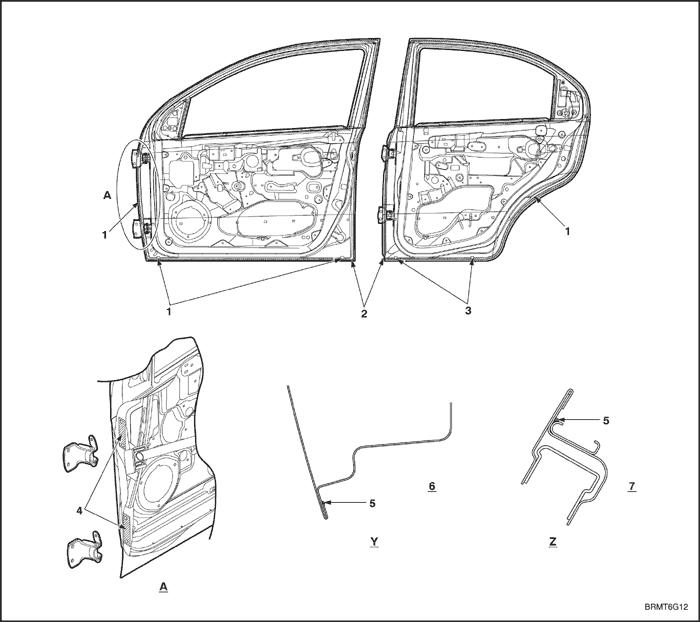
FRONT & REAR DOOR
- Water drain holes to be free of sealer 2 places front door
- Sealer to wiped around door corners
- Water drain holes to be free of sealer 2 places rear door
- Apply wax to door hinge
- Hem Flange Sealer
- Apply body sealer along heming flange
- Apply body sealer to intersection between inner panel and channel
- Y. Typical section of bottom of front and rear doors
- Z. Typical section of top of front and rear doors
DEADNER
GENERAL DESCRIPTION
Deadner is properly designed and applied for reduce the vibration and noise. Also, it plays in maintaining the structural rigidity of the panel.
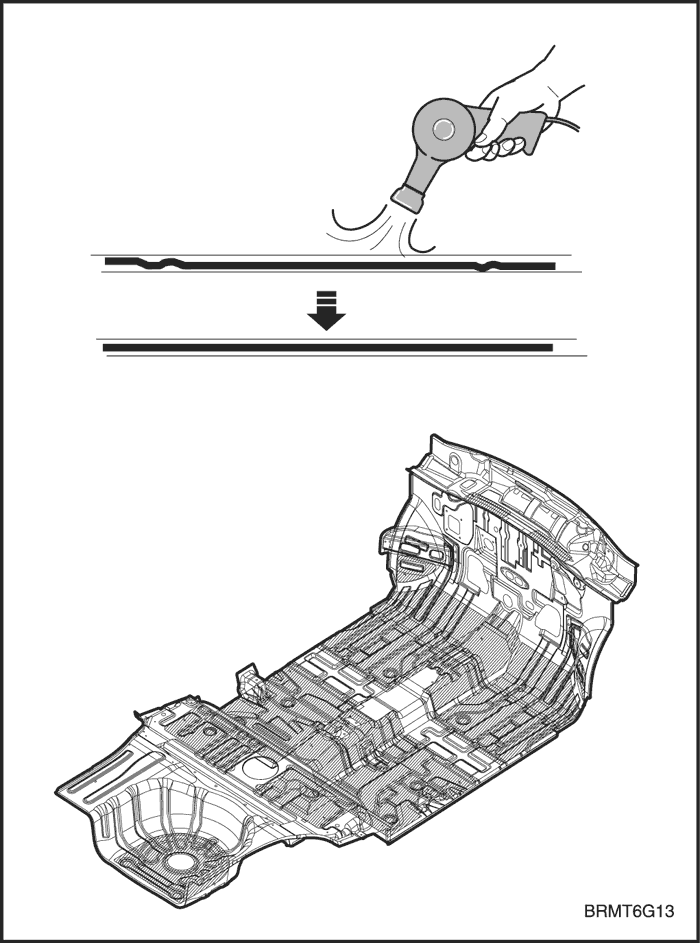
REPAIR PROCEDURE
- Remove the related parts.
- Seats, carpet.
- Trims, others.
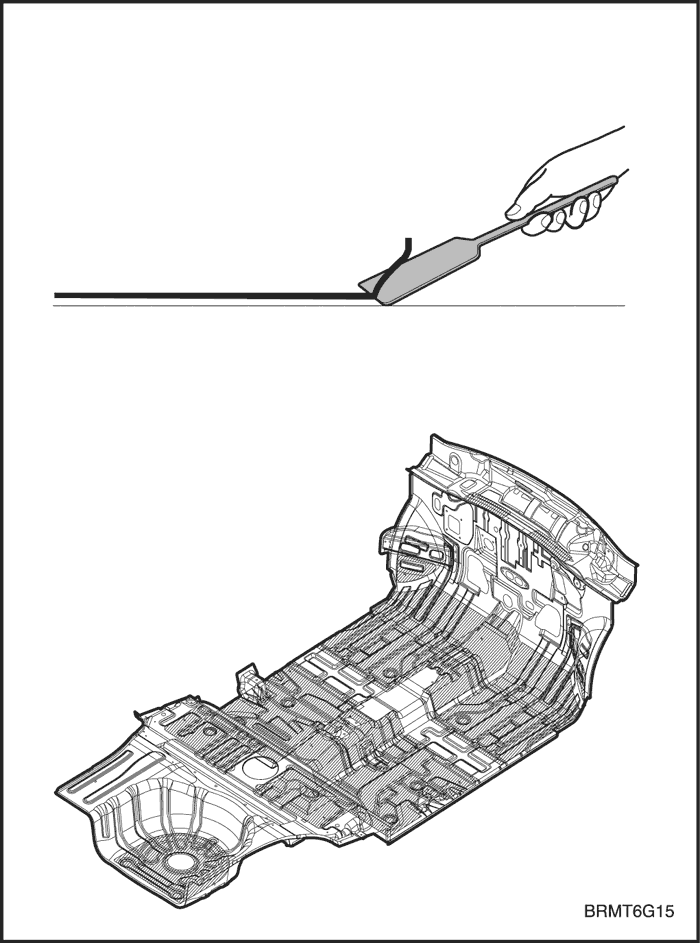
- Removal of the damaged deadner.
- Peel off the damaged deadner with a steel spatula,carefully.
- Clean and dry.
- Before applying the deadner, thoroughly clean anddry the areas to be applied.
- Prelocation the new deadner on the panels to beapplied.
Note : Avoid the parts mounting holes and serviceholes.
- Adhension of deadner.
- Heat the surface of deadner with a torch or heating gun until it adheres itself.
- Push and adhere to the panel with a rubberspatula.
Note : In order to take full advantage of the deadner,its face must adhere and contact the panels perfectly.
Caution : Be careful not to burn the composite partswhen beating.


- Install the related parts.
- Install in the reverse order in which they were removed.