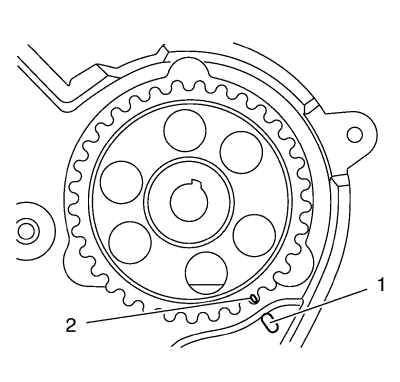
- Rotate the fuel pump drive sprocket that the marks (1) and (2) align.
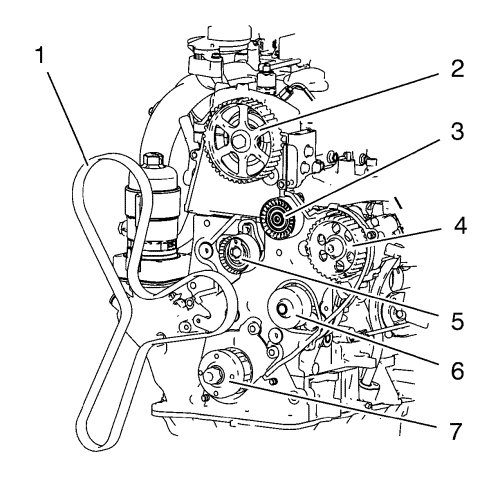
Note: Examine that the timing belt is tensioned during the installation.
- Install the timing belt (1) in the following order:
| 2.1. | Crankshaft sprocket (7) |
| 2.2. | Water pump pulley (6) |
| 2.3. | Fuel pump drive pulley (4) |
| 2.4. | Timing belt idler pulley (3) |
| 2.5. | Camshaft drive sprocket (2) |
| 2.6. | Timing Belt Tensioner (5) |
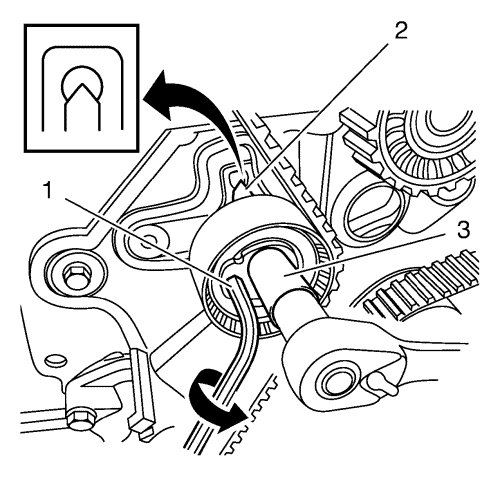
- Turn the hex-key (1) tab in an anticlockwise direction to tension the belt. Turn until the point aligns with the notch (2).
Caution: Refer to Fastener Caution in the Preface section.
- Aligning with notch (2) notch, tighten the timing belt tensioner bolt (3) to 25 N·m (19 lb ft).
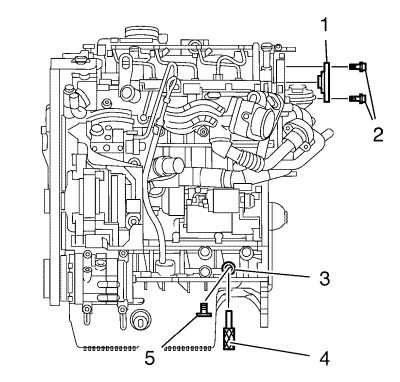
- Remove the EN-48246 locking tool (1) and remove the bolts (2). Remove EN-48245 locking tool (4) from the lower crankcase hole (3). Install the lower crankcase closure bolt (5) and tighten to 30 N·m (23 lb ft).
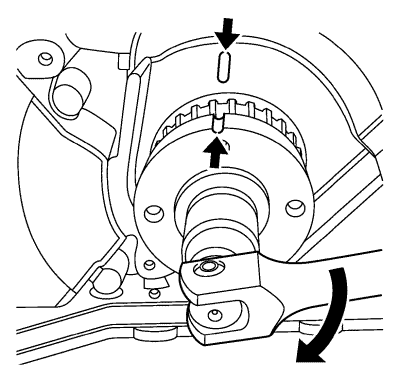
Note: If the timing marks are not aligned, repeat the forward procedure and recheck the marks. Alignment of marks is critical for engine performance and emissions.
- Turn the crankshaft in a clockwise direction 2 cycles and check the positions from the crankshaft.
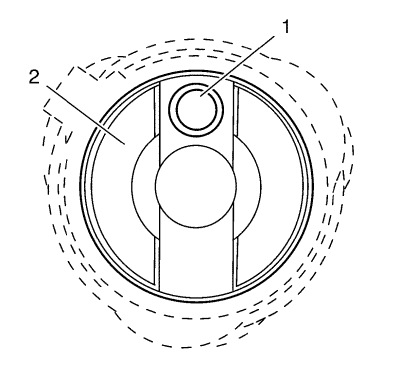
Note:
| • | Examine that the bore (1) in the camshaft (2) is on top. |
| • | Examine the correct positions of the camshaft and the crankshaft. |
- Check the camshaft position.
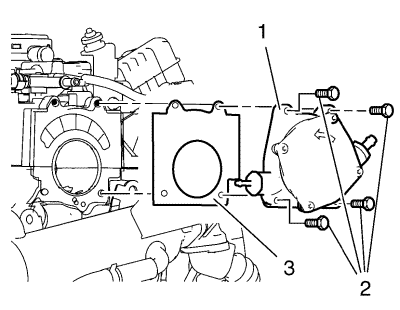
- Install a NEW vacuum pump gasket (3).
Note: Ensure that the vacuum pump surface and cylinder head surface are clear of old gasket material.
- Install the vacuum pump (1).
Caution: Refer to Fastener Caution in the Preface section.
- Install the 4 vacuum pump bolts (2) and tighten to 12 N·m (107 lb in).
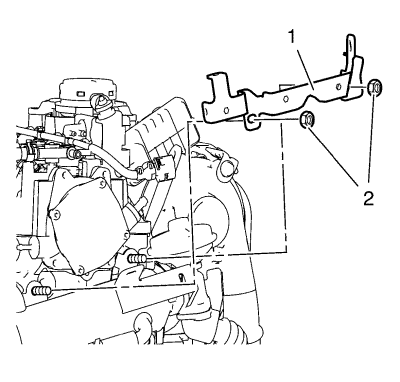
- Install the wiring harness bracket (1).
- Install the 2 wiring harness bracket nuts (2) and tighten to 20 N·m (15 lb ft).
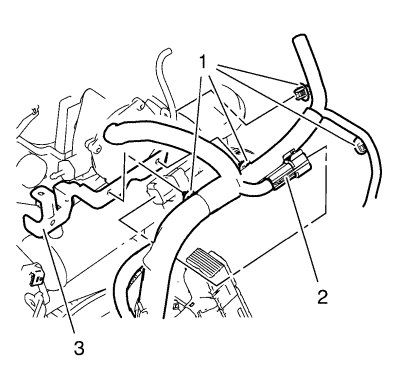
- Install 4 wiring harness clips (1) to the bracket (3).
- Install the wiring harness plug (2).


