Camshaft Position Actuator Solenoid Valve Replacement
Removal Procedure
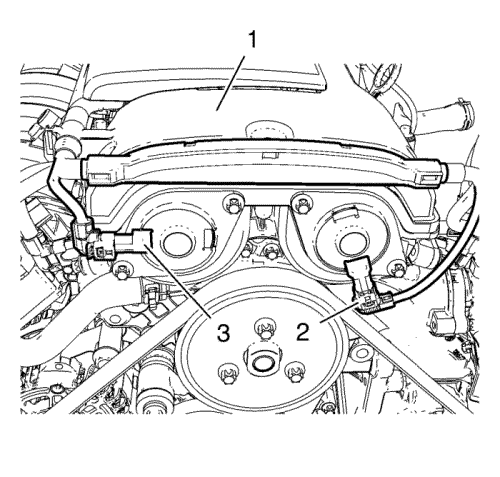
- Disconnect the intake camshaft position actuator solenoid valve wiring harness plug (3).
- Disconnect the exhaust camshaft position actuator solenoid valve wiring harness plug (2).
- Unclip ECM wiring harness (1) from camshaft cover.
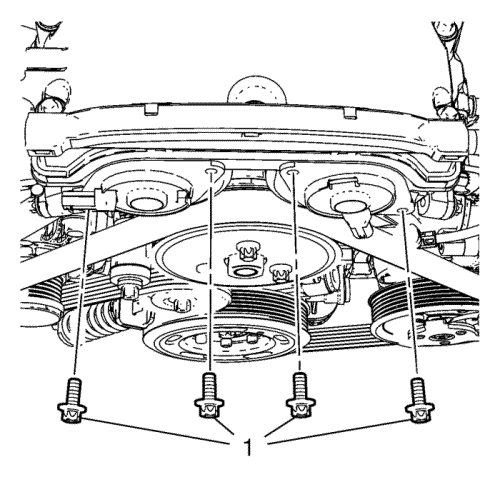
- Remove the 4 camshaft position actuator solenoid valve bolts (1).
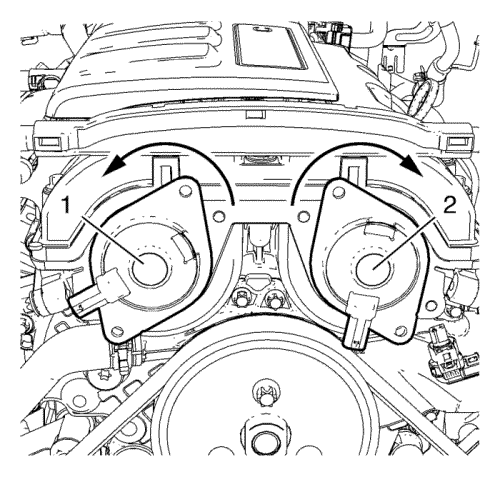
- Carefully rotate the intake camshaft position actuator solenoid valve (1) anticlockwise as shown.
- Carefully rotate the exhaust camshaft position actuator solenoid valve (2) clockwise as shown.
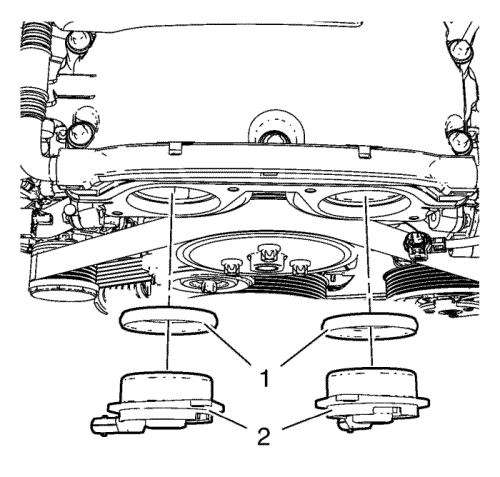
Caution: The camshaft position actuator solenoid valves must be kept parallel to the engine front cover during removal and installation. The camshaft position actuator solenoid valves can be damaged if they become wedged or stuck during this process.
- Carefully remove the 2 camshaft position actuator solenoid valves (2) and the seal rings (1).
Installation Procedure

Caution: The camshaft position actuator solenoid valves must be kept parallel to the engine front cover during removal and installation. The camshaft position actuator solenoid valves can be damaged if they become wedged or stuck during this process.
Note: Lubricate the seal rings with oil in order to make the installation easier.
- Carefully install the 2 camshaft position actuator solenoid valves (2) and the 2 seal rings (1) by gently pressing into position.
Caution: Refer to Fastener Caution in the Preface section.

- Install the 4 camshaft position actuator solenoid valve bolts (1) and tighten to 8 N·m (71 lb in).
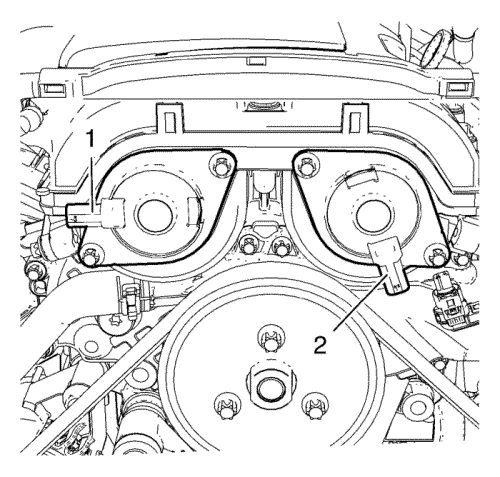
- The 2 camshaft position actuator solenoid valves should be installed in the position as shown (1) and (2).

- Clip ECM wiring harness (1) to camshaft cover.
- Connect the exhaust camshaft position actuator solenoid valve wiring harness plug (2).
- Connect the intake camshaft position actuator solenoid valve wiring harness plug (3).
| © Copyright Chevrolet. All rights reserved |


