Automatic Transmission Flex Plate Replacement
Special Tools
EN 652 Automatic Transmission Flex Plate Holder
For equivalent regional tools, refer to Special Tools .
Removal Procedure
- Open the bonnet.
- Remove the automatic transmission. Refer to
Transmission Replacement : 2.0L Diesel LNP → 1.6L LXT, L2W, LDE and 1.8L 2H0 → 2.0L Diesel LLW .

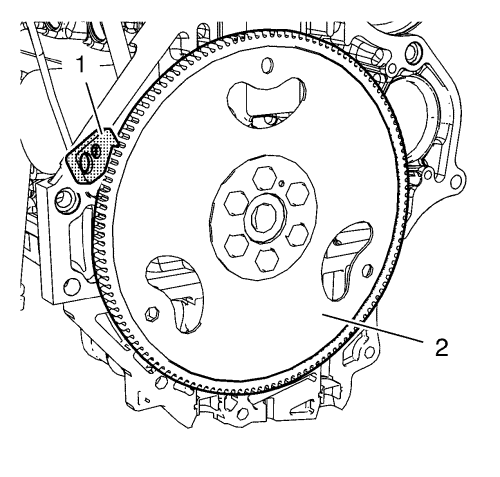
- Install the EN 652 holder (1) to hold the automatic transmission flex plate (2).
- Loosen the 6 automatic transmission flex plate bolts.
- Remove the EN 652 holder (1).

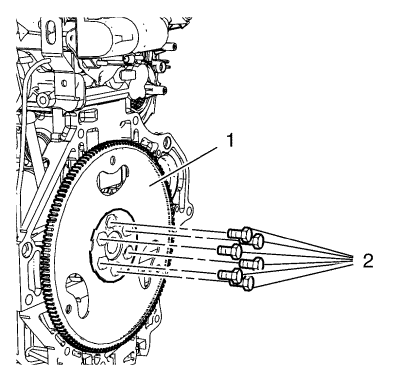
- Remove and DISCARD the 6 automatic transmission flex plate bolts (2).
- Remove the automatic transmission flex plate (1).
Installation Procedure
- Clean the automatic transmission flex plate bolt threads.

- Install the automatic transmission flex plate (1) and the EN 652 holder to hold the automatic transmission flex plate (2).
Caution: Refer to Fastener Caution in the Preface section.
Caution: Refer to Torque-to-Yield Fastener Caution in the Preface section.

- Install the 6 NEW automatic transmission flex plate bolts (2) and tighten the bolts to 105 N·m (77 lb ft).
- Remove the EN 652 holder.
- Install the automatic transmission. Refer to
Transmission Replacement : 2.0L Diesel LNP → 1.6L LXT, L2W, LDE and 1.8L 2H0 → 2.0L Diesel LLW
- Close the bonnet.
| © Copyright Chevrolet. All rights reserved |


