Oil Pump Cleaning and Inspection
Removal Procedure

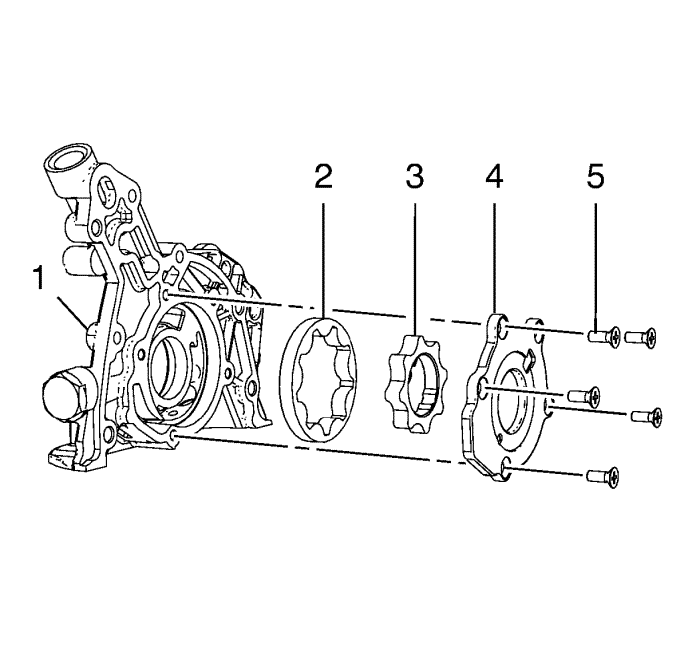
- Remove the 5 oil pump cover bolts (5) from the oil pump housing (1).
- Remove the oil pump cover (4).
- Remove the inner (3) and outer (2) rotor.

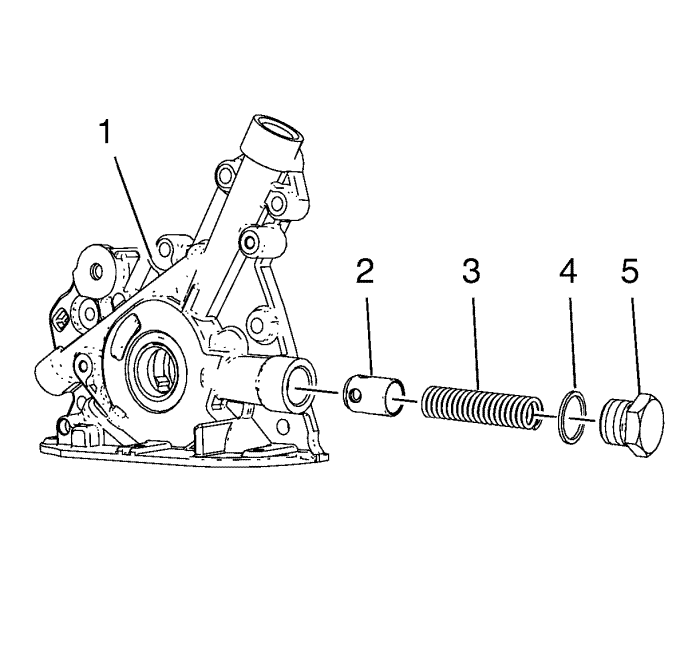
- Remove the bolt (5) with seal ring (4) from the oil pump housing (1).
- Remove the oil pressure relief valve spring (3).
- Remove the oil pressure relief valve (2).
Visual Measurement
- Visually check parts for trapping:
| • | Oil pressure relief valve |

Caution: During the assembly of the oil pump, the bevelled edge of the outer rotor must face the oil pump housing. Be sure to apply a coating of engine oil to the inner and outer rotor. Improper installation of the rotor or failure to apply engine oil to the inner and outer rotor could result in component failure.
- Check oil pump.
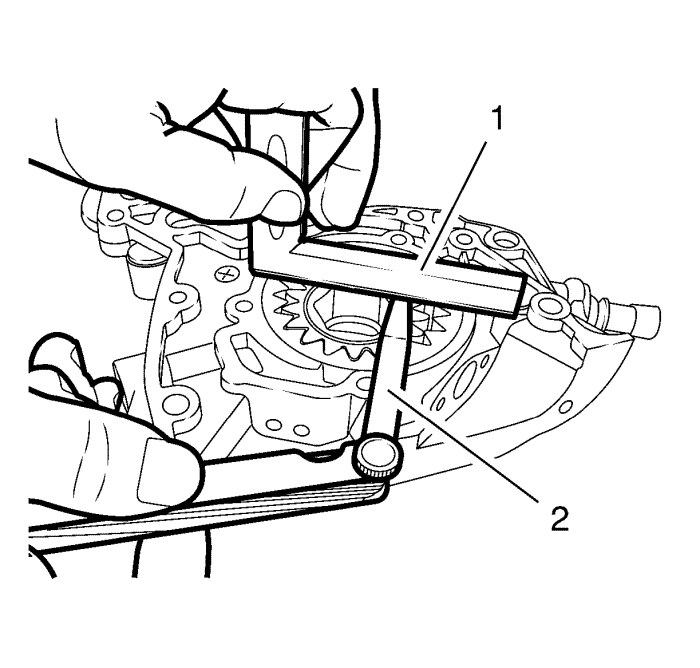
| | Note: The permissible clearance between rotors and oil pump housing upper edge is 0.03-0.10 mm (0.001181-0.003937 in). |
| 2.1. | Insert the inner and outer rotor. |
| 2.2. | Measure the gap with a straightedge (1), feeler gauge (2). |
Installation Procedure

- Install the oil pump cover (4).
Caution: Refer to Fastener Caution in the Preface section.
- Install the 5 oil pump cover bolts (5) to the oil pump housing (1) and tighten to 6 N·m (53 lb in).

- Install the oil pressure relief valve (2) and the oil pressure relief valve spring (3).
- Use a NEW seal ring (4).
- Install the bolt (5) to the oil pump housing (1) and tighten to 50 N·m (37 lb ft).
| © Copyright Chevrolet. All rights reserved |


