To the top of the document
Cruze
   
GMDE Start Page Load static TOC Load dynamic TOC Help?

Piston, Connecting Rod, and Bearing Installation

Special Tools

    • EN-50425 Compressor - Piston Ring
    • EN-470-B Angle Meter

For equivalent regional tools, refer to Special Tools .

    2373481

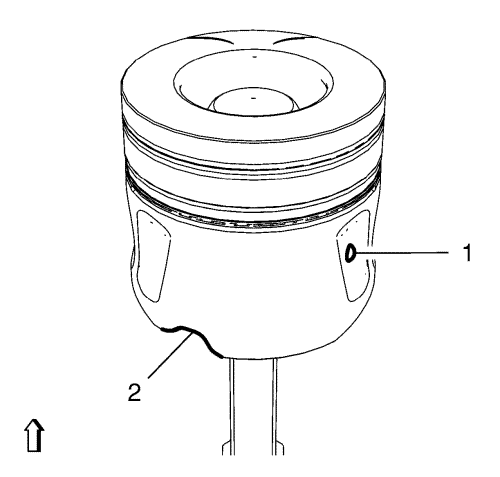
    Note: The dot (1) on the piston skirt must point to the timing side to ensure that the notch (2) for the oil nozzle is at the correct position.
  1. Displace the piston ring joints 120° to each other.
  2. Coat all pistons and cylinder bores and the EN-50425 compressor with engine oil.
  3. Turn the crankshaft to TDC of combustion stroke of cylinder 2.

  4. 2373487
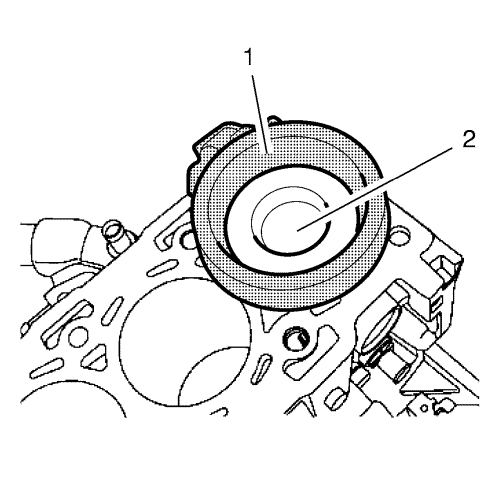
  5. Use the EN-50425 compressor (1) as shown in the illustration above.

  6. 2373482

    Note: When using the old pistons, old connecting rods and old big-end bearing caps, install them at their original positions.
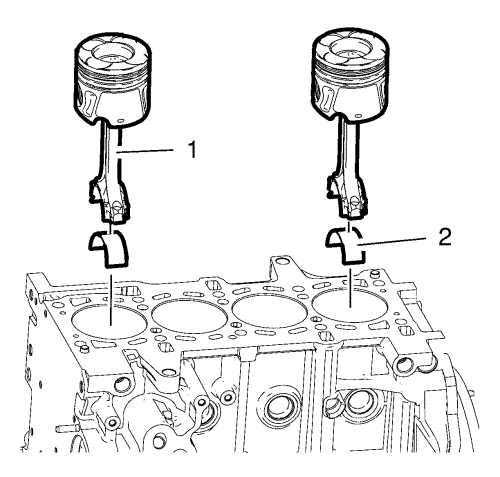
  7. Install the 2 pistons with the connecting rod (1) and the connecting rod upper bearing shells (2) into cylinder 1 and 4.

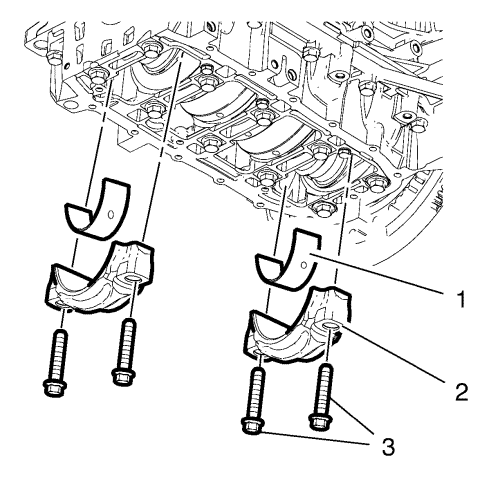
  8. 2373484
  9. Install the 2 big-end bearing caps (2) with the connecting rod lower bearing shells (1) to cylinder 1 and 4.
  10. Note: Do not tighten the bearing cap retaining bolts (3).

  11. Install 4 NEW big-end bearing shell bolts (3).
  12. Caution: Refer to Fastener Caution in the Preface section.

    Caution: Refer to Torque-to-Yield Fastener Caution in the Preface section.

  13. Tighten the 4 NEW connecting rod bearing shell bolts (3) in 2 steps.
  14. 8.1. First Step: 30 N·m (22 lb ft)
    8.2. Second Step: + 70°. Use the EN-470-B angle meter .
  15. Turn crankshaft through 180° and set crankshaft to TDC of combustion stroke of cylinder 1.

  16. 2373485

    Note: When using the old pistons, old connecting rods and old big-end bearing caps, install them at their original positions.

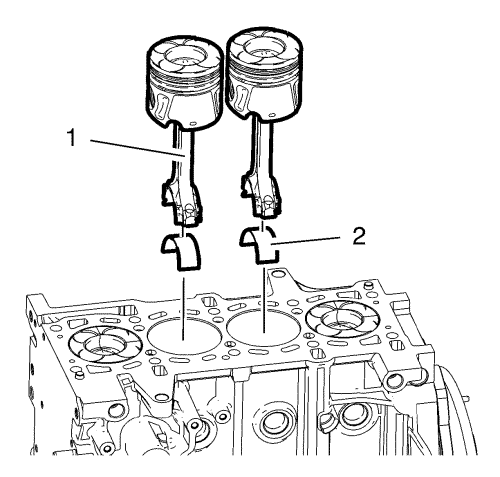
  17. Install 2 pistons with connecting rod (1) and connecting rod upper bearing shells (2) into cylinder 2 and 3.

  18. 2373484
  19. Install 2 big-end bearing caps (2) with connecting rod lower bearing shells (1) to cylinder 2 and 3.
  20. Note: Do not tighten the bearing cap retaining bolts (3).

  21. Install 4 NEW big-end bearing shell bolts (3).
  22. Caution: Refer to Fastener Caution in the Preface section.

  23. Tighten the 4 big-end bearing shell bolts (3) in two steps.
  24. 13.1. First Step: 30 N·m (22 lb ft)
    13.2. Second Step: + 70°. Use EN-470-B angle meter .


© Copyright Chevrolet. All rights reserved