Orlando |
||||||||
|
|
|
|||||||
CH-807 Plug
For equivalent regional tools, refer to Special Tools .
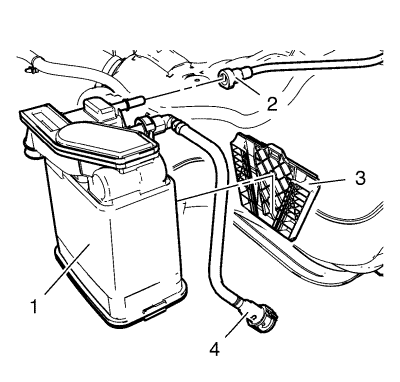
Warning: Do not breathe the air through the EVAP component tubes or hoses. The fuel vapours inside the EVAP components may cause personal injury.
Warning: Petrol or petrol vapours are highly flammable. A fire could occur if an ignition source is present. Never drain or store petrol or diesel fuel in an open container, due to the possibility of fire or explosion. Have a dry chemical (Class B) fire extinguisher nearby.
Warning: Always wear safety goggles when working with fuel in order to protect the eyes from fuel splash.
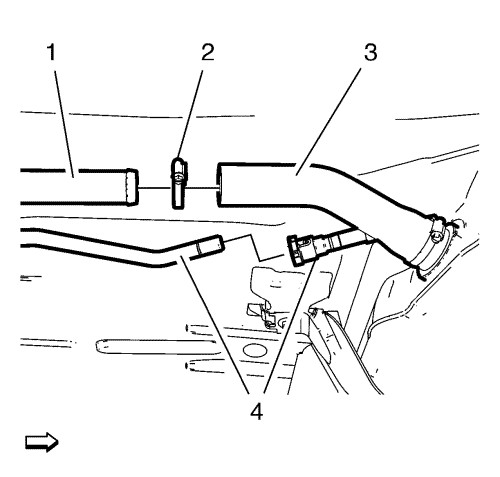
Note: Do not remove the fuel tank filler hose when the fuel contents in the fuel tank is over the half filled with fuel.
Note: Attention to other parts like pipes or hoses that are installed at the fuel tank. Lower the fuel tank only a little bit, when its not able to remove the evaporative emission canister easily. Remove the fuel tank, if necessary.
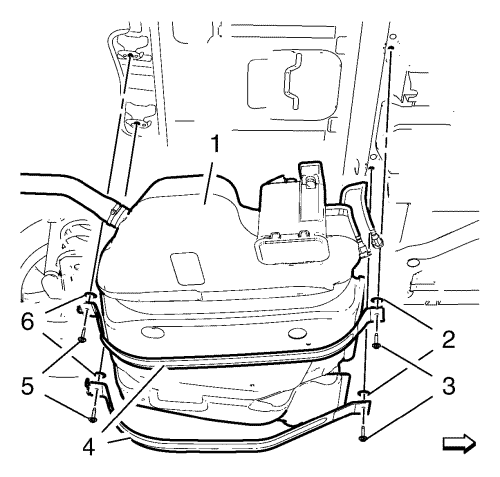
Note: A second technician is required.
Note: A second technician is required.
Caution: Refer to Fastener Caution in the Preface section.
| © Copyright Chevrolet. All rights reserved |
| © Copyright Chevrolet. All rights reserved |


