Belt Idler Pulley Replacement - Lower
Special Tools
EN-48952 Fixing Pin
For equivalent regional tools, refer to Special Tools .
Removal Procedure
- Raise and support the vehicle. Refer to Lifting and Jacking the Vehicle .
- Remove the front compartment insulator. Refer to Front Compartment Insulator Replacement .
- Remove the front part of the right front wheelhousing lining. Refer to Front Wheelhouse Liner Replacement .
- Remove the drive belt and pulley cover. Refer to Drive Belt and Pulley Cover Removal .
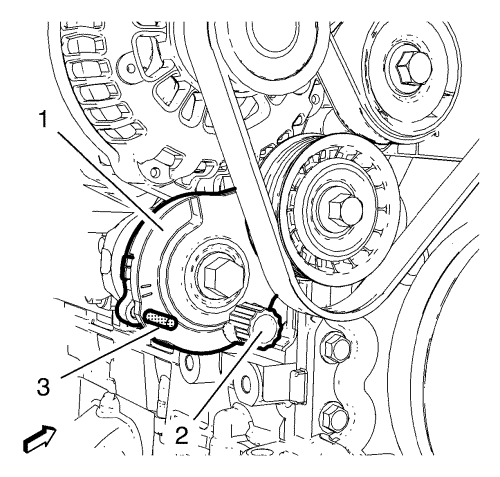
- Apply tension to the drive belt tensioner (1) with a suitable spanner on the holder (2) by rotating anti-clockwise.
- Install the EN-48952 fixing pin (3).
- Remove the drive belt from the drive belt tensioner.
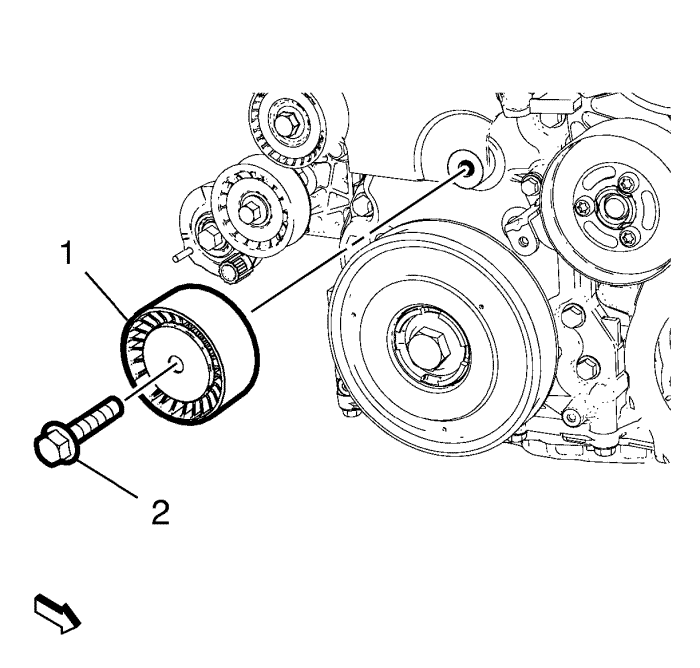
- Remove the lower drive belt idler pulley bolt (2).
- Remove the lower drive belt idler pulley (1).
Installation Procedure
- Install the lower drive belt idler pulley (1).
Caution: Refer to Fastener Caution in the Preface section.
- Install the lower drive belt idler pulley bolt (2) and tighten to 58 N·m (43 lb ft).
- Install the drive belt to the drive belt tensioner.
- Apply tension to the drive belt tensioner (1) with a suitable spanner on the holder (2) by rotating anti-clockwise.
- Remove the EN-48952 fixing pin (3).
- Relieve tension from the drive belt tensioner (1) and allow the tensioner to slide back slowly.
- Inspect the drive belt for correct seat.
- Install the drive belt and pulley cover. Refer to Drive Belt and Pulley Cover Installation .
- Install the front part of the right front wheelhousing lining. Refer to Front Wheelhouse Liner Replacement .
- Install the front compartment insulator. Refer to Front Compartment Insulator Replacement .
- Lower the vehicle.
| © Copyright Chevrolet. All rights reserved |
| © Copyright Chevrolet. All rights reserved |


