- Remove any old thread sealant and gasket material with a suitable tool.
- Clean the upper oil pan and upper oil pan components with solvent.
Note: Ensure that the sealing surface is clear of oil, grease and old sealing material.
- Clean out debris from the bolt holes.
Warning: Refer to Safety Glasses and Compressed Air Warning in the Preface section.
- Dry the upper oil pan and upper oil pan components with compressed air.
Note: The complete installation procedure of the upper oil pan should be done in 10 minutes.
Note: DO NOT coat sealing compound on the upper oil pan bolt holes and bolt threads.
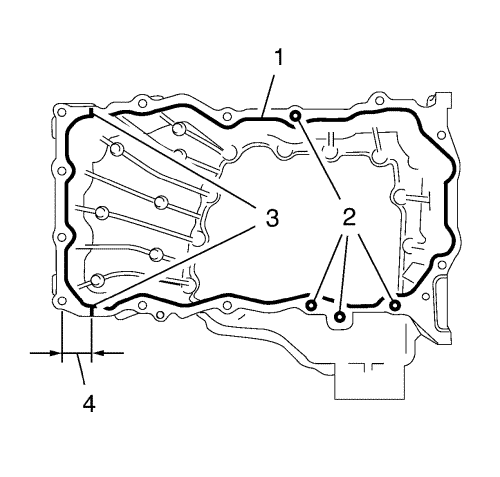
- Apply sealing compound on the sealant line (1) including circular dispensing on 4 holes (2).
- Apply spot dispensing at 2 areas (3).
- There must be a seal line which extends 26 mm (1.02 in) from the last hole (4).
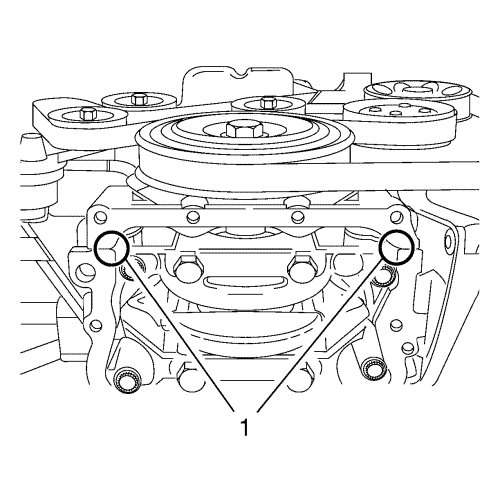
- Fill sealant compound at 2 areas (1) between front cover and bed plate if the space is empty.
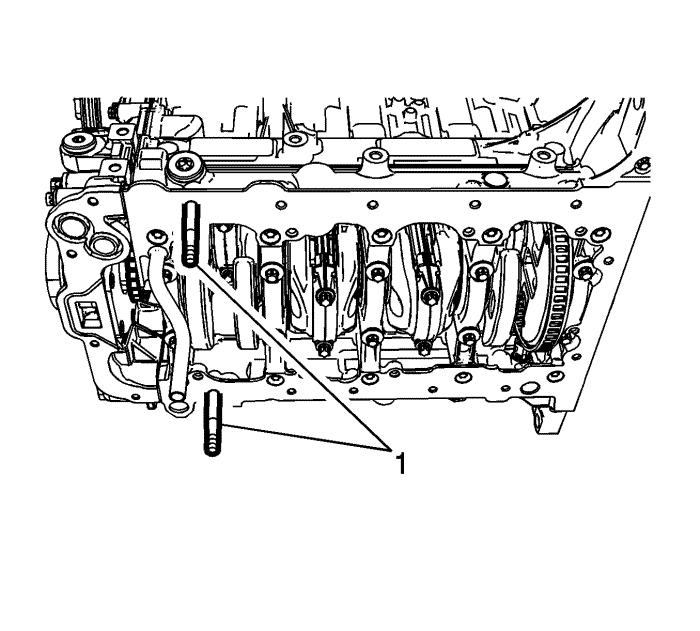
Note: The alignment pins will help maintaining position while installing the bolts.
- To aid in upper oil pan alignment, install 2 EN-50435 guide pins (1) on the bed plate.
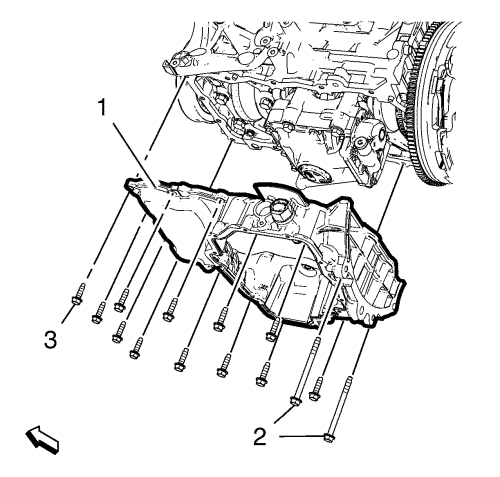
- Install the upper oil sump (1).
Caution: Refer to Fastener Caution in the Preface section.
- Install the oil pan retaining bolts and handtighten.
- Remove the EN-50435 guide pins .
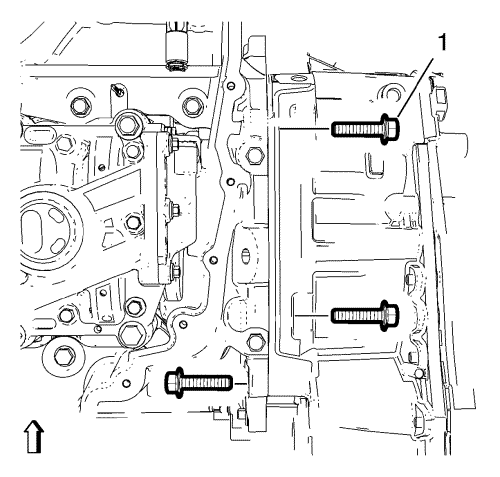
- Install 14 upper sump retaining bolts (2, 3) and tighten evenly to 25 N·m (18 lb ft).
- For manual transmission, install the 3 oil pan to transmission bolts (1) and tighten to 58 N·m (43 lb ft).
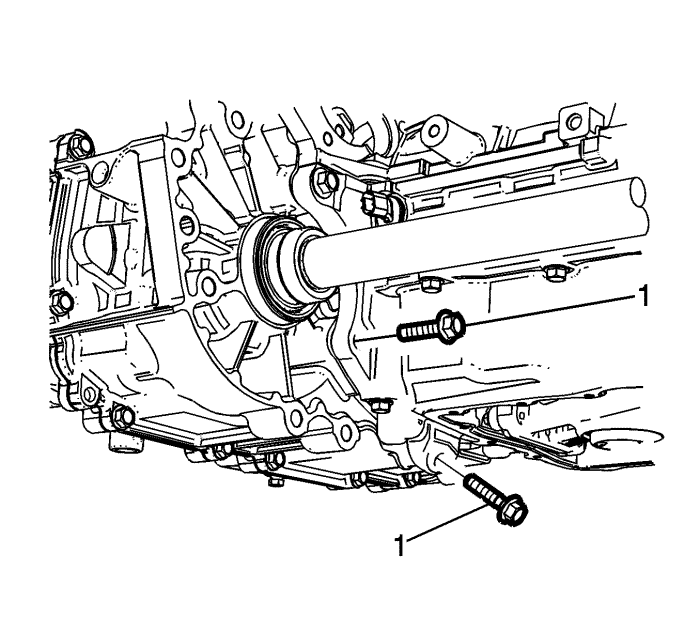
- For automatic transmission, install the 2 oil pan to transmission bolts (1) and tighten to 58 N·m (43 lb ft).

- Connect the engine oil level indicator wiring harness plug (1) to the engine oil level indicator (2).
- Install the front wheel drive intermediate shaft bracket. Refer to Front Wheel Drive Intermediate Shaft Bracket Replacement .
- Install the exhaust front pipe. Refer to
Exhaust Front Pipe Replacement : 2.0L Diesel LNP → LDE, LLU, LXT, LXV, L2W, 2H0, LFH,LGE .
- Install the lower sump. Refer to Lower Sump Replacement .
- Install the front compartment insulator. Refer to Front Compartment Insulator Replacement .
- Lower the vehicle.
- Install the oil level indicator .
- Fill the engine with engine oil. Refer to Engine Mechanical Specifications .


