To the top of the document
Orlando
   
GMDE Start Page Load static TOC Load dynamic TOC Help?

Exhaust Camshaft Installation

Special Tools

EN-50433 Adaptor - Exhaust Camshaft Sprocket Fixing

For equivalent regional tools, refer to Special Tools .

  1. Ensure that the crankshaft is 90° beyond TDC of combustion stroke of cylinder 1.

  2. 2373154

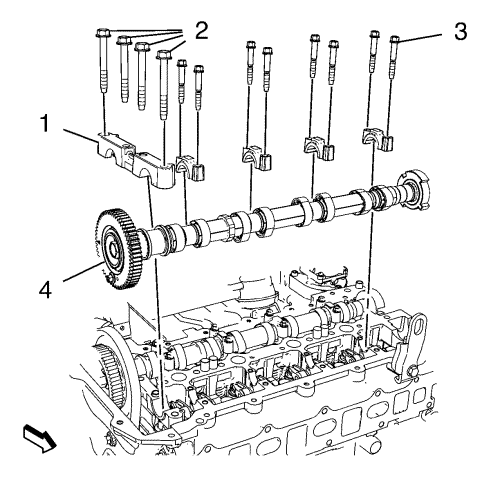
    Caution: Use extreme care when removing the camshaft not to nick, scratch, or damage the camshaft lobes or bearing surfaces.

    Note: Install the camshaft guides in order as removed.

    Note: Clean the contact surfaces from camshaft, camshaft sprocket and camshaft sprocket bolt.

  3. Coat the camshaft bearing surfaces with engine oil.
  4. Install the exhaust camshaft (4).
  5. Note: Tighten the camshaft seat guide cap from cylinder 2 at first.

  6. Install the 4 camshaft seat guide caps.
  7. Caution: Refer to Fastener Caution in the Preface section.
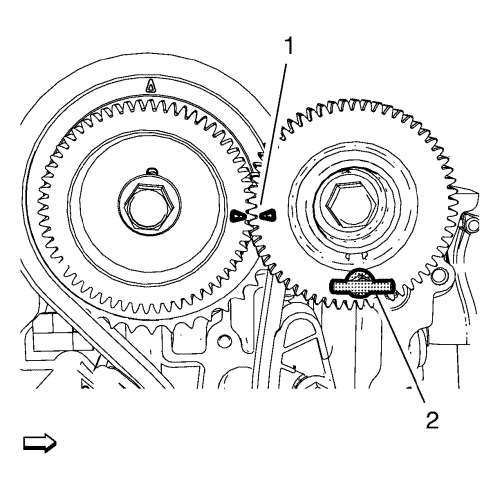
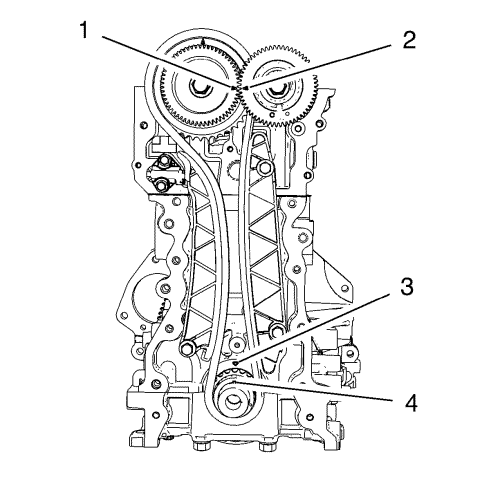
  8. Install the 8 camshaft seat guide cap retaining bolts (3) and tighten to 10 N·m (89 lb in).
  9. Install the camshaft seat guide cap (1).
  10. Install 4 camshaft seat guide cap retaining bolts (2) and tighten to 25 N·m (18 lb ft).

  11. 2373336
  12. The arrows on the camshaft sprockets must align as shown (1).
  13. Remove the EN-50433 sprocket fixing (2) from the exhaust camshaft sprocket.

  14. 2501438
  15. Rotate the engine 2 revolutions clockwise.
  16. Set crankshaft 90° beyond TDC of combustion stroke of cylinder 1.
  17. • The arrow on the inlet camshaft gear (1) must align with the arrow on the exhaust camshaft gear (2).
    • The notch in the camshaft sprocket (4) must align with the mark on the engine block (3)


© Copyright Chevrolet. All rights reserved


© Copyright Chevrolet. All rights reserved