Engine Support Fixture
Special Tools
| • | EN-47649-100 Engine Bridge Feet |
| • | EN-47650 Retainer Frame |
| • | EN-47650-250 Front Adapter |
| • | EN-47650-300 Rear Adapter |
| • | EN-47650-310 Adaptor to EN-47650-300 |
For equivalent regional tools refer to, Special Tools .
Assemble EN-47649 Engine Bridge
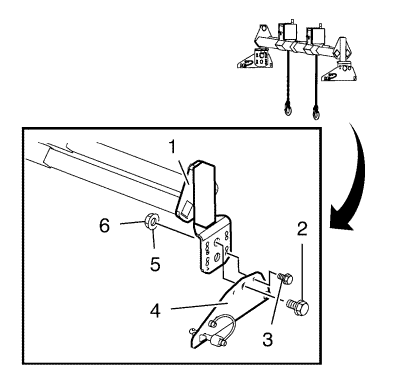
Install EN-47649-100 feet (4) to EN 47649 bridge (1).
- Tighten mounting bolt (2) and nut (6) on both sides.
Put washer (5) under nut on both sides.
- Tighten adjustment screw (3) when bridge is adjusted vertical on both sides.
Assemble and Adjustment of EN-47650 - Retainer Frame
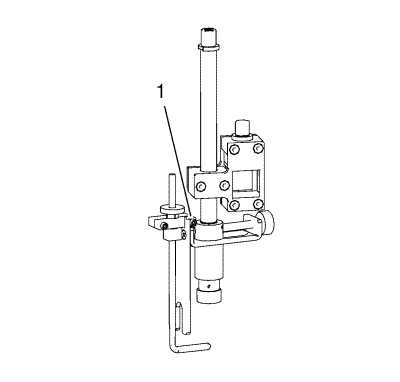
| • | Pre-assemble EN-47650-250 adaptor (1) by following manufacturer's instructions. |
| | Note: Pre-assemble special tool assembly outside the vehicle, in accordance with the table. |
| • | Pre-assemble EN-47650 frame off vehicle. |
Measurement
| Dimension
|
a
| 1350 mm (53.1 in)
|
b
| 575 mm (23.6 in)
|
c
| 385 mm (15.1 in)
|
d
| 90 mm (3.5 in)
|
Note: EN-47650-30 extension is equipment of EN-47650 frame and enclosed in the EN-47650 frame tool kit.
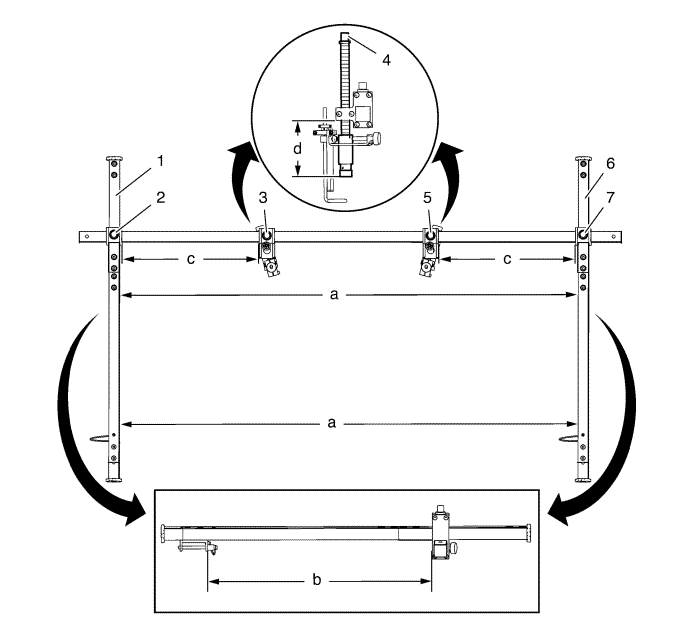
- Install EN-47650-30 extension bars (1, 6) of the frame set to EN-47650 frame .
Note: Outer bars of EN 47650 frame MUST be arranged parallel.
- Tighten hexagons (2, 6) on both sides.
- Adjust height of EN 47650 frame.
| • | Tighten hexagons (3, 5) on both sides. |
| • | Adjust height with hexagons (4) on both sides |
Installation Procedure
- Remove dash upper extension panel opening cover. Refer to Dash Upper Extension Panel Opening Cover Replacement .
- Use EN-47650-310 adaptor (1) for this operation.
Caution: To avoid paint damage, use protective covers on the wings.
Note: Do NOT tighten fasteners of EN 47650-300 adapter.
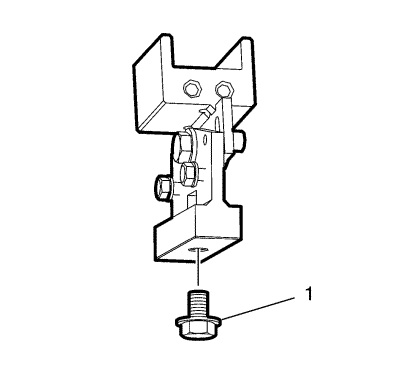
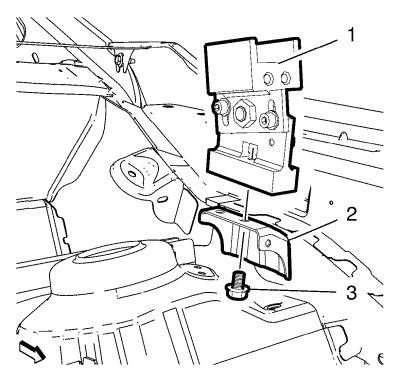
- Install EN-47650-300 adaptor (1) over hole (2) in the front compartment rail and tighten bolt (3).
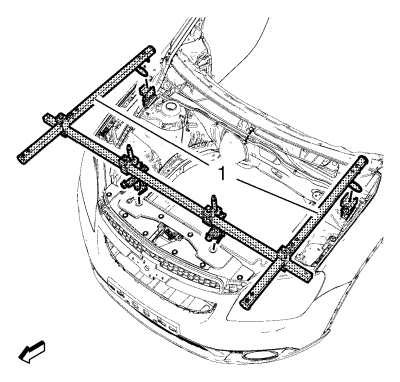
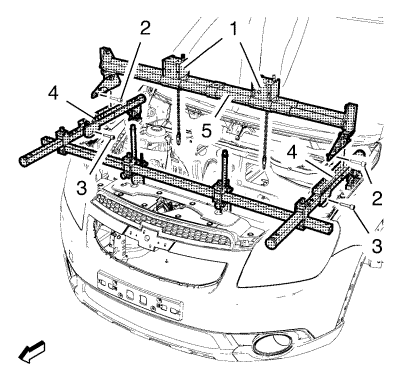
- With the aid of an assistant install EN-47650 frame (1) to the vehicle. If necessary readjust EN-47650 frame (1) for appropriate fitting.
- Tighten rear side of EN-47650 frame :
| 5.1. | Insert safety pins (2) through the EN-47650-300 adaptors and the side bar to prevent movement. |
| 5.2. | Tighten EN-47650 frame to EN-47650-300 adaptors with mounting bolts (1). |
| 5.3. | Tighten bolts (3, 4, 5). |
| 5.4. | Tighten outer bolts (1) of EN-47650-300 adaptors . |
| 5.5. | Re-tighten ALL hexagons of EN-47650 frame . |
Note: Left hook must not be tightened!
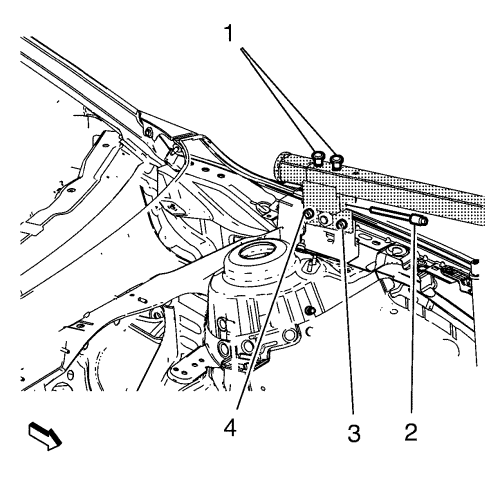
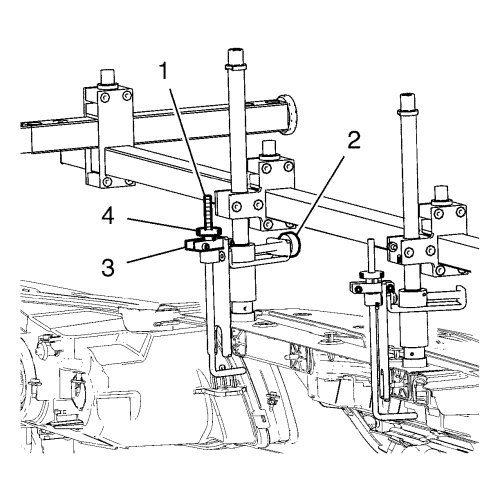
- Tighten only front right side of EN-47650 frame :
| 6.1. | Align the right hook (1) with thumb wheel (2) to upper tie bar. |
| 6.2. | Tighten the right hook (1) to upper tie bar, using the thumb wheel (4). |
| 6.3. | Tighten bolts at right clamping piece (3). |
Note: EN-47650-50 rail is equipment of EN-47650 frame and enclosed in the EN-47650 frame tool kit.
- Install EN-47650-50 rail (4) to EN-47650 frame .
Secure EN-47650-50 rail (4) with safety pins (3).
Note: Secure chain boxes with hook chains on the outside of engine bride.
- Install EN-47649 bridge (5) with the aid of an assistant onto EN-47650-050 rail (4).
Secure EN-47649 bridge (5) with safety pins (2).
- When tool assemble EN-47650 frame and EN-47649 bridge is under load, adjust complete assemble and re-tighten ALL fasteners.
Removal Procedure
Note: Secure chain boxes with hook chains on the outside of engine bride.
- Remove EN-47649 bridge (5) with the aid of an assistant.
Remove safety pins (2).
Note: EN-47650-50 rail is equipment of EN-47650 frame and enclosed in the EN-47650 frame tool kit .
- Remove EN 47650-50 rail (4) from EN 47650 frame.
Remove safety pins (3).
- Remove front right side of EN-47650 frame :
| • | Loosen the bolts from right clamping piece (3). |
| • | Loosen the right hook (1) with thumb wheel (2) and turn the hook 90° from upper tie bar. |
- Loosen rear side of EN-47650 frame :
| 4.1. | Loosen EN-47650 frame from EN-47650-300 adaptors with mounting bolts (1). |
| 4.2. | Remove safety pins (2) from the EN-47650-300 adaptors and the side bars. |
- With the aid of an assistant remove EN-47650 frame (1) from the vehicle.
- Remove bolt (3) and EN-47650-300 adaptor (1) from front compartment rail (2).
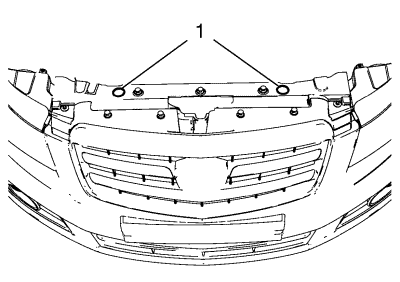
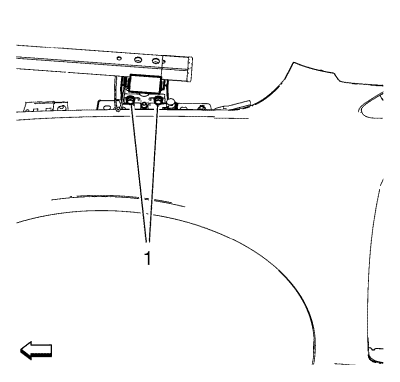
- Clean contact surfaces (1) from EN-47650 frame on the upper tie bar with solvent.
- Remove dash upper extension panel opening cover. Refer to Dash Upper Extension Panel Opening Cover Replacement .
| © Copyright Chevrolet. All rights reserved |
| © Copyright Chevrolet. All rights reserved |


