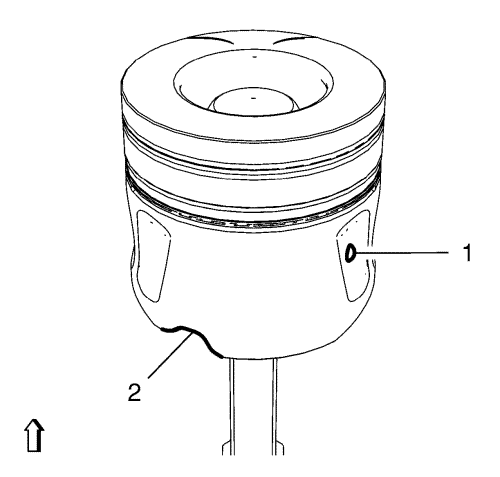
Note: The dot (1) on the piston skirt must point to the timing side to ensure that the notch (2) for the oil nozzle is at the correct position.
- Displace the NEW piston ring joints 120° to each other.
- Coat all pistons and cylinder bores and the EN-50425 compressor with engine oil.
- Turn the crankshaft to TDC of combustion stroke of cylinder 2.
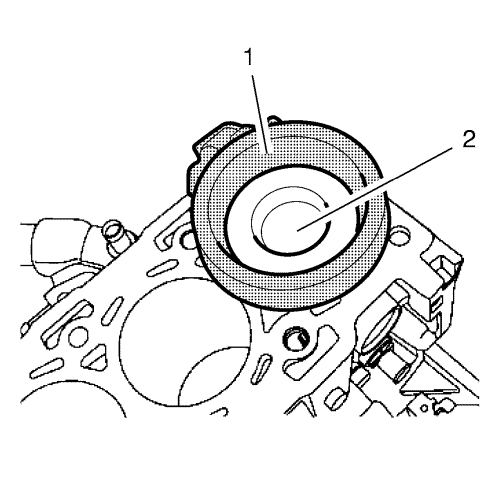
- Use the EN-50425 compressor (1) as shown in the illustration above.
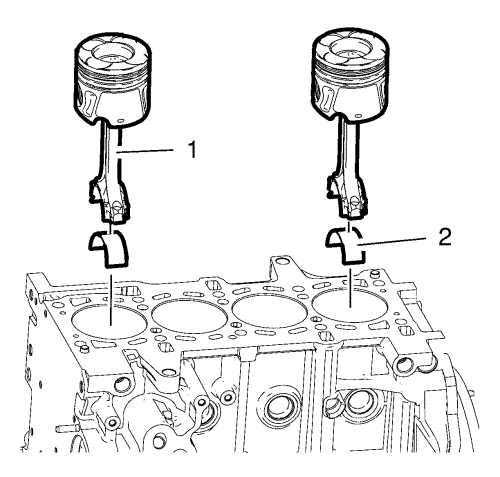
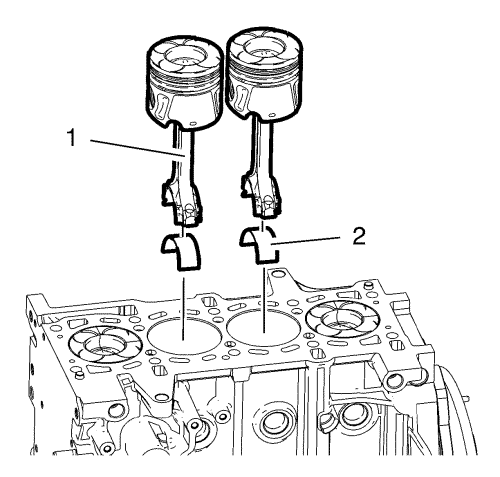
Note: When using the old pistons, old connecting rods and old big-end bearing caps, install them at their original positions.
- Install the 2 NEW pistons with the NEW connecting rod (1) and the NEW connecting rod upper bearing shells (2) into cylinder 1 and 4.
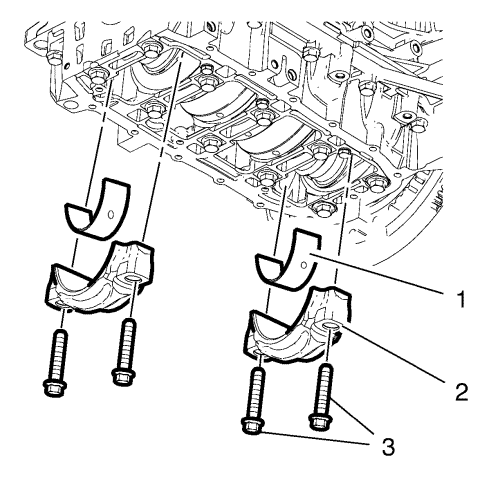
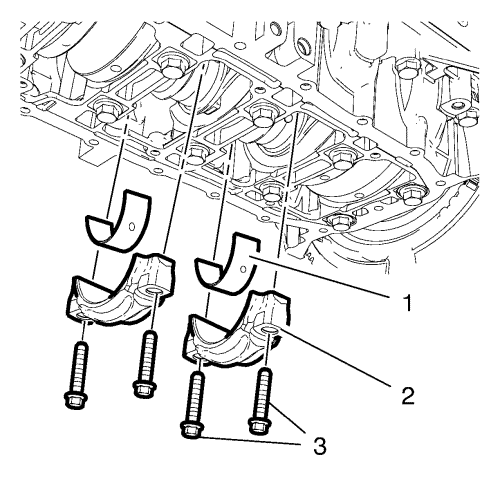
- Install the 2 big-end bearing caps (2) with the connecting rod lower bearing shells (1) to cylinder 1 and 4.
Note: Do not tighten the bearing cap retaining bolts (3).
- Install 4 NEW big-end bearing shell bolts (3).
Caution: Refer to Fastener Caution in the Preface section.
Caution: Refer to Torque-to-Yield Fastener Caution in the Preface section.
- Tighten the 4 big-end bearing shell bolts (3) in 2 steps.
| 8.1. | First step tighten to 30 N·m (22 lb ft). |
| 8.2. | Second step to an additional 70° , use the EN-470-B meter . |
- Turn crankshaft through 180° and set the crankshaft to TDC of combustion stroke of cylinder 1.
Note: When using the old pistons, old connecting rods and old big-end bearing caps, install them at their original positions.
- Install 2 NEW pistons with NEW connecting rod (1) and NEW connecting rod upper bearing shells (2) into cylinder 2 and 3.
- Install 2 NEW big-end bearing caps (2) with NEW connecting rod lower bearing shells (1) to cylinder 2 and 3.
Note: Do not tighten the bearing cap retaining bolts (3).
- Install 4 NEW big-end bearing shell bolts (3).
- Tighten the 4 big-end bearing shell bolts (3) in 2 steps.
| 13.1. | First step tighten to 30 N·m (22 lb ft). |
| 13.2. | Second step to an additional 70° , use the EN-470-B meter . |
- Install crankshaft balancer. Refer to Crankshaft Balancer Installation .
- Install intake camshaft. Refer to Inlet Camshaft Replacement .