Clutch Pressure and Driven Plate Replacement
Special Tools
DT-50180 Clutch Centre Guide
For equivalent regional tools, refer to Special Tools .
Removal Procedure
- Remove the transmission from the vehicle. Refer to Transmission Replacement .
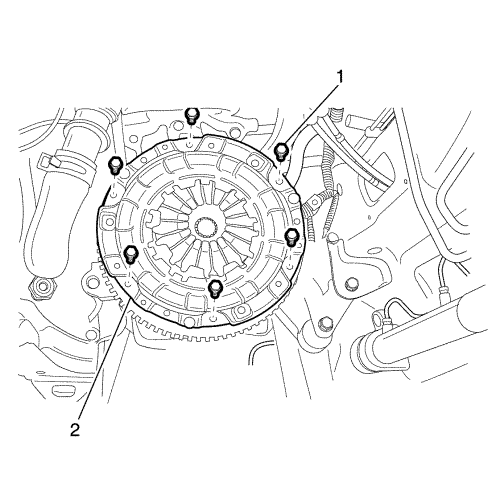
Note: Remove the clutch pressure plate bolts symmetrically to avoid clutch pressure plate distortion.
- Remove the 6 clutch pressure plate bolts (1).
- Remove the clutch pressure plate and clutch disc (2).
Pressure Plate Inspection Procedure
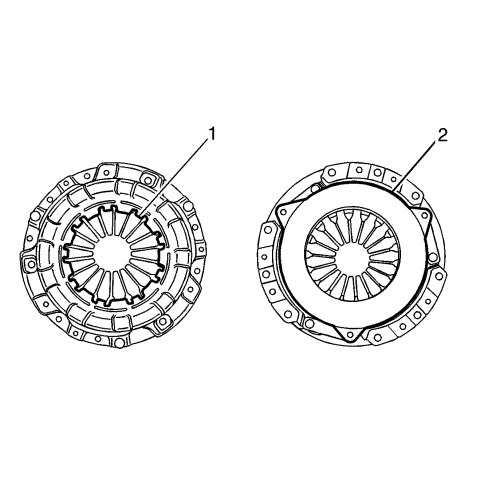
- Inspect the weak and damaged diaphragm spring (1).
- Inspect the face that may be polluted by the oil or grease (2).
Clutch Disc Inspection Procedure
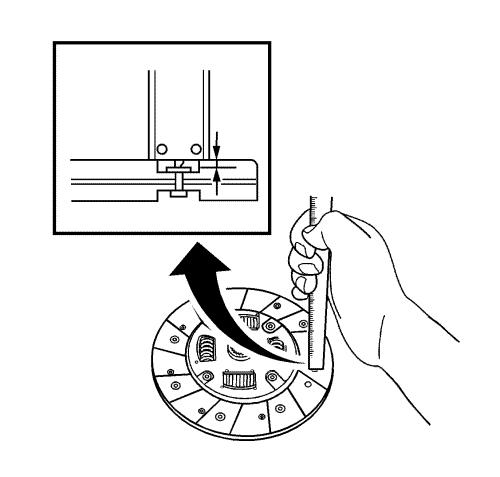
- Measure the rivet head depth from the clutch disc surface and replace if the depth is below the limit.
Specifications
| • | Rivet head depth for standard equals 1.1 mm (0.043 in). |
| • | Rivet head depth for limit equals 0.4 mm (0.016 in). |
- Replace the clutch disc if the clutch disc surface is contaminated or if the clutch disc rivets are loose.
Clutch Disc Runout In A Rotational Direction Inspection Procedure
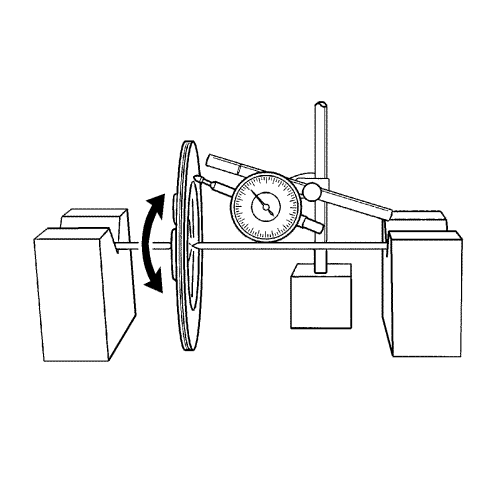
Measure the runout in a rotational direction and replace if the runout exceeds the limit.
Specifications
The disc runout limit in a rotational direction equals 0.7 mm (0.028 in).
Installation Procedure
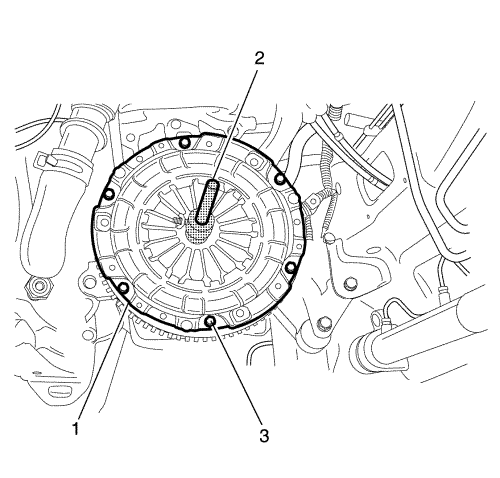
- Install the clutch pressure plate and clutch disc (1) to the flywheel.
- Align the clutch pressure plate and clutch disc onto the flywheel using DT-50180 Clutch Centre Guide (2).
Caution: Refer to Fastener Caution in the Preface section.
- Install the 6 bolts (3) and tighten the bolts crosswise to 35 N·m (26 lb ft) .
- Remove the DT-50180 clutch centre guide (2).
- Install the transmission to the vehicle. Refer to Transmission Replacement .
| © Copyright Chevrolet. All rights reserved |


