Front Wheel Drive Shaft Replacement
Special Tools
| • | DT-50183 Wheel Drive Shaft Remover |
| • | DT-50186 Wheel Hub Holding Tool |
| • | DT-50188 Hub Spindle Remover |
Removal Procedure
Caution: Refer to Vehicle Lifting and Jacking Caution in the Preface section.
- Raise and support the vehicle. Refer to Vehicle Lifting and Jacking Caution .
- Remove the tire and wheel assembly. Refer to Tire and Wheel Removal and Installation .
- Drain the transmission fluid, as necessary.
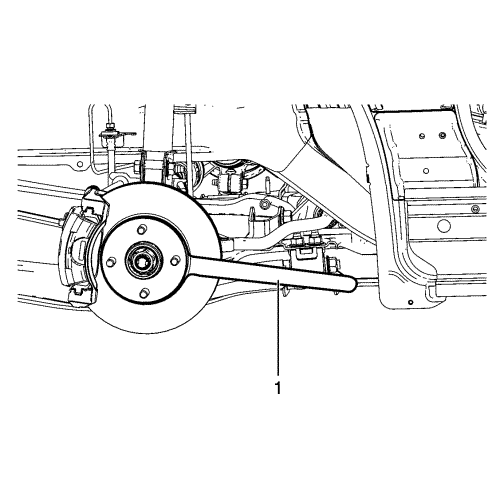
- Install the DT-50186 tool (1) to the wheel hub with the wheel nuts.
Note: Use a suitable tool to release the crimping on the wheel drive shaft retaining nut.
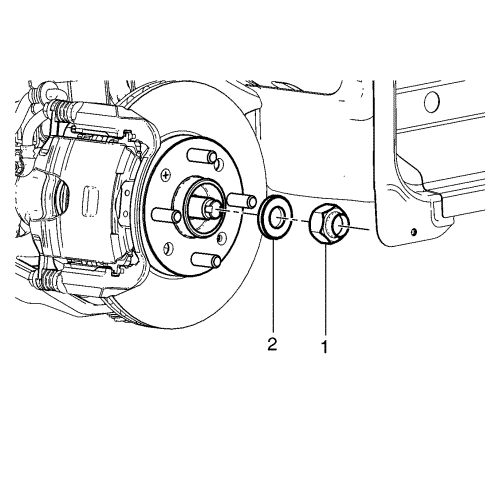
Note: The wheel drive shaft retaining nut (1) must be discarded after removal.
- Remove the wheel drive shaft nut (1) and washer (2) from the wheel drive shaft and discard.
- Remove the DT-50186 tool from the wheel hub.
- Disconnect the outer track rod assembly from the steering knuckle. Refer to Steering Linkage Outer Track rod Replacement .
- Separate the control arm ball joint from the steering knuckle. Refer to Lower Control Arm Replacement .

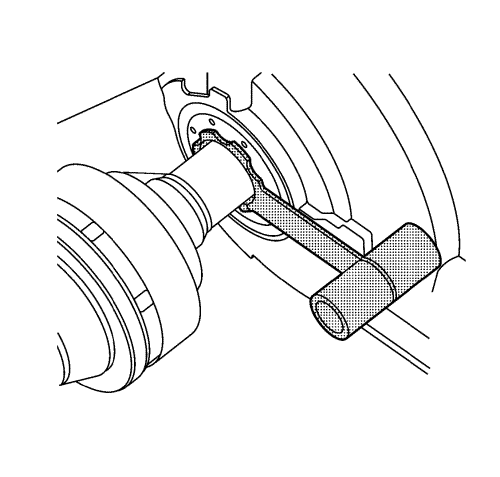
- Using the DT-50188 remover (2), separate the wheel drive shaft from the steering knuckle (1).
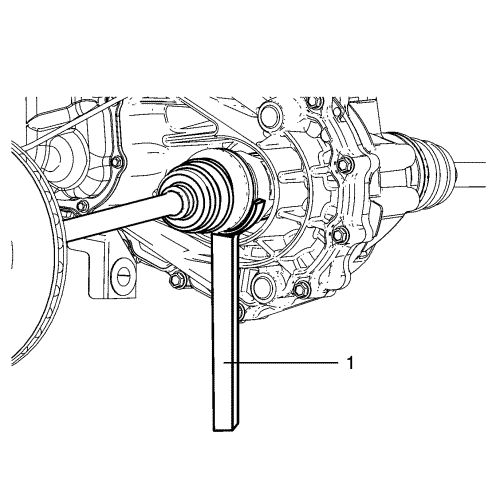
- For the manual gearbox, install the DT-50183 remover (1) on the groove of inner joint and remove the wheel drive shaft from the transaxle.
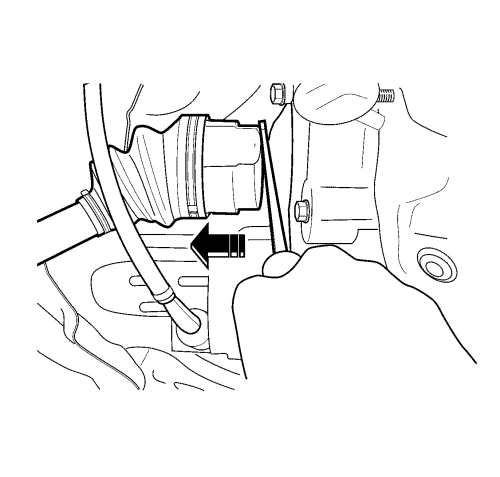
- For the automatic transmission, insert a big flat-head screwdriver between the inner joint and the transaxle, and remove the wheel drive shaft from the transaxle.
- If the wheel drive shaft seal is found to be defective, replace the seal. Refer to Front Wheel Drive Shaft Seal Replacement - Left Side .
Installation Procedure
- Position the DT-6332 protector in the transaxle.
- Install the wheel drive shaft until the wheel drive shaft splines are past the axle seal.
- Remove the DT-6332 protector from the wheel drive shaft.
- Install the wheel drive shaft until it is fully seated in the transaxle.
Note: In the following step, DO NOT pull on the wheel drive shaft. Pull only on the inner joint.
- With the wheel drive shaft installed, grasp the inner tripod housing and pull the tripod outward to ensure that the wheel drive shaft is properly engaged. The wheel drive shaft will remain in place if properly installed.
- Install the wheel drive shaft to the front wheel hub/bearing.
- Install the control arm ball joint to the steering knuckle. Refer to Lower Control Arm Replacement .
- Install the outer tie rod assembly to the steering knuckle. Refer to Steering Linkage Outer Track rod Replacement .
- Hand tighten the NEW wheel drive shaft nut (2) on the wheel drive shaft (1).
- Install the DT-50186 tool (1) to the wheel hub with two wheel nuts (3).
- Support the DT-50186 tool (1) outer end on a safety stand.
Caution: Refer to Fastener Caution in the Preface section.
- Using a torque wrench and the appropriate size socket, install the wheel drive shaft nut and tighten to 240 N·m (177 lb ft).
- Remove the DT-50186 tool (1) from the wheel hub.
- Install the tire and wheel assembly. Refer to Tire and Wheel Removal and Installation .
- Lower the vehicle.
- Fill the transaxle fluid and inspect the fluid level of the transaxle, as necessary. Refer to Transmission Fluid Replacement or Transmission Fluid Replacement .
| © Copyright Chevrolet. All rights reserved |


