Sump Replacement
Removal Procedure
- Open the bonnet.
- Raise the vehicle by its full height. Refer to Lifting and Jacking the Vehicle .
- Place collecting basin underneath.
- Remove the oil drain bolt.
- Collect the engine oil.
Caution: Refer to Fastener Caution in the Preface section.
- Install the NEW seal ring and the oil drain bolt, tighten to 8 N·m (71 lb in).
- Lower the vehicle by its full height.
- Remove the oil level indicator tube. Refer to Oil Level Indicator Tube Replacement .
- Raise the vehicle by its full height.
- Remove the front compartment splash shield. Refer to Front Compartment Splash Shield Replacement .
- Remove the exhaust flexible pipe. Refer to Exhaust Pipe Replacement .

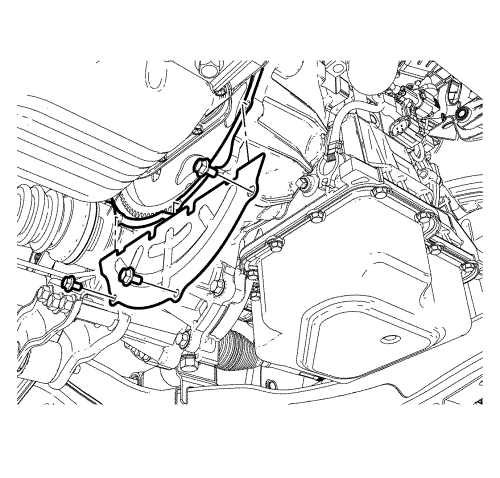
- Remove the 3 housing lower plate bolts from the transmission.
- Remove the transmission housing lower plate.

Note: Remove the sump evenly all the way around with a suitable tool.
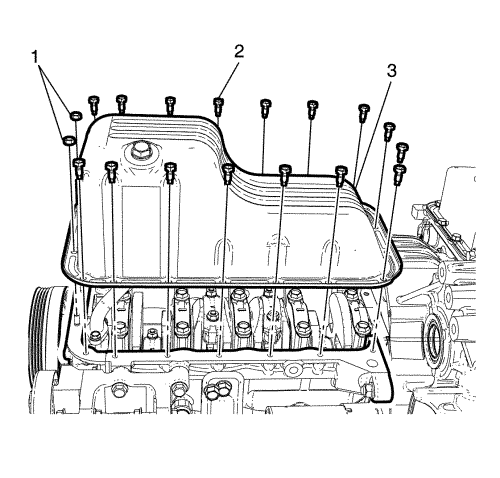
- Remove the 16 oil pan bolts (2), 2 nuts (1) and remove the oil pan (3).
Installation Procedure
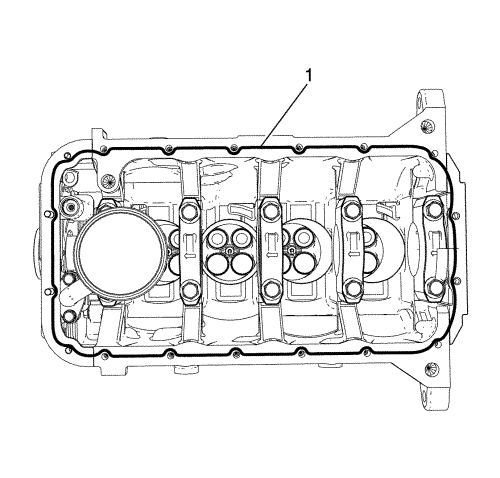
- Clean the sealing surfaces.

- Apply an approximately 3.5 mm (0.14 in) thick bead of oil pan sealant to the joints (1).
Caution: Refer to Fastener Caution in the Preface section.

Note: The assembly time including torque check must take no longer than 10 minutes.
- Install the 16 oil sump bolts (2), 2 nuts (1) to the oil sump (3) and tighten to 10 N·m (89 lb in).

- Install the transmission housing lower plate.
- Install the 3 housing lower plate bolts to the transmission and tighten to 10 N·m (89 lb in).
- Install the exhaust flexible pipe. Refer to Exhaust Pipe Replacement .
- Install the front compartment splash shield. Refer to Front Compartment Splash Shield Replacement .
- Lower the vehicle.
- Install the oil level indicator tube. Refer to Oil Level Indicator Tube Replacement .
Note: Inspect the engine oil level and correct if necessary.
- Refill the collected engine oil.
- Close the bonnet.
| © Copyright Chevrolet. All rights reserved |


