Piston, Connecting Rod, and Bearing Installation
Special Tools
EN-45059 Torque Angle Sensor Kit
For equivalent regional tools, refer to Special Tools
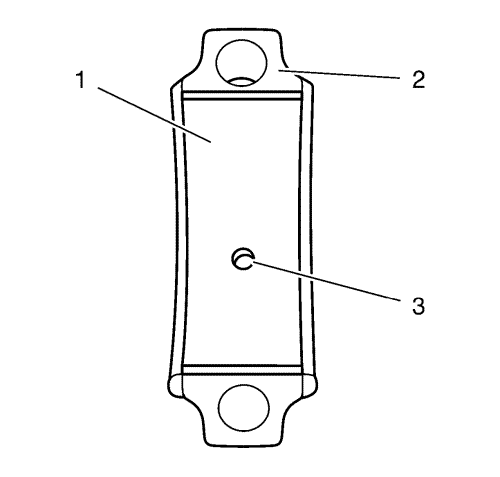
Note: Install the 3 connecting rod bearing shells (1) with oil bore (3) into the connecting rod bearing caps (2).
If the old connecting rod bearing shells will be reused, install in their original position.
Note: Apply lubricant equally spaced to all bearings.
- Install the 6 connecting rod bearing shells to the connecting rod and connecting rod bearing caps
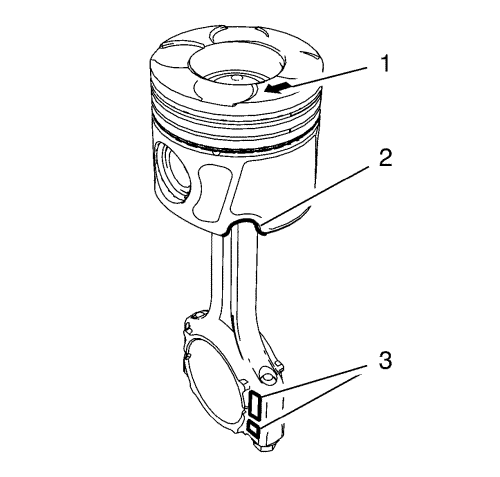
- Install the piston with arrow on top (1) pointing to the timing side.
Note: The connecting rod bearing and connecting rod bearing caps must be installed in their original position.
- Assemble the connecting rod and connecting rod bearing caps with marker (3) to the timing side.
- The piston ring joints must be displaced 120° to each other.
Note: The EN-50516 fixing tool should not be installed.
- Set the crankshaft to BDC of cylinder 1.
- Install a piston ring compressor in order to compress the piston rings.
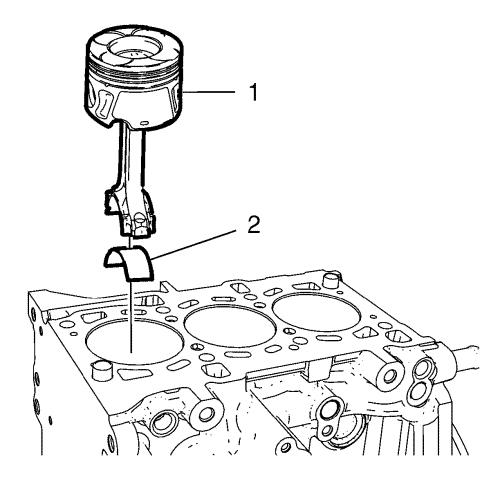
- Install the piston with connecting rod (1) and connecting rod upper bearing shells (2) into cylinder 1.
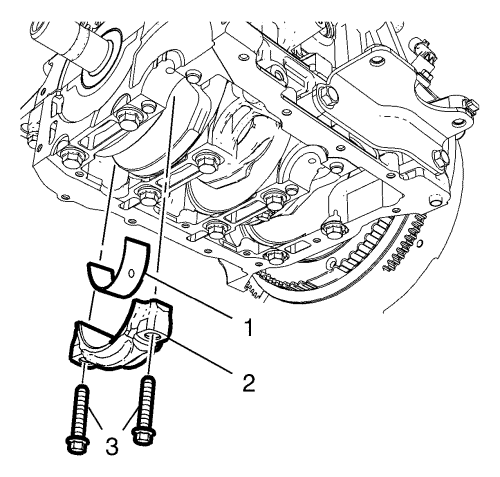
- Install the connecting rod bearing cap (2) with the connecting rod lower bearing shells (1) into cylinder 1
Caution: Refer to Fastener Caution in the Preface section.
Caution: Refer to Torque-to-Yield Fastener Caution in the Preface section.
- Install the 2 NEW connecting rod bearing cap bolts (3) to cylinder 1 and tighten in following order:
| • | Tighten the bolts in first step to 20 N·m (15 lb ft). |
| • | Tighten the bolts to additional 40°, use the EN-45059 torque angle sensor . |
- Set the crankshaft to BDC of cylinder 2 and follow the steps 6-9.
- Set the crankshaft to BDC of cylinder 3 and follow the steps 6-9.
| © Copyright Chevrolet. All rights reserved |


