Camshaft Housing Installation
Special Tools
| • | EN-50515 Fixing Tool Camshaft |
| • | EN-50516 Fixing Tool Crankshaft |
For equivalent regional tools, refer to Special Tools .
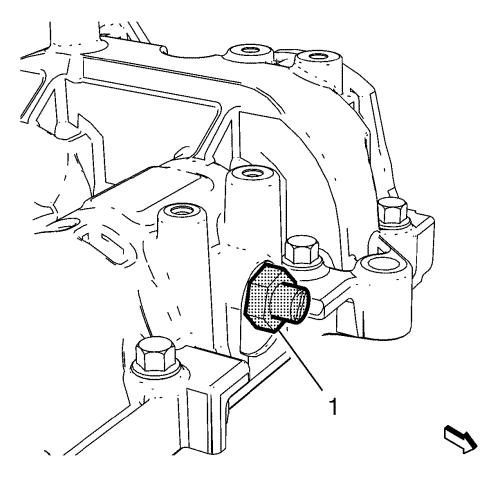
- Install the EN-50515 fixing tool (1) on exhaust side.
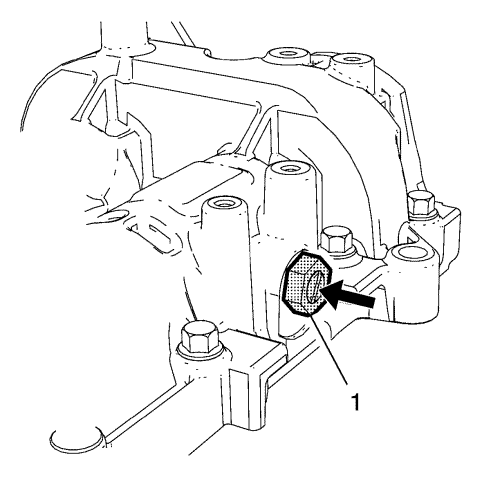
- Apply pressure at EN-50515 fixing tool (arrow) and turn the camshaft, until EN-50515 fixing tool (1) engages in the exhaust camshaft.
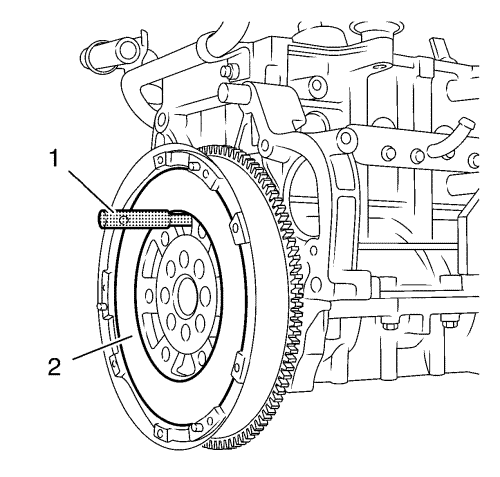
- Turn crankshaft in engine direction of rotation until EN-50516 fixing tool (1) to engage with the drilling at flywheel (2) and cylinder block.
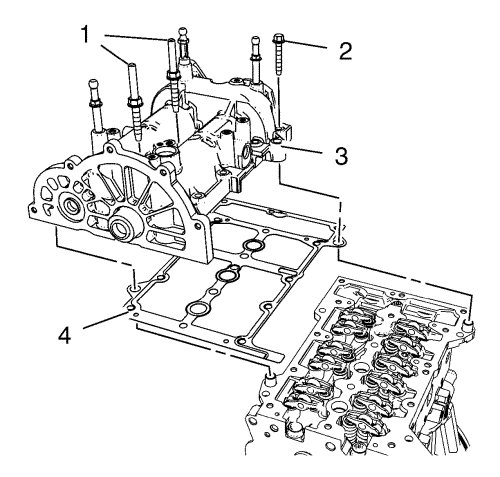
- Install a NEW camshaft housing gasket (4).
- Install the camshaft housing (3):
Note: Do not tighten the studs.
- Install the 2 camshaft housing studs (1).
Note: Take note that there are different bolt lengths. Do not tighten the bolts.
- Install 13 NEW camshaft housing bolts (2).
Caution: Refer to Fastener Caution in the Preface section.
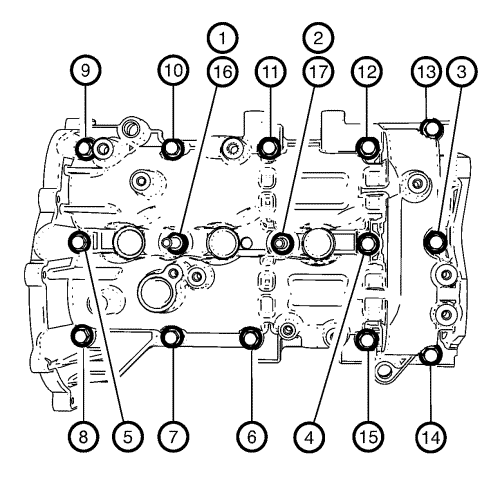
- Tighten the 13 camshaft cover bolts and the 2 camshaft cover studs in sequence as shown:
| • | For camshaft housing studs tighten to 25 N·m (18 lb ft). |
| • | For camshaft housing bolts tighten to 20 N·m (15 lb ft). |
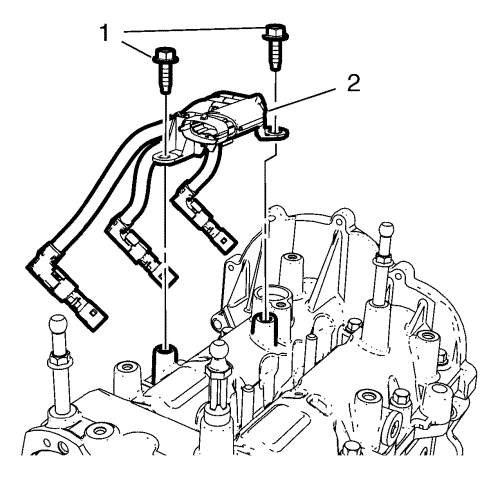
- Install the glow plug wiring harness bracket (2).
- Install the 2 glow plug wiring harness bracket bolts (1) and tighten to 9 N·m (80 lb in).
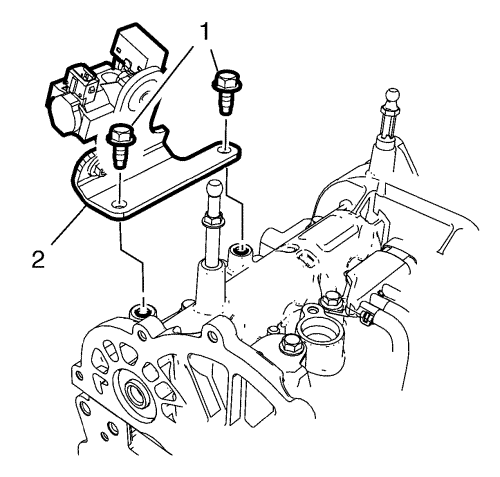
- Install the turbocharger wastegate actuator vacuum control solenoid valve bracket (2).
- Install the 2 turbocharger wastegate actuator vacuum control solenoid valve bracket bolts (1) and tighten to 9 N·m (80 lb in).
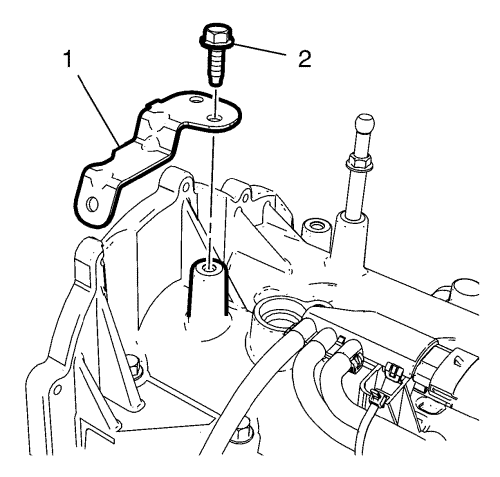
- Install the engine control module wiring harness bracket (1).
- Install the engine control module wiring harness bracket bolt (2) and tighten to 9 N·m (80 lb in).
| © Copyright Chevrolet. All rights reserved |


