Differential Housing Support Bushing Replacement - Rear
Tools Required
J-45725 Cradle Bushing Replacer
Removal Procedure
- Raise and support the vehicle. Refer to Lifting and Jacking the Vehicle .
- Remove the rear differential assembly. Refer to Differential Replacement .
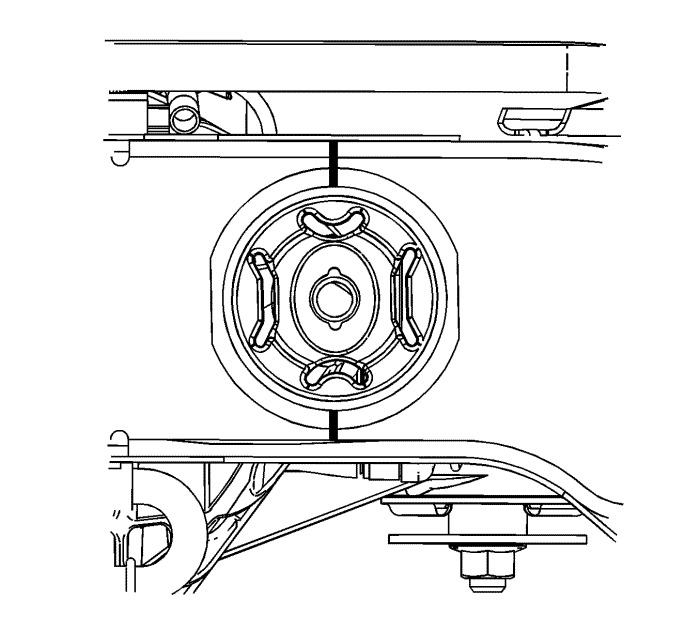
- Mark a reference point on the frame and old bushing at the 12 and 6 o'clock position to use to alignment the new bushing.
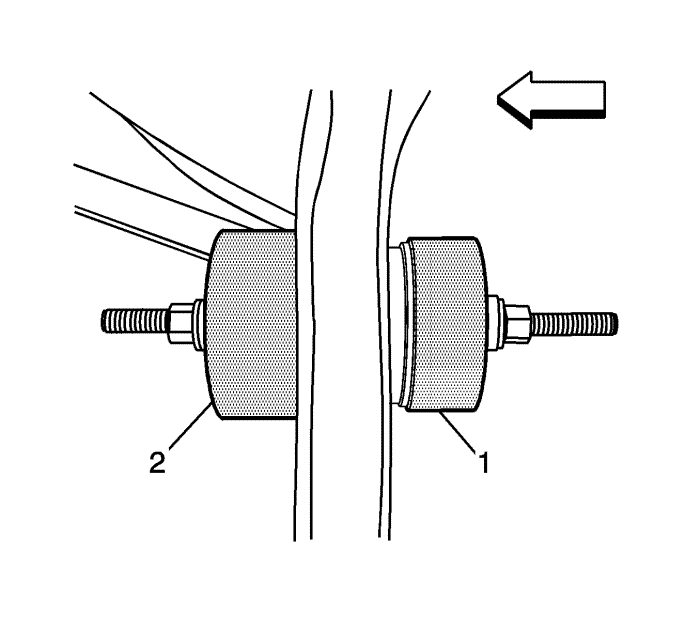
- Position the J-45725-1A (1) on the bushing (2).
- Position the J-45725-2A (1) on the frame.
Important: Apply a small amount of grease on the threaded rod to lubricate the nuts when turning the nuts.
- Install the threaded rod, bearing and washers.
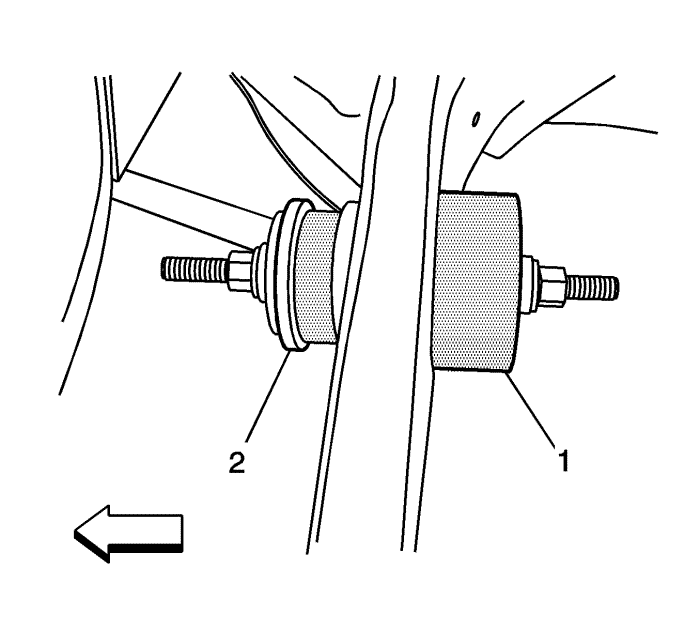
- Adjust the nuts so that they are touching the J-45725-1A (2) and the J-45725-2A (1).
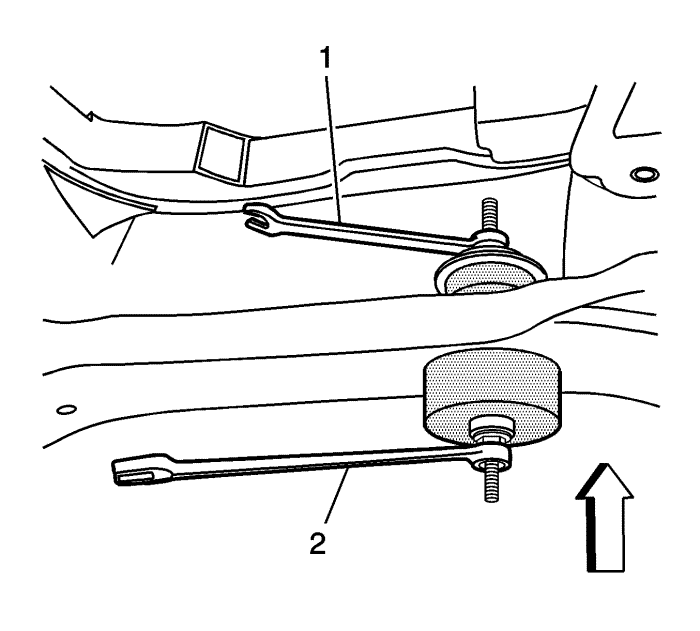
- Install the proper size wrenches on the nuts.
Important: In the following service procedure, use only HAND TOOLS when using the J-45725.
- While holding the front wrench (1) rotate the rear wrench (2) to remove the bushing.
- Remove the special tools.
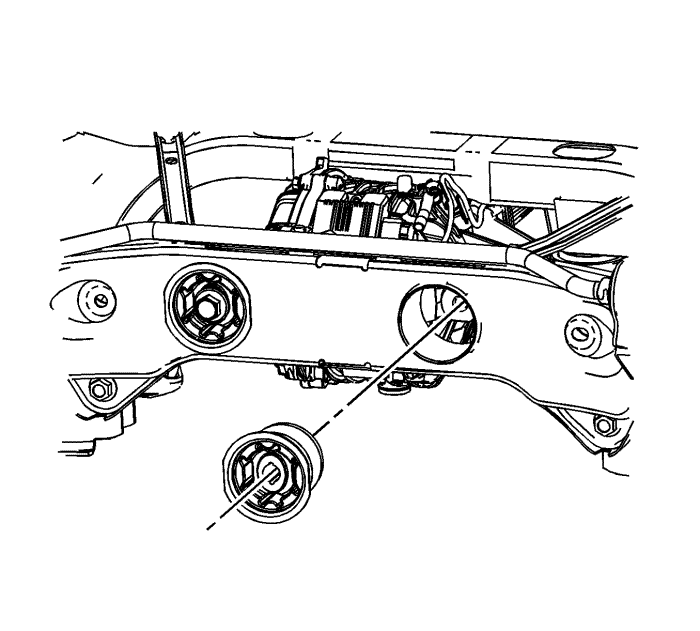
- Remove the bushing from the frame.
Installation Procedure
Important: Failure to perform the following service procedure prior to the installation of the new bushing, could cause premature failure of the bushing.
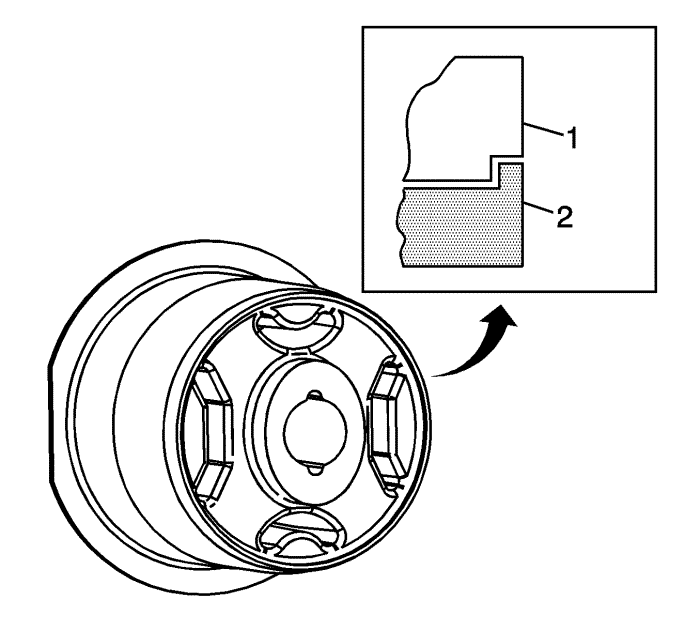
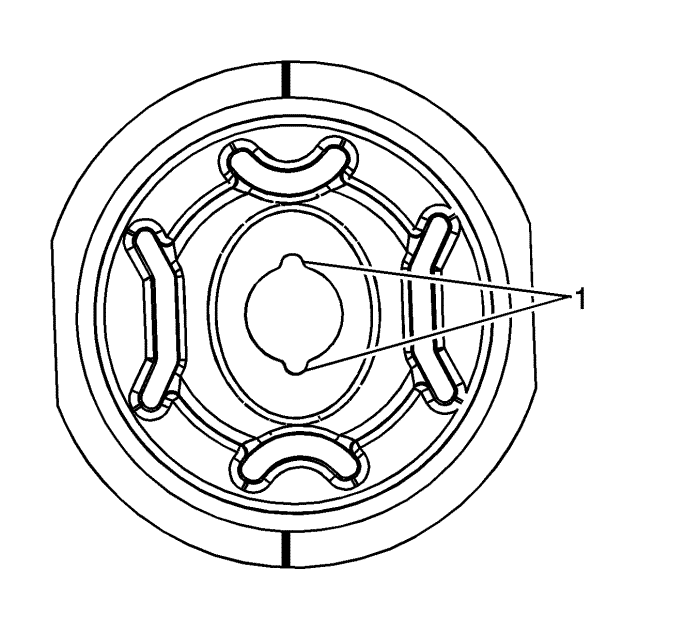
- Before the installation of the new bushing, use a straight edge draw a line on the new bushing at the 12 and 6 o'clock positions. Ensure that the grooves (1) are at the 12 and 6 o'clock positions.
- Position the new bushing so that the reference marks on the frame and the bushing are in alignment. This will ensure that the new bushing will be within the + or - 5° specification required for the proper alignment of the bushing.
Important: The following procedure is to temporarily hold the new bushing in place so that the special tools can be installed for the proper installation. This is NOT to be used to install the bushing.
- Using a block of wood and a hammer, slightly tap the bushing into the frame.
- Assemble the threaded rod, bearings and washers as indicated in step 7 in the removal procedure.
- Position the J-45725-4 (2) on the inside of the frame.
- Position J-45725-1A (1) on the outside of the frame.
- Adjust the nuts so that they are touching the J-45725-2 (1) and the J-45725-2A (2).
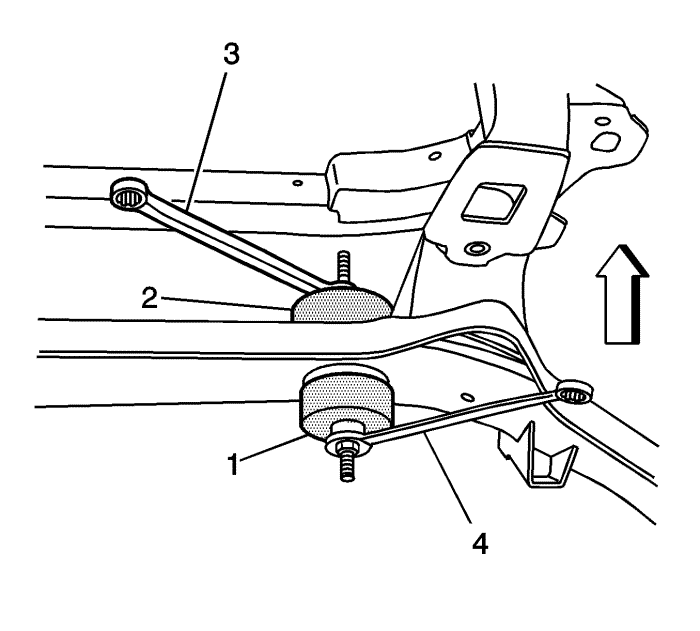
- While holding the front wrench (2) rotate the rear wrench (1) to install the bushing.
- Remove the special tools.
- Install the rear differential assembly. Refer to Differential Replacement .
- Lower the vehicle.
| © Copyright Chevrolet. All rights reserved |


