Captiva |
||||||||
|
|
|
|||||||
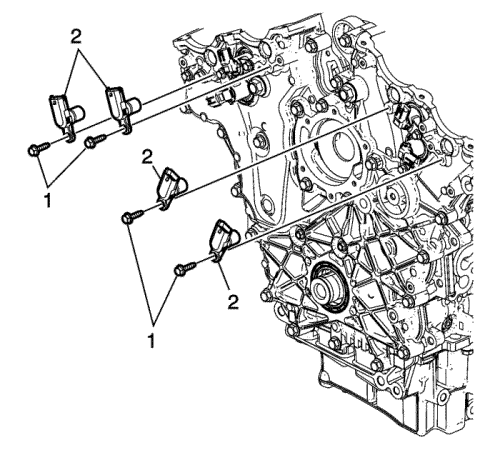

Caution: The camshaft position actuator valves must be removed from the front cover prior to front cover removal or damage to the valves may occur.
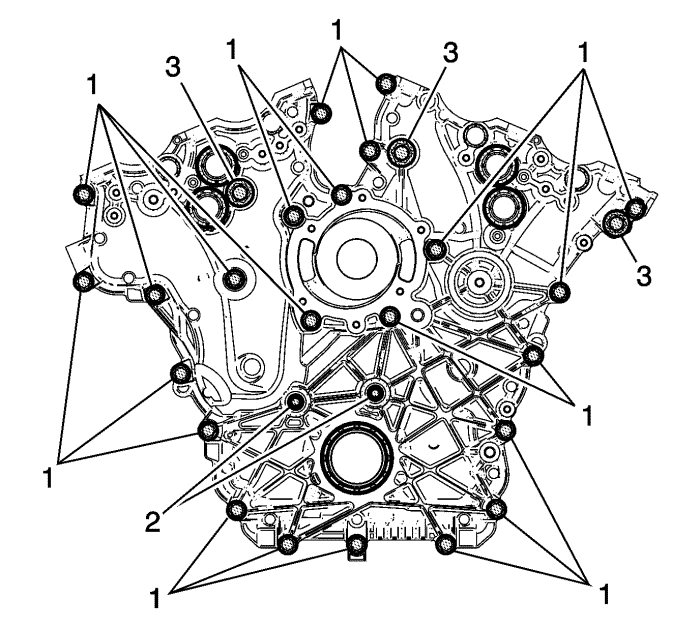
Note: Engine front cover bolts in the number (3) location are model dependent and may have already been removed.
Note: There are a total of 23 M8 bolts (1) and 2 M6 bolts (2) that must be removed, and 3 optional M12 bolts (3) that may need to be removed before the front cover will separate from the engine block.
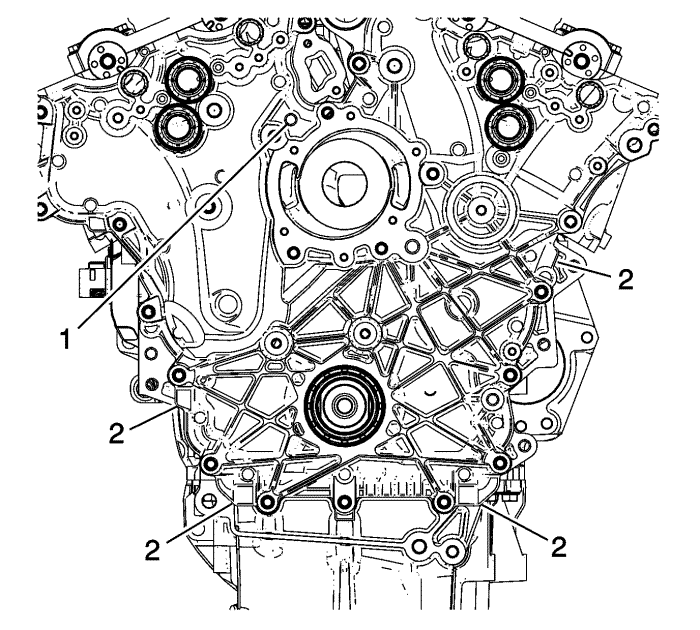
Caution: Do not use the jackscrew hole without first removing all engine front cover bolts. Failure to remove all engine front cover bolts before using the jackscrew hole could result in damage to components.
Caution: Do not pry between the engine front cover and the camshaft position sensors or the camshaft position actuators in order to separate the RTV. Use the pry points and a bolt in the jackscrew hole in order to remove the engine front cover. Damage to the camshaft position sensors or the camshaft position actuators may occur if the camshaft position sensors or the camshaft position actuators are used to pry against in order to remove the engine front cover.

| © Copyright Chevrolet. All rights reserved |


