Timing Belt Inspection
Special Tools
| • | EN-48245 Camshaft Locking Tool |
| • | EN-48246 Crankshaft Locking Tool |
For equivalent regional tools, refer to Special Tools .
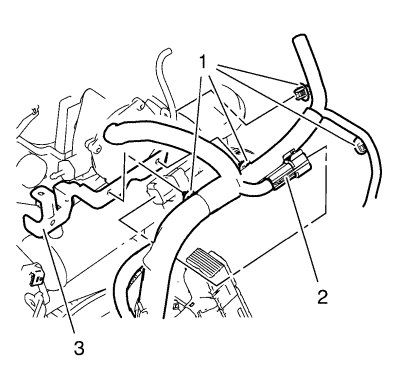
- Remove the wiring harness plug (2).
- Remove 4 wiring harness clips (1) from the bracket (3).
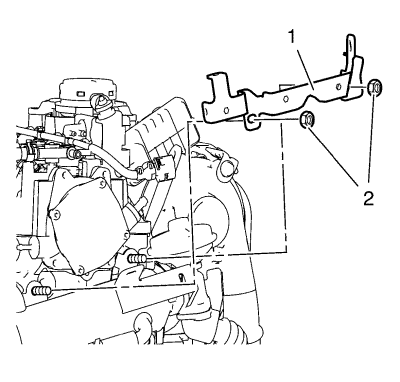
- Remove the 2 (2) nuts from the wiring harness bracket (1).
- Remove the wiring harness bracket (1).
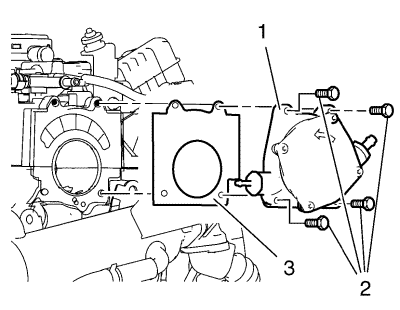
- Remove the 4 vacuum pump bolts (2).
- Remove the vacuum pump (1).
- Remove the vacuum pump gasket (3).
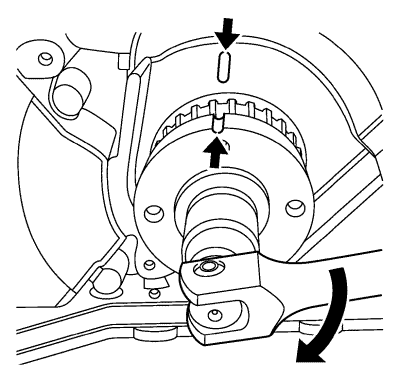
- Rotate the crankshaft to the markings at the crankshaft sprocket and oil pump cover.
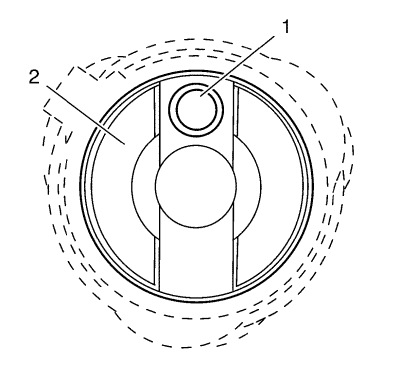
Note:
| • | Examine that the bore (1) in the camshaft (2) is on top. |
| • | Examine the correct positions of the camshaft and the crankshaft. |
- Rotate the camshaft (1) to the shown position.
Caution: Refer to Fastener Caution in the Preface section.
Note: If the timing marks are not aligned, repeat the forward procedure and recheck the marks. Alignment of marks is critical for engine performance and emissions.
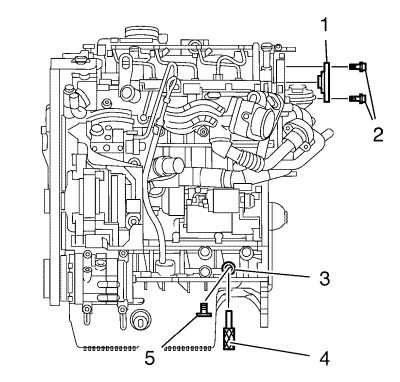
- Install the EN-48246 locking tool (1) to fix the camshaft and install the bolts (2) and tighten to 11 N·m (98 ft in).
- Remove the lower crankcase closure bolt (5).
- Install EN-48245 locking tool (4) into the lower crankcase hole (3). Turn the crankshaft to TDC until the tool engages in the crankshaft.

- Remove the EN -48246 locking tool (1) and remove the bolts (2). RemoveEN-48245 locking tool (4) from the lower crankcase hole (3). Install the lower crankcase closure bolt (5) and tighten to 30 N·m (23 lb ft).
- If the timing marks are not aligned. Refer to Timing Belt Removal and Timing Belt Installation . Alignment of marks is important for engine performance and emissions.
| © Copyright Chevrolet. All rights reserved |


