Camshaft Seal Replacement
Special Tools
For equivalent tools, Refer to Special Tools .
Removal Procedure
- Open the hood.
- Remove the timing belt. Refer to Timing Belt Replacement .
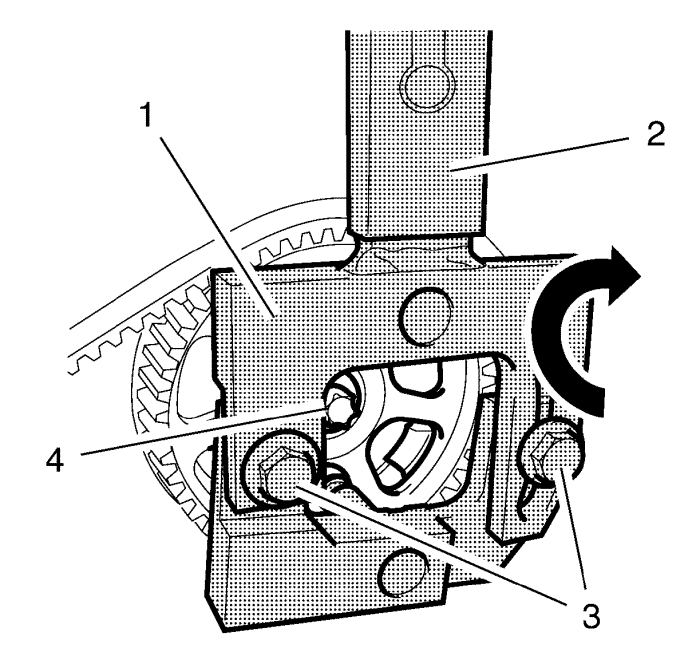
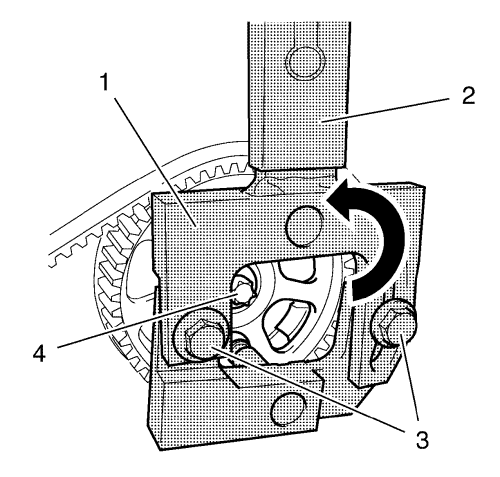
- Install the EN-6347 holding tool (1) and the EN-956-1 extension (2) in the exhaust camshaft sprocket to counterhold.
Note: A second technician is required.
- Loosen the locking bolts (3) from EN-6347 holding tool .
Note: The grooves of EN-6347 holding tool must locate in the camshaft sprocket. Check for correct seating.
- Tighten the 2 locking bolts (3).
- Loosen the exhaust camshaft sprocket bolt (4) while holding the exhaust camshaft sprocket EN-6347 holding tool.
- Remove the EN-6347 holding tool and the EN-956-1 extension from the exhaust camshaft sprocket.
- Remove the exhaust camshaft sprocket bolt (4).
- Remove the exhaust camshaft sprocket.
- Repeat the same procedure at the intake camshaft sprocket for removal.
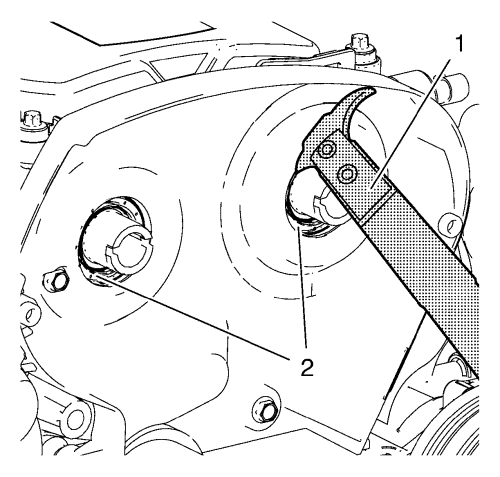
Note: Be careful not to damage the sealing surfaces.
- Remove the 2 camshaft oil seals (2) use the EN-45000 remover (1).
Installation Procedure
Note:
| • | Coat the camshaft oil seal with NEW engine oil. |
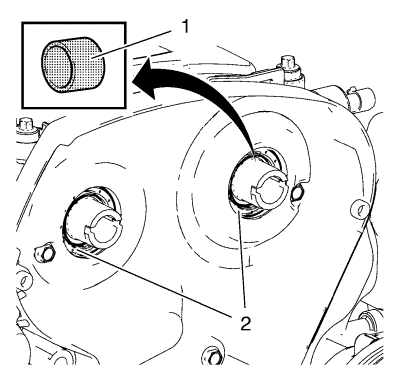
| • | While installing the camshaft oil seal (2) to the cylinder head it is important that the camshaft oil seal concisely at the cylinder head fits. |
- Install the NEW camshaft oil seal (2) use the EN-422 installer (2).
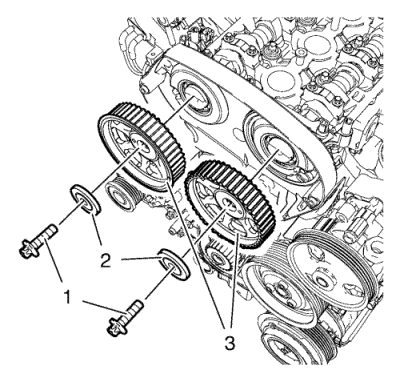
- Install the camshaft sprockets (3).
Note: Turn the sprockets around till them locked in correct position.
- Install the camshaft sprocket washers (2) and the camshaft sprocket bolts (1) and hand tighten.
- Install EN-6347 holding tool and EN-956-1 Brace Holder to counterhold.
Caution: Refer to Fastener Caution in the Preface section.
Note: A second technician is required.
- Tighten the bolts to 67.5 N·m (50 lb ft).
- Remove the EN-6347 holding tool and the EN-956-1 extension from the exhaust camshaft sprocket
- Install the timing belt. Refer to Timing Belt Replacement .
- Close the hood.
| © Copyright Chevrolet. All rights reserved |


