Timing Belt Inspection - Adjustment
Special Tools
| • | EN-6625 Flywheel Holder |
| • | EN-42492 Timing Belt Installer |
For equivalent regional tools, Refer to Special Tools .
Removal Procedure
- Remove the drive belt, Refer to Generator, Air Conditioning Compressor, and Power Steering Pump Belt Removal .
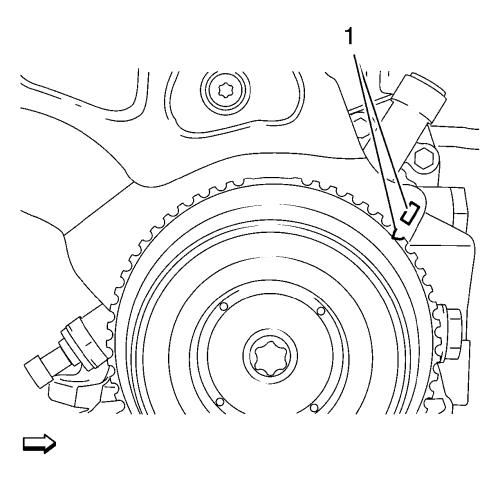
Note: Turn the engine in the direction of engine rotation. The crankshaft pulley mark and the timing belt rear cover mark must align (1).
- Set the engine to TDC.
- Remove the crankshaft pulley, Refer to Crankshaft Pulley Removal .
- Remove the timing belt lower front cover, Refer to Timing Belt Lower Front Cover Removal .
- Remove the timing belt upper front cover, Refer to Timing Belt Upper Front Cover Removal .
- Install the crankshaft balancer bolt.
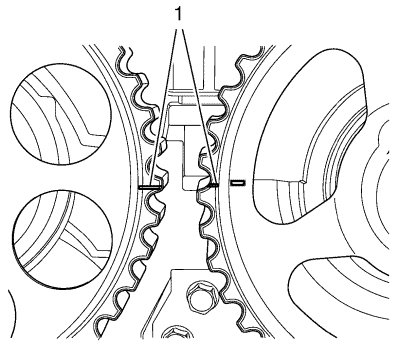
- The camshaft gears marks must align (1).
- Install the EN-852 locking tool between the camshaft sprockets.
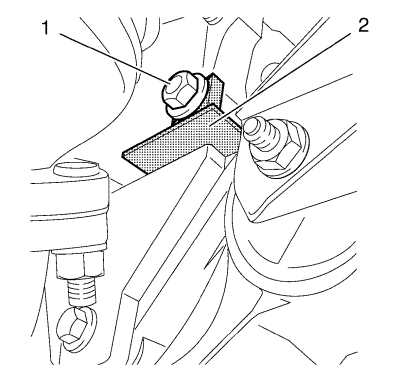
- If the camshaft gears do not match then remove the engine/transmission bolt (1) and Remove the EN-6625 holder (2).
- Remove the EN-6625 holder (2).
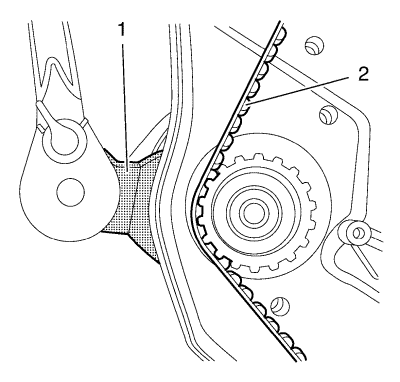
- Slightly loosen the water pump bolts.
- Rotate the water pump counterclockwise, use the EN-42492 installer to relieve the timing belt tension.
- Remove the timing belt.
Installation Procedure
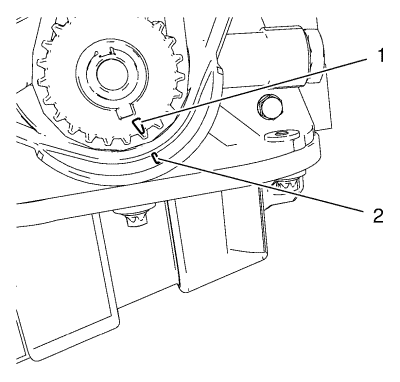
- Check the crankshaft position.
- The crankshaft sprocket mark and the rear cover mark must align (1, 2).

- If the EN-6625 holder removal was necessary, then install the EN-6625 holder (2) to block the crankshaft.
- Install the timing belt.

- Rotate the water pump counterclockwise, use the EN-42492 installer .
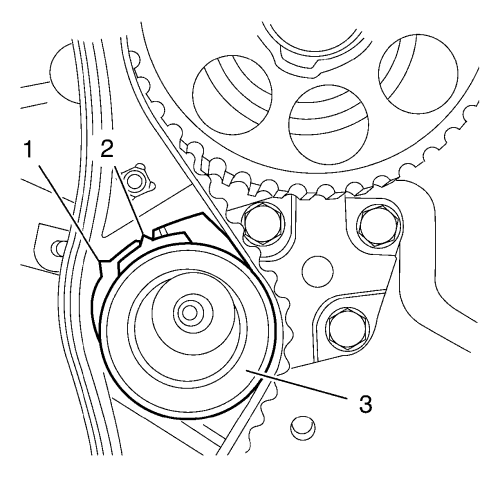
- Rotate the water pump clockwise until the adjust arm pointer of the timing belt automatic tensioner (3) is aligned to the notch (2) in the timing belt automatic tensioner bracket.
Caution: Refer to Fastener Caution in the Preface section.
Note: Use a mirror.
- Tighten the water pump bolts to 10 N·m (89 lb in).
- Remove the EN-42492 installer and the EN-852 locking tool .
- Turn the engine in the direction of engine rotation one complete cycle.
- Check the position of the camshaft gears, of the crankshaft and the tension.

- The crankshaft sprocket mark and the rear cover mark must align (1, 2).

- The camshaft gear marks must align (1).
- the EN-852 locking tool must be installed between the camshaft gears.
- Install the timing belt lower front cover, Refer to Timing Belt Lower Front Cover Installation .
- Install the timing belt upper front cover, Refer to Timing Belt Upper Front Cover Installation .
- Install the crankshaft pulley, Refer to Crankshaft Pulley Installation .
- Install the drive belt, Refer to Generator, Air Conditioning Compressor, and Power Steering Pump Belt Installation .
| © Copyright Chevrolet. All rights reserved |


