Rear Axle Bracket Replacement
Special Tools
EN-45059 Torque Angle Sensor Kit
For equivalent regional tools. Refer to Special Tools
Removal Procedure
Warning: Use of eye goggles is necessary to prevent personal injury.
- Raise and suitably support the vehicle. Refer to Lifting and Jacking the Vehicle .
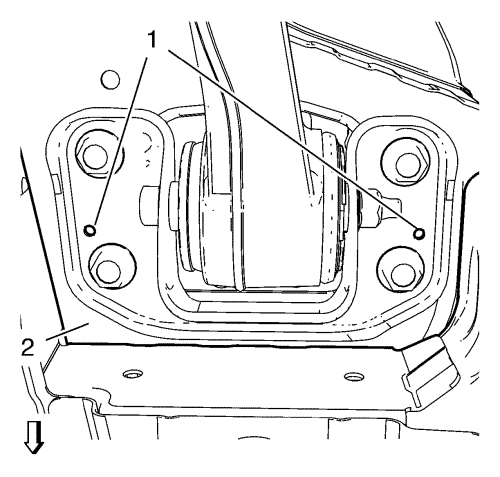
- Using a 6 mm (0.2 in) drill bit, drill 2 holes (1) through the rear axle bracket and into the underbody (2). These holes (1) will be used by guide pins to correctly align the rear axle bracket to the underbody (2).
- Support the rear axle with a hydraulic lift table.
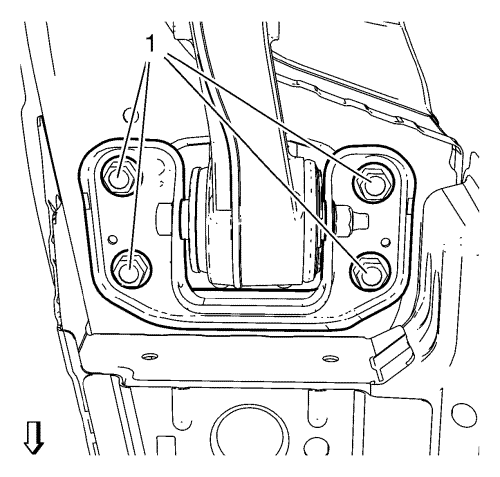
Note: Service one side at a time, the other side must be installed
- Remove and DISCARD 4 rear axle bracket bolts (1).
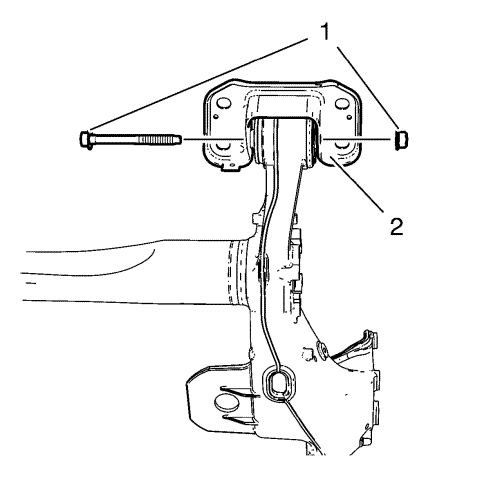
- Remove and DISCARD the rear axle bushing bolts and nuts (1) from the rear axle (2).
Installation Procedure

Note: The axle bush bolts (1) and nuts must be tightened with the axle at the correct trim height.
- Loosely install the NEW rear axle bushing bolts and nuts (1) to the rear axle (2).

- Loosely install the 4 NEW axle bracket bolts (1).
- Apply anti-corrosion treatment to the guide pin holes in the underbody and rear axle bracket.
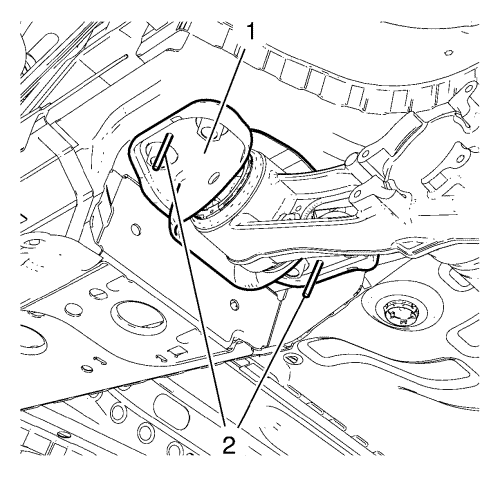
- Using 6 mm (0.2 in) drill bits (2) as guide pins, align the rear axle bracket (1) to the underbody.
Warning: Refer to Torque-to-Yield Fastener Warning in the Preface section.
Caution: Refer to Fastener Caution in the Preface section.

- Tighten the axle bracket bolts (1) to 90 N·m (66 lb ft) + 45°, using EN-45059 angle meter .
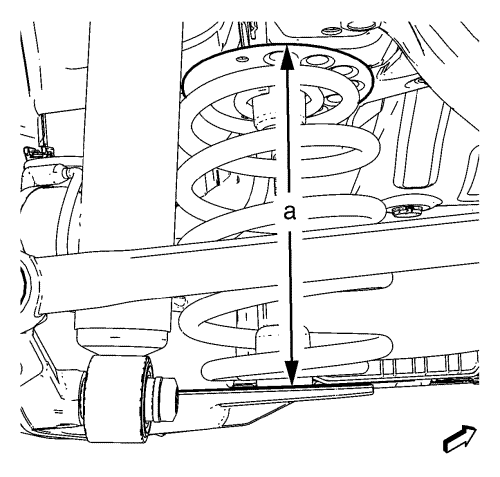
- Using the lift table, raise the axle to the correct trim height specification by measuring the vertical distance between the bottom edge of the upper spring seat and the bottom of the notch in the lower spring seat.
Trim Height Specification
Dimension (a): 217 mm (8.54 in)

- Tighten the axle bushing through bolts (1) and nuts and tighten to 70 N·m (52 lb ft) + 120°, using EN-45059 angle meter .
- Remove the hydraulic lift table from the rear axle.
- Lower the vehicle.
| © Copyright Chevrolet. All rights reserved |


