Fuel Injector Replacement
Special Tools
| • | EN-48560 Injector Fixing Tool |
For equivalent regional tools, refer to Special Tools .
Removal Procedure
- Open the bonnet.
- Remove the air cleaner assembly. Refer to Air Cleaner Assembly Replacement .
- Remove the camshaft cover. Refer to Camshaft Cover Replacement .
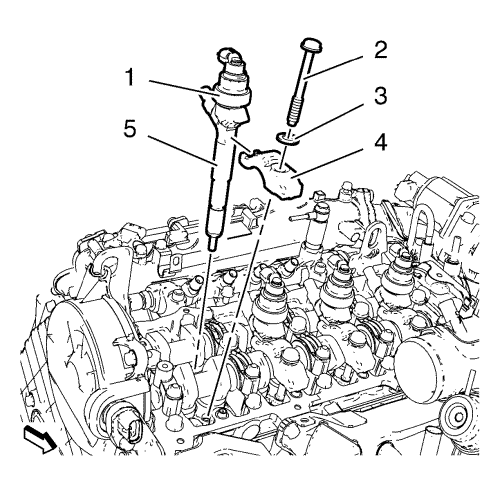
- Remove the 4 fuel injector bolts (2) in conjunction with the 4 washers (3).
- Remove the 4 fuel injector brackets (4).
Note: The fuel injector gaskets have to be replaced every time the injector is removed.
- Remove the 4 fuel injectors (1) in conjunction with the 4 fuel injector gaskets (5).
Installation Procedure
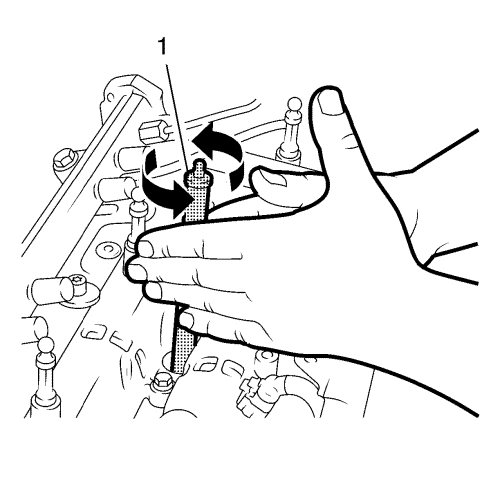
Note: Use both sides of EN-47632 cleaning tool, one for loosening the dirt and the other to remove the dirt.
- Clean the sealing surface, using the EN-47632 cleaning tool (1).

- Install the 4 fuel injectors (1) in conjunction with the 4 NEW fuel injector gaskets (5).
- Install the 4 fuel injector brackets (4).
- Loosely install the 4 fuel injector bolts (2) in conjunction with the 4 washers (3).
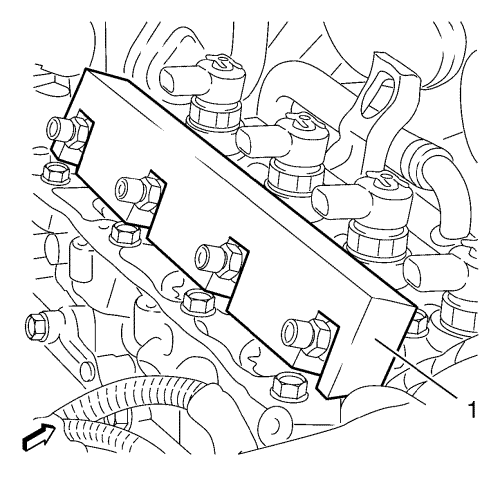
- Install the EN-48560 fixing tool (1) in order to fix the injectors.
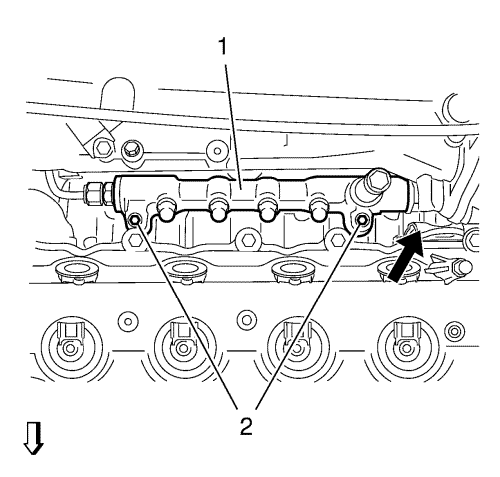
Note: Do not remove the fuel rail (1).
- Loosen the fuel rail bolt (2).
Caution: Refer to Fastener Caution in the Preface section.
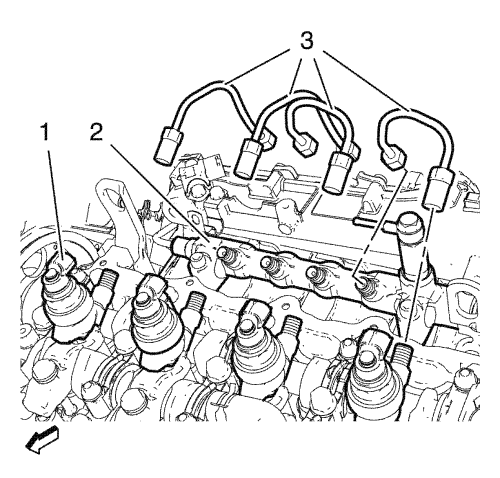
- Install the 4 fuel injection fuel feed pipes (3) to the fuel rail (2) and to the fuel injectors (1) and hand tighten.

- Tighten the 4 fuel injector bolts (2) in sequence:
| • | First step: tighten to 40 N·m (30 lb ft) |
| • | Second step: loosen the 4 fuel injector bolts (2). |
| • | Third step: tighten to 32 N·m (24 lb ft) |

- Fasten the fuel rail (1) by tighten the 2 fuel rail bolts (2) to 25 N·m (18 lb ft).
- Remove the 4 fuel feed pipes.
- Install the camshaft cover. Refer to Camshaft Cover Replacement
- Install the air cleaner assembly. Refer to Air Cleaner Assembly Replacement .
- Close the bonnet.
| © Copyright Chevrolet. All rights reserved |


