Engine Coolant Fan Shroud Replacement — LDE,LXT,LXV,L2W,2H0, LUW-MT
Removal Procedure
- Disconnect battery negative cable. Refer to Battery Negative Cable Disconnection and Connection .
- Raise and support the vehicle. Refer to Lifting and Jacking the Vehicle .
- Drain the cooling system. Refer to Cooling System Draining and Filling .
- Remove the radiator outlet hose from the radiator. Refer to Radiator Outlet Hose Replacement .
- Remove the radiator inlet hose from the radiator. Refer to Radiator Inlet Hose Replacement .

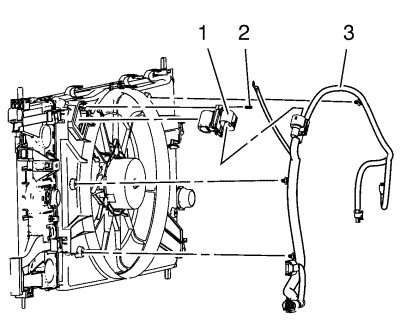
- Disconnect the engine coolant fan resistor wiring harness plug (1) and remove the ground cable nut.
- Remove the wiring harness (3). Cut the 4 clips.

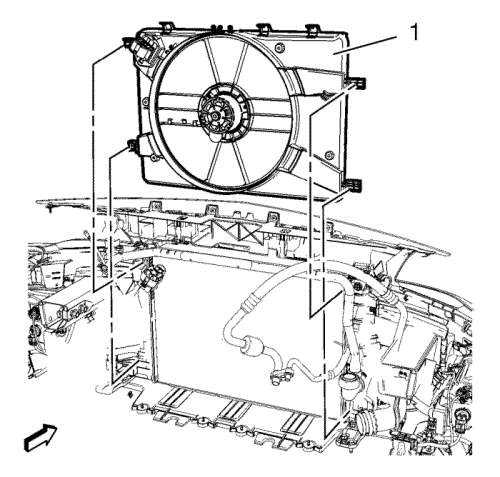
Note: You stand against driving direction.
- Unclip the engine coolant fan shroud (1) at the shown four mounting points.
Note: Push the engine coolant fan to the right side and lift it up.
- Remove the engine coolant fan shroud (1).

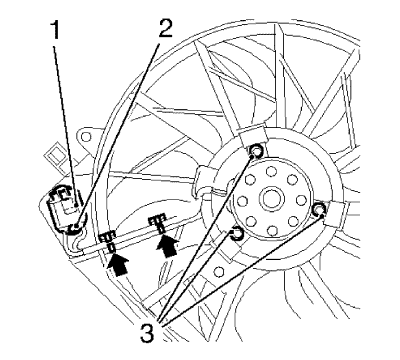
- Remove the engine coolant fan resistor (1) by unclipping the retainer clip (2).
- Unclip the engine coolant fan from engine coolant fan resistor wiring harness (arrows).
- Remove the 3 engine coolant fan motor bolts (3) from the engine coolant fan.
Installation Procedure

- Install the engine coolant fan.
Caution: Refer to Fastener Caution in the Preface section.
- Install the 3 engine cooling fan motor bolts (3) to the engine cooling fan and tighten to 4 N·m (35 lb in)
- Clip in the engine coolant fan to the engine coolant fan resistor wiring harness (arrows).
- Install the engine coolant fan resistor (1) by clipping the retainer clip (2).

- Install the engine coolant fan shroud (1).
- Clip in the engine coolant fan shroud (1) at the shown four mounting points.

- Connect the engine coolant fan resistor wiring harness plug (1).
- Install the wiring harness (3). Install 4 NEW clips.
- Install the ground cable and the ground cable nut and tighten to 10 N·m (89 lb in).
- Install the radiator inlet hose to the radiator. Refer to Radiator Inlet Hose Replacement .
- Install the radiator outlet hose to the radiator. Refer to Radiator Outlet Hose Replacement .
- Top up the cooling system. Refer to Cooling System Draining and Filling .
- Connect battery negative cable. Refer to Battery Negative Cable Disconnection and Connection .
| © Copyright Chevrolet. All rights reserved |


