To the top of the document
Cruze
   
GMDE Start Page Load static TOC Load dynamic TOC Help?

Fuel Tank Replacement

Removal Procedure

  1. Open the bonnet.
  2. Disconnect the battery. Refer to Battery Negative Cable Disconnection and Connection .
  3. Raise and support the vehicle. Refer to Lifting and Jacking the Vehicle .
  4. Remove the right rear tyre and wheel assembly. Refer to Tyre and Wheel Removal and Installation .
  5. Remove the rear wheelhouse panel liner. Refer to Rear Wheelhouse Panel Liner Replacement .
  6. Drain the fuel tank. Refer to Fuel Tank Draining .

  7. 2373049
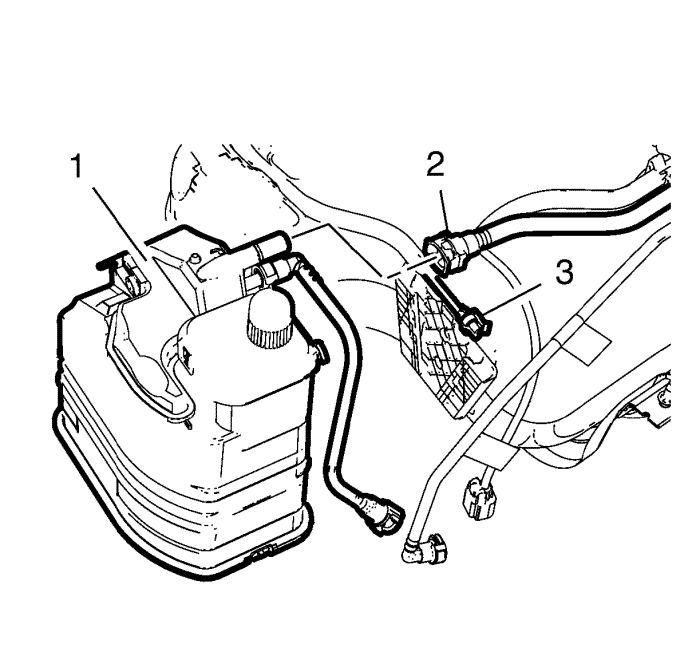
  8. Disconnect the fuel pressure sensor wiring harness plug (2).
  9. Disconnect the fuel feed pipe connector (1) from the fuel feed pipe. Refer to Plastic Collar Quick Connect Fitting Service .
  10. Disconnect the fuel tank vent pipe connector (3) from the fuel tank vent pipe (3). Refer to Plastic Collar Quick Connect Fitting Service .
  11. Install suitable caps the to the fuel pipes.

  12. 2373050

    Warning: Do not breathe the air through the EVAP component tubes or hoses. The fuel vapours inside the EVAP components may cause personal injury.

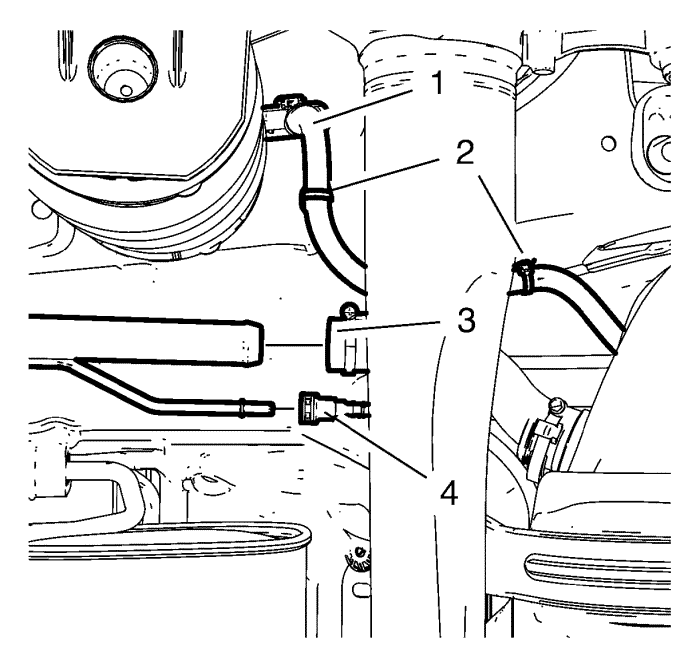
  13. Loosen the clamp (5).
  14. Remove the fuel tank filler hose (3) from the fuel tank filler pipe .
  15. Disconnect the fuel tank filler vent pipe connector (4) from the fuel tank filler vent pipe. Refer to Plastic Collar Quick Connect Fitting Service .
  16. Plug the fuel tank filler vent pipe with a suitable cap.
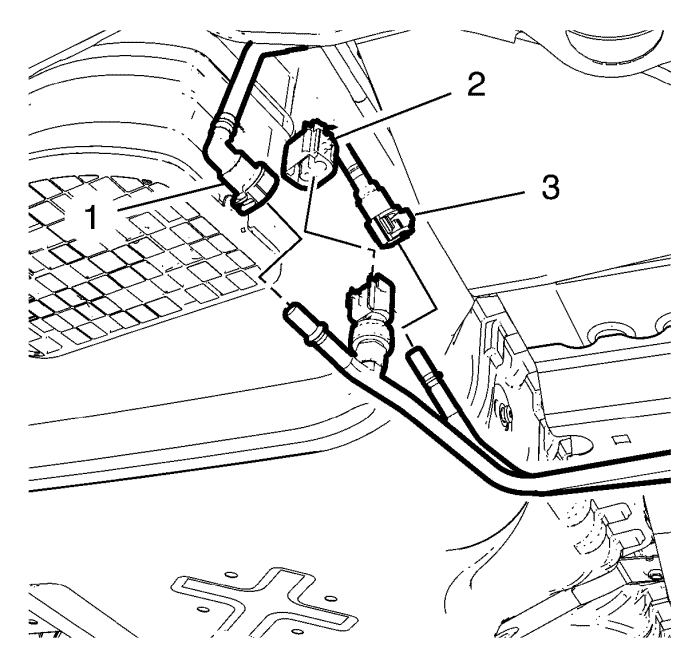
  17. Disconnect the fuel tank wiring harness inline connector (1) and unclip the wiring harness from 2 retainer clips (2).

  18. 2028244

    Warning: To help avoid personal injury, always use jack stands when you are working on or under any vehicle that is supported only by a jack.

    Caution: When you are jacking or lifting a vehicle at the frame side rails or other prescribed lift points, be certain that the lift pads do not contact the catalytic converter, the brake pipes or the fuel lines. If such contact occurs, vehicle damage or unsatisfactory vehicle performance may result.

  19. Place a suitable adjustable jack under the fuel tank.
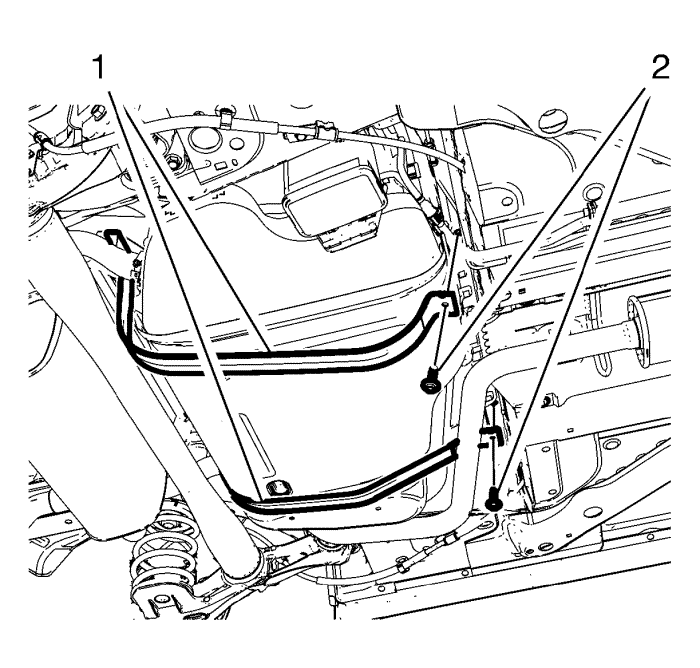
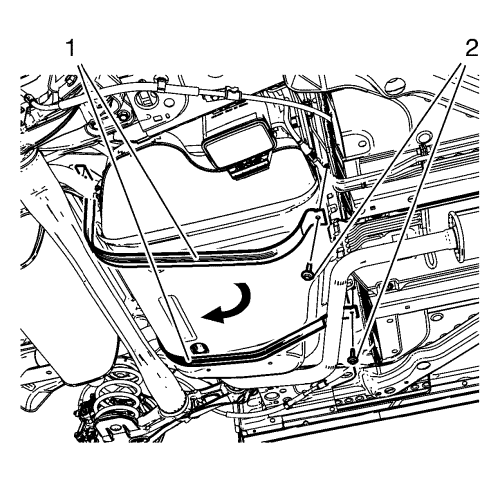
  20. Remove the 2 fuel tank strap bolts (2).
  21. Remove the 2 fuel tank straps (1).
  22. Note: Second technician required.

    Note: Retract the jack.

  23. Remove the fuel tank.

Disassemble Procedure

  1. Remove the fuel tank fuel pump module. Refer to Fuel Tank Fuel Pump Module Replacement .

  2. 2373051

    Warning: Always wear safety goggles when working with fuel in order to protect the eyes from fuel splash.

  3. Disconnect the fuel tank vent pipe (2).
  4. Disconnect the evaporative emission canister wiring harness plug (3).
  5. Remove the evaporative emission canister (1) from the evaporative emission canister bracket by releasing tab and lifting it upwards.

Assemble Procedure


    2373051
  1. Install the evaporative emission canister (1) to the evaporative emission canister bracket .
  2. Connect the evaporative emission canister wiring harness plug (3).
  3. Connect the fuel tank vent pipe (2).
  4. Install the fuel tank fuel pump module. Refer to Fuel Tank Fuel Pump Module Replacement .

Installation Procedure


    2373059

    Note: Second technician required.

    Note: Extend the jack.

  1. Install the fuel tank.
  2. Install the 2 fuel tank straps (1).
  3. Caution: Refer to Fastener Caution in the Preface section.

  4. Install the 2 fuel tank strap bolts (2) and tighten to 22 N·m (16 lb ft).

  5. 2373050
  6. Install the fuel tank filler hose (3) to the fuel tank filler pipe .
  7. Tighten the clamp (5).
  8. Connect the fuel tank filler vent pipe connector (4) to the fuel tank filler vent pipe. Refer to Plastic Collar Quick Connect Fitting Service .
  9. Connect the fuel tank wiring harness inline connector (1) and clip in the wiring harness to 2 retainer clips (2).

  10. 2373049
  11. Connect the fuel tank vent pipe connector (3) to the fuel tank vent pipe (3). Refer to Plastic Collar Quick Connect Fitting Service .
  12. Connect the fuel feed pipe connector (1) to the fuel feed pipe. Refer to Plastic Collar Quick Connect Fitting Service .
  13. Connect the fuel pressure sensor wiring harness plug (2).
  14. Install the rear wheel house panel liner. Refer to Rear Wheelhouse Panel Liner Replacement .
  15. Install the right rear tyre and wheel assembly. Refer to Tyre and Wheel Removal and Installation .
  16. Lower the vehicle.
  17. Connect the battery. Refer to Battery Negative Cable Disconnection and Connection .


© Copyright Chevrolet. All rights reserved