Brake, Accelerator, and Clutch Pedal Replacement - Right Hand Drive
Removal Procedure
- Remove the air cleaner assembly. Refer to
Air Cleaner Assembly Replacement : LDE, LXV, LUW, 2H0 and LFH .
- Loosen steering gear tank remove bolt.
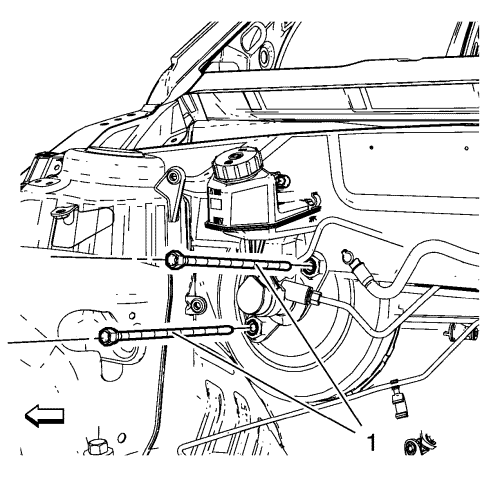
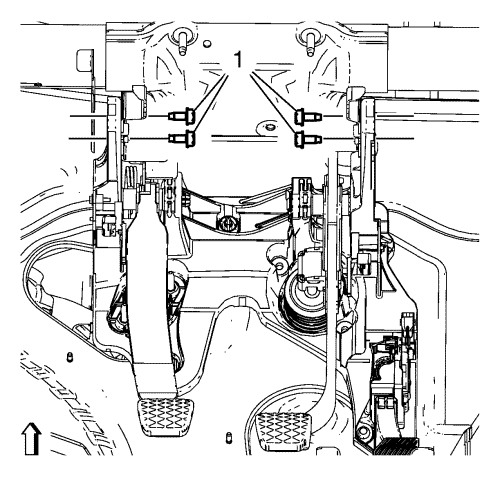
- Remove the brake booster bolts (1).
Note:
| • | Do NOT open hydraulic brake system. |
| • | Second mechanic required. |
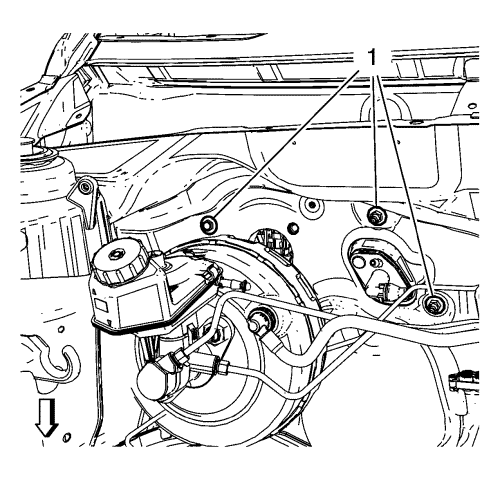
- Pull the brake booster and the BPMV assembly forward in order to get access to the brake pedal bracket nuts (1).
- Remove the brake pedal bracket nuts (1).
- Remove the instrument panel lower trim pad cover. Refer to Instrument Panel Lower Trim Pad Cover Replacement .
- Remove the steering column upper trim cover. Refer to Steering Column Upper Trim Cover Replacement .
- Remove the steering column lower trim cover. Refer to Steering Column Lower Trim Cover Replacement .
- Remove the intermediate steering shaft. Refer to Intermediate Steering Shaft Replacement .
- Remove the steering column. Refer to Steering Column Replacement .
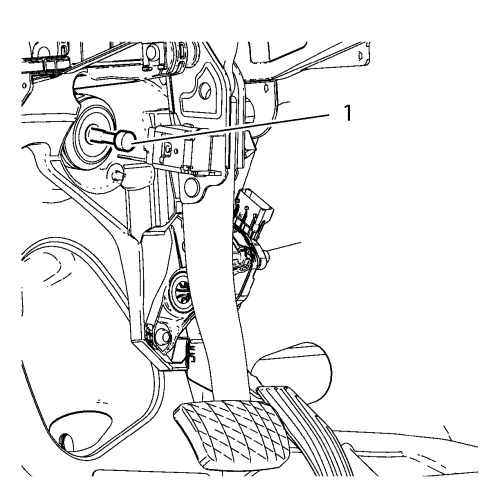
- Disconnect the brake pedal pushrod (1) from the brake pedal with brake pedal applied a bit.
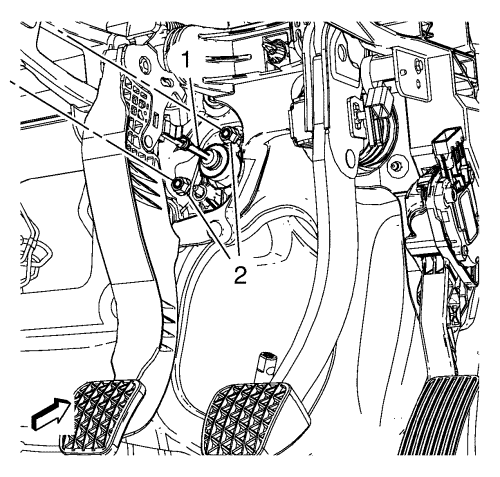
- Remove the clutch master cylinder nuts (2) from the pedal bracket, if equipped.
- Disconnect clutch master cylinder push rod (1) from the clutch pedal, if equipped.
- Remove the brake pedal bracket bolt (1) from the tie bar.
- Separate wiring harness from pedal bracket.
- Disconnect electrical connectors.
- Remove brake and accelerator and clutch pedal assembly from vehicle.
- Transfer component parts as needed.
Installation Procedure
- Install the brake and accelerator and clutch pedal assembly to the vehicle.
- Install wiring harness to brake pedal bracket.
- Connect electrical connectors.
Caution: Refer to Fastener Caution in the Preface section.
- Install brake pedal bracket bolts and tighten to 20N·m (15 lb ft).
- Connect clutch master cylinder push rod (1) to the clutch pedal, if equipped.
- Install the clutch master cylinder nuts (2) to the pedal bracket, if equipped and tighten to 18 N·m (13 lb ft).
- Connect the brake pedal pushrod (1) to the brake pedal.
- Install the steering column. Refer to Steering Column Replacement .
- Install the intermediate steering shaft. Refer to Intermediate Steering Shaft Replacement .
- Install the steering column lower trim cover. Refer to Steering Column Lower Trim Cover Replacement .
- Install the steering column upper trim cover. Refer to Steering Column Upper Trim Cover Replacement .
- Install the instrument panel lower trim pad cover. Refer to Instrument Panel Lower Trim Pad Cover Replacement .
Note:
| • | Do NOT open hydraulic brake system. |
| • | Second mechanic required. |
- Pull the brake booster and the BPMV assembly forward in order to gain access to the brake pedal bracket nuts (1).
- Install the pedal bracket nuts (1) and tighten to 20 N·m (15 lb ft).
- Install the brake booster bolts (1) and tighten to 19 N·m (15 lb ft).
- Install steering gear tank and tighten bolt.
- Install the air cleaner assembly. Refer to
Air Cleaner Assembly Replacement : LDE, LXV, LUW, 2H0 and LFH .
- Calibrate the brake pedal position sensor. Refer to Brake Pedal Position Sensor Calibration .
| © Copyright Chevrolet. All rights reserved |


