Exhaust Muffler Replacement
Removal Procedure
Warning: Refer to Exhaust Service Warning in the Preface section.
Warning: Refer to Protective Goggles and Glove Warning in the Preface section.
Caution: Refer to Exhaust Flexible Pipe Bending Caution in the Preface section.
- Raise and support the vehicle. Refer to Lifting and Jacking the Vehicle .
- Support the exhaust muffler.
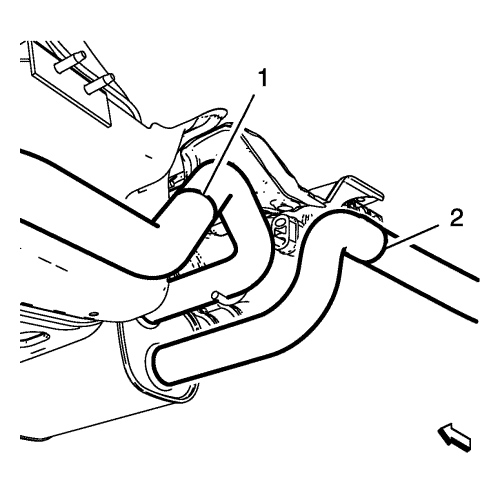
- Note the dent mark (1) around the exhaust pipe.
- Cut the exhaust muffler from the exhaust rear muffler with a suitable tool at the marked position (1).
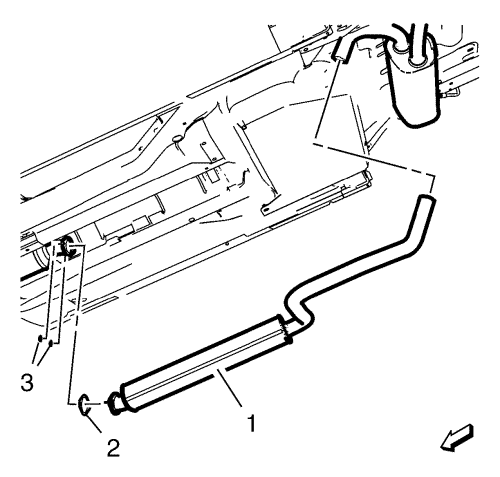
- Remove the 2 nuts (3).
- Unsupport and remove the exhaust muffler (1).
- Remove and DISCARD the gasket (2).
Installation Procedure
- In case of reuse of the exhaust parts, check the exhaust pipes at the separating sets for the following conditions:
| • | roundness of the exhaust pipe, any deformation in the range of the double-clamp must be eliminated. |
| • | burrs inside and outside the exhaust pipe at the cutting edge, use a file to eliminate. |
| • | rust at the exhaust pipe outside, use sandpaper to eliminate. |
Note: A second technician is required.
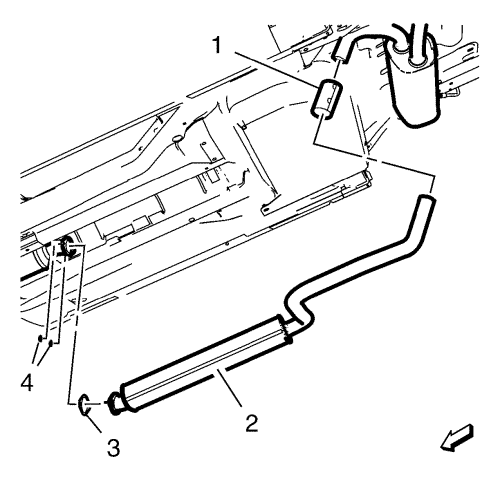
- Install the exhaust muffler (2) with a NEW gasket (3) to the catalytic converter.
- Support the exhaust muffler.
Caution: Refer to Fastener Caution in the Preface section.
- Install the 2 nuts (4) and tighten to 17 N·m (13 lb ft).
- Install the exhaust pipe clamp (1) and loosely tighten.
- Position the exhaust rear muffler and the exhaust rear auxiliary muffler.
- Tighten the exhaust pipe clamp (1) to 30 N·m (22 lb ft).
- Lower and unsupport the vehicle.
| © Copyright Chevrolet. All rights reserved |


